
This article will provide an in-depth guide to how to crosshatch quilt. Crosshatching is a popular quilting technique that creates a geometric pattern and adds texture to the fabric. This guide will walk you through the steps required to achieve the perfect end result, from selecting the right fabric and tools to stitching the quilting lines. With a bit of patience, you can create beautiful quilts that will last for years to come.
What is Crosshatching?

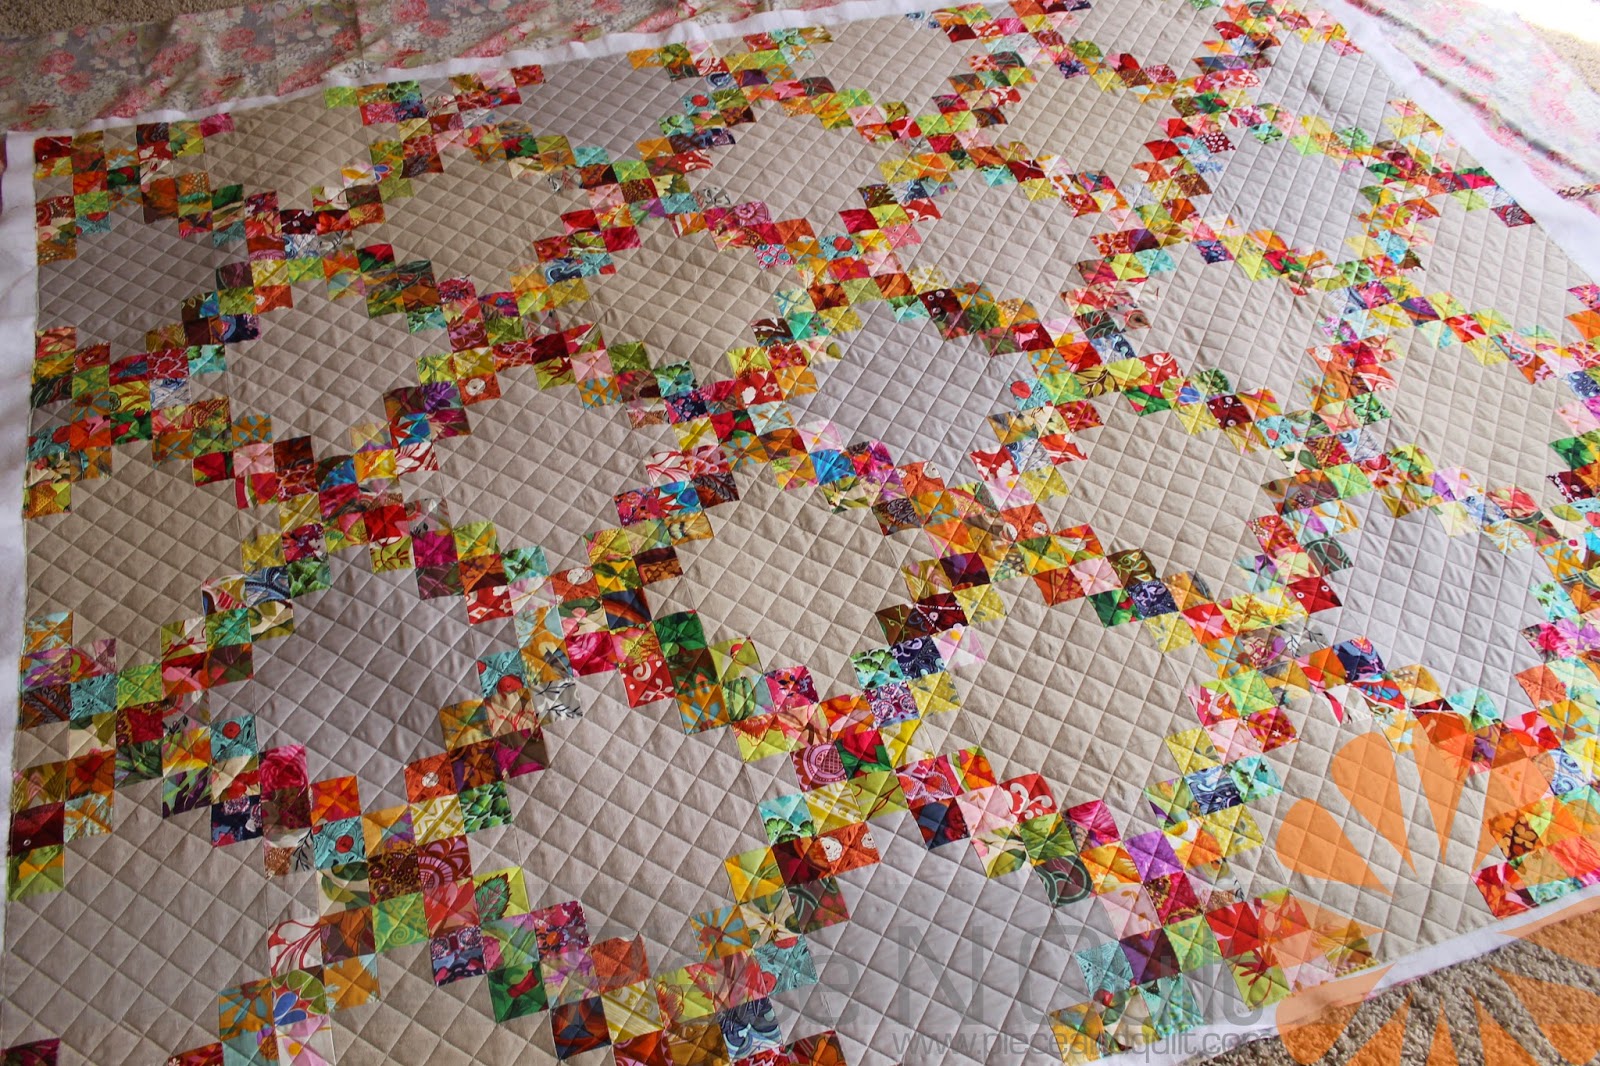
Crosshatching is a quilting technique used to create interesting and unique designs on a quilt. It is a method of marking a quilt for quilting that involves marking a grid of parallel lines in both directions. This technique is used to create the illusion of texture, depth, and movement in a quilt and is typically used in more elaborate quilt designs.
How to Mark a Quilt for Cross Hatching:
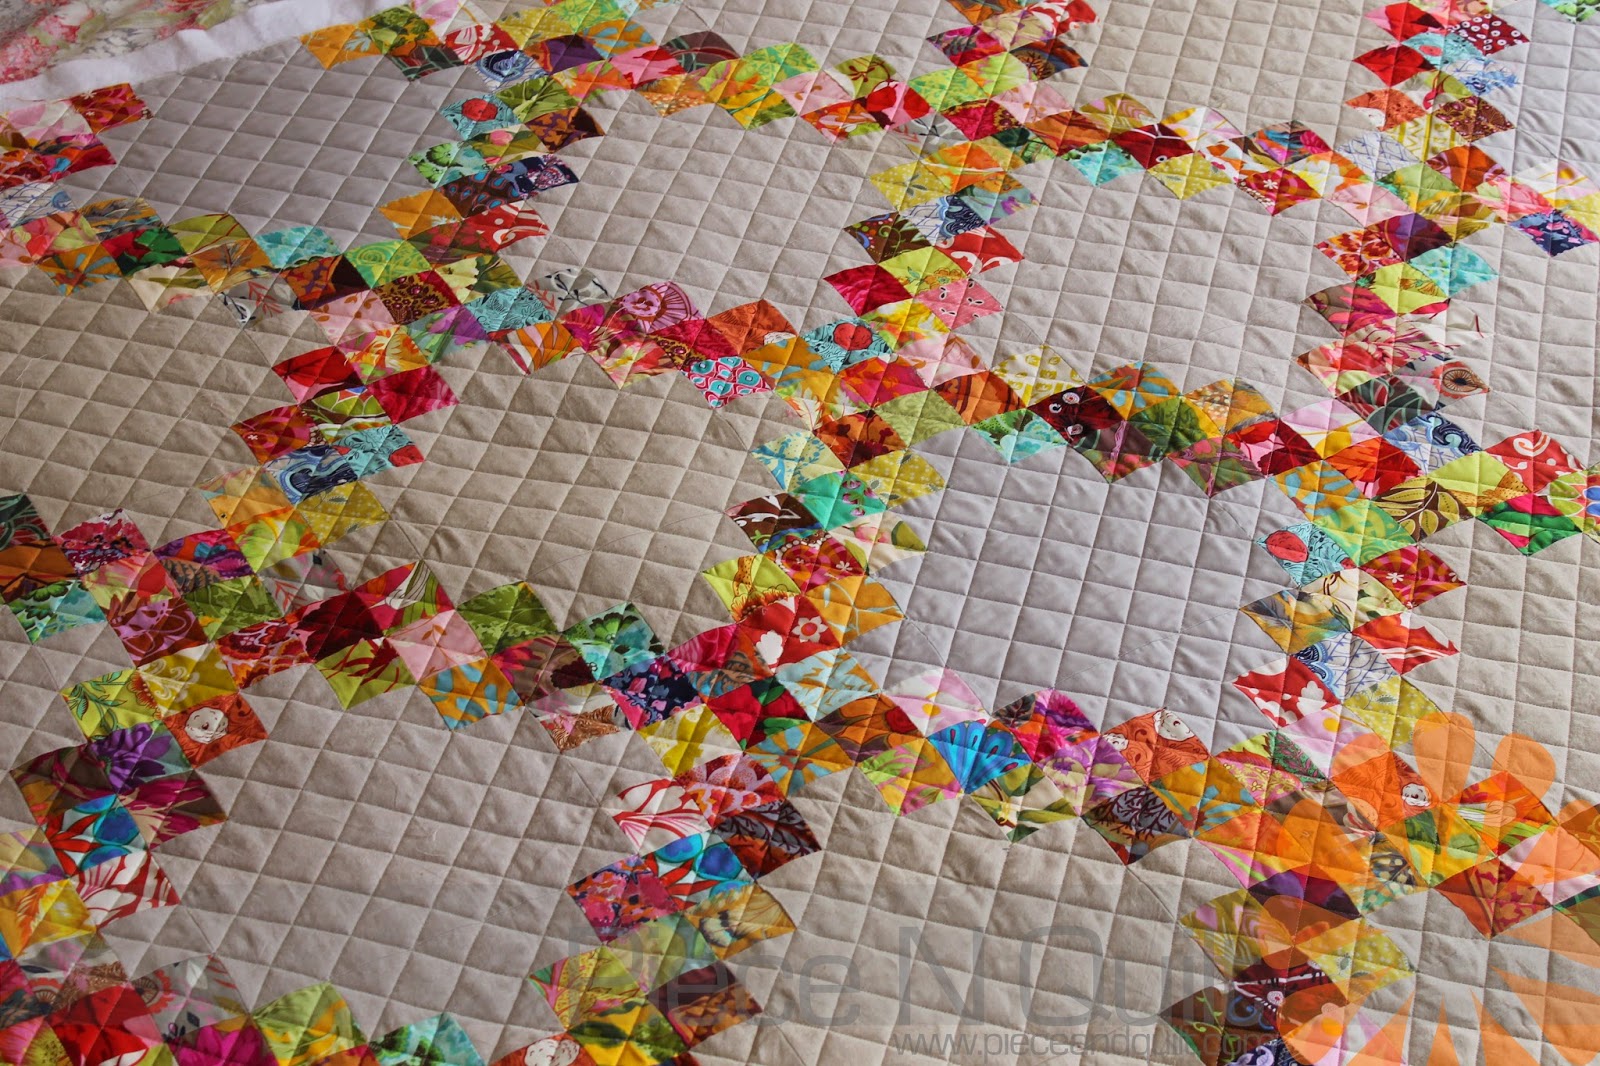
- Decide on the pattern of the crosshatching you would like to use. This could be a grid pattern, a diamond pattern, or a combination of the two.
- Draw the pattern onto the quilt top with a quilting pencil or marker.
- Using a ruler and quilting needle, sew along the lines of the pattern.
- Start from the center of the quilt and work outward, stitching along each line of the pattern.
- Once the crosshatching is finished, the quilt can then be quilted as desired.
Preparing the Quilt for Crosshatching
Before starting to crosshatch your quilt, it is important to prepare the material correctly. Here is a step-by-step guide to getting your quilt ready for crosshatching.
Step 1: Choose your fabric and batting. Select a quilting fabric that is medium weight and has a tight weave. Batting should be thin and made of a high-quality material.
Step 2: Cut your quilt top and backing. Cut the quilt top and backing into pieces that measure the same size. Sew the pieces together.
Step 3: Layer your quilt top and batting. Place the quilt top on top of the batting and baste the two layers together with a quilting basting spray.
Step 4: Mark the design you want to crosshatch. Using a quilting ruler and marking pen, draw the design you want to quilt onto the quilt top.
Step 5: Thread your sewing machine. Thread a cotton thread in the top and bottom of the machine. Make sure the upper thread tension is loose.
Step 6: Start quilting. Begin quilting in the middle of the design and work your way outwards. Use a walking foot to help ensure even stitching.
Step 7: Finish the quilt. Once you have completed the quilting, trim the excess batting and backing from the quilt. Bind the quilt by hand or machine.
By following these steps, you can ensure that your quilt is properly prepared for crosshatching and ready for the next stage: creating a beautiful, intricate quilt pattern. With the right supplies and a bit of patience, you can easily create a stunning quilt with a unique crosshatch design.
Marking a Quilt for Crosshatching
Step 1: Begin by measuring the quilt and cutting the batting and backing fabric to fit the quilt.
Step 2: Lay the batting and backing fabric on a flat surface, and lay the quilt top on top of the batting and backing.
Step 3: Use a ruler and a fabric marking pencil to draw a grid of straight lines across the quilt top.
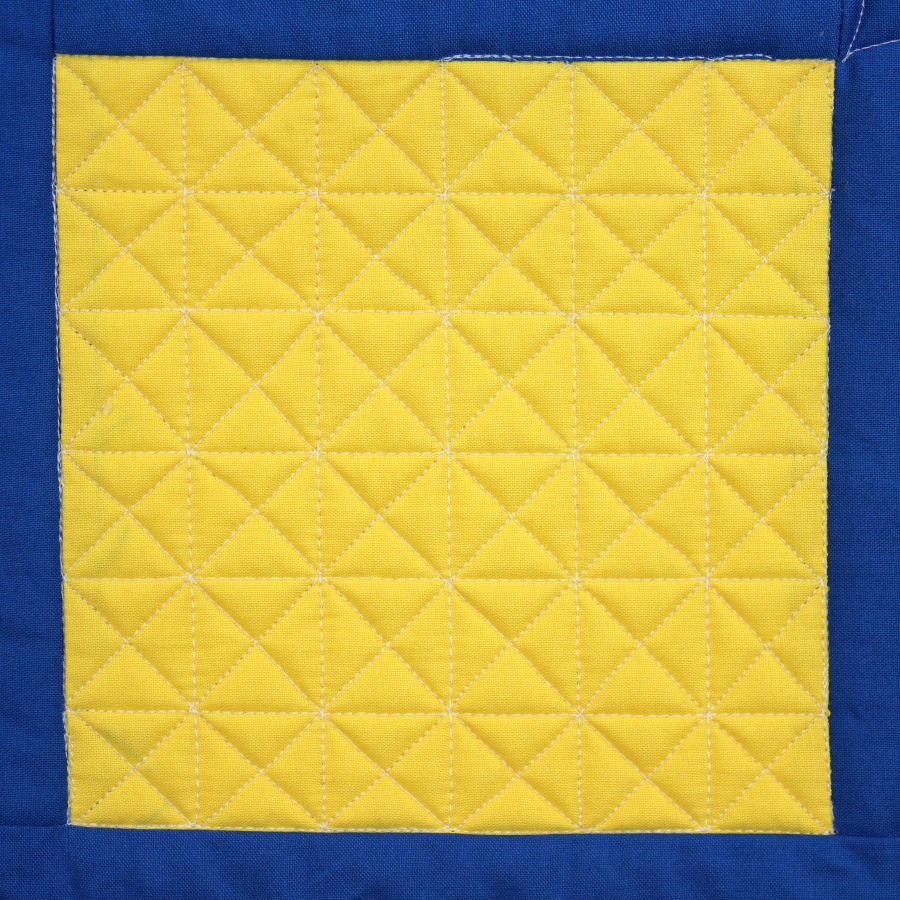
Step 4: Measure the quilt top and draw a grid of diagonal lines across the quilt top. Make sure the diagonal lines intersect with the horizontal and vertical lines.
Step 5: Draw a line connecting the intersecting points of the grid. This will form the crosshatch pattern on the quilt.
Step 6: Trace the crosshatching pattern onto the batting and backing fabric.
Step 7: Pin the quilt top, batting, and backing fabric together.
Step 8: Sew the quilt together, following the crosshatching lines.
Step 9: Remove the pins and trim the excess batting and backing fabric.
Step 10: Finish the edges of the quilt and the binding, and enjoy your beautiful crosshatch quilt!
Preparing the Thread
- Fabric – Choose a lightweight fabric for your crosshatching quilt. This will help the thread glide smoothly across the fabric while quilting.
- Thread – It is essential to use a thread that is strong enough to hold the quilt together but not too thick that it will create a bulky quilt. Use a quilting-weight cotton thread that is colorfast so it won’t fade or bleed.
- Needles – Use a sharp needle that is designed for quilting. The size of the needle should be appropriate for the thread and fabric you are using.
- Bobbin – Fill the bobbin with the same quilting thread you are using for the top thread. This will help ensure the quilt stitches are consistent.
Starting the Crosshatching
Crosshatching is a quilting technique that involves stitching together two layers of fabric in a grid-like pattern. To begin, you’ll need to have two pieces of fabric, both cut to the same size and shape. Place the two fabrics right sides together and pin them together.
Begin stitching from the center of the fabric and work your way outwards. You’ll want to stitch in a grid pattern, making sure to keep the same distance between all of your stitches. As you go, make sure to use a backstitch at the beginning and end of each seam. This will ensure that the seams are secure.
Once you have finished stitching the two pieces of fabric together, turn the fabric right side out. You may need to use a tool such as a knitting needle or a chopstick in order to push out the corners.
Now you’re ready to begin crosshatching. Start by drawing a line in the center of the fabric. From there, you’ll draw a series of parallel lines that overlap the center line. To ensure that the lines are evenly spaced, you may want to use a ruler or a quilting ruler.
Next, you’ll start stitching along the lines. You’ll want to use a backstitch at the beginning and end of each seam, to ensure that the seams are secure. When you’re finished, you’ll have a beautiful crosshatch quilt!
Finishing the Crosshatching
- Start by folding the quilt along the intersection of two hatching lines.
- Cut the two pieces of fabric along the folded line.
- Unfold the cut pieces and position them as they were before.
- Pin the two pieces together.
- Using a sewing machine, stitch the two pieces together following the line of the crosshatch.
- Repeat this process for all the intersecting lines.
- Finally, press the entire quilt again with an iron for a neat finish.
Finishing Touches
- Steam Press – After the quilt is complete, use a steam press to flatten the quilt and remove any wrinkles.
- Stitching – Use a coordinating thread to add a finishing stitch along the edges of the quilt. This will help secure the edges and give the quilt a more finished look.
- Label – Add a label to the back of the quilt with the name of the quilt and the date it was completed.
Frequently Asked Questions
What Materials do I Need to Crosshatch Quilt?
To crosshatch quilt, you will need: fabric, batting, a quilting ruler, quilting pins, and a quilting needle. Depending on the size, you may also need a quilting hoop. You will also need a rotary cutter if you are cutting your own fabric, as well as thread and scissors.
What are the Differences Between Crosshatch Quilting and Other Types of Quilting?
Crosshatch quilting is a unique way of quilting that uses a more than one line of stitching to create a grid-like pattern. It is distinct from other quilting styles, such as straight-line, free-motion, and echo, due to its symmetrical design and the use of multiple straight seams. Crosshatch quilting is also more time-consuming than other quilting styles, as it requires precise and exact measurements and careful stitching. Additionally, the use of multiple lines of quilting can potentially create more bulk at the seams, making it more difficult to achieve a smooth finish.
Is Crosshatch Quilting Suitable for Beginners?
Crosshatch quilting is a great way for beginners to learn the basics of quilting. With its simple lines and shapes, it is easy to understand and requires minimal supplies and tools. The technique is also very forgiving, so even if you make mistakes, you can easily fix them. Once you have mastered the basics, you can start to experiment with different designs and incorporate more complex elements.
What Tools Should I Use to Create a Perfect Crosshatched Quilt?
Creating a perfect crosshatched quilt requires the right tools. You will need a good pair of scissors, a quilting ruler, a rotary cutter, fabric markers, and a quilting hoop. Additionally, you will need a good quality quilt batting and quilting thread. If you plan on using fabrics that are difficult to work with, consider using a press cloth and steam iron to make the fabric easier to work with.
Is there any risk of damaging my quilt fabric when crosshatching?
Yes. Crosshatching is an embroidery technique that involves stitching multiple lines on the same area of fabric. If not done carefully, it can cause damage to the fabric. Here are some tips to avoid damaging your quilt fabric when crosshatching:
- Choose the right needle: Use a sharp needle that is suitable for the type of fabric you are working with. A sharp needle will make it easier to stitch and will reduce the risk of tearing the fabric.
- Use the right thread: Use a thread that is strong enough to hold up to the stitching pressure and that is the same color as the fabric.
- Practice on scraps: Before you start stitching on your quilt, practice on scraps of the same fabric to get the hang of the technique.
- Stitch slowly: When stitching, go slow and be gentle with the fabric. This will help to reduce the risk of tearing or bunching.
- Use a stabilizer: Use a stabilizer to hold the fabric in place while stitching. This will help to reduce the risk of shifting or puckering.
By following these tips, you can avoid damaging your quilt fabric when crosshatching.
Conclusion
Crosshatching quilts can be a fun and creative way to add a unique touch to your quilt. Using different widths of strips and a variety of colors can create beautiful patterns that will be sure to impress. With the ability to customize the quilt according to the size and pattern desired, you can make a truly one-of-a-kind quilt that is sure to be a family heirloom.


