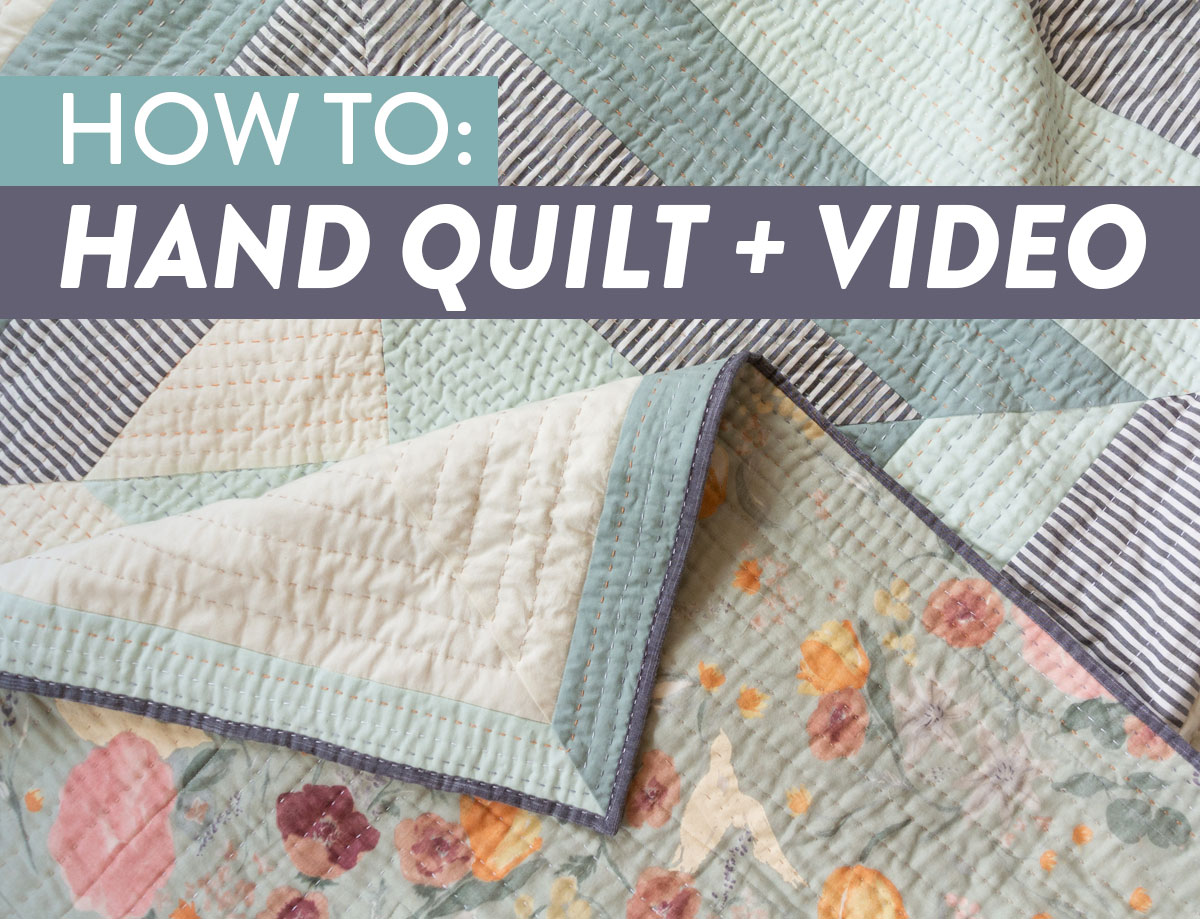
Are you looking to learn how to finish a quilt by hand? With the right techniques and expert tips, you can create a beautiful, unique quilt that will last for years to come. This article will provide you with the information you need to get started on your quilt-making journey. We’ll cover the basics of hand-quilting, the materials you’ll need, and the steps you’ll need to take to create a perfect quilt every time. By the end of this article, you should be able to confidently create a quilt that you can be proud of.
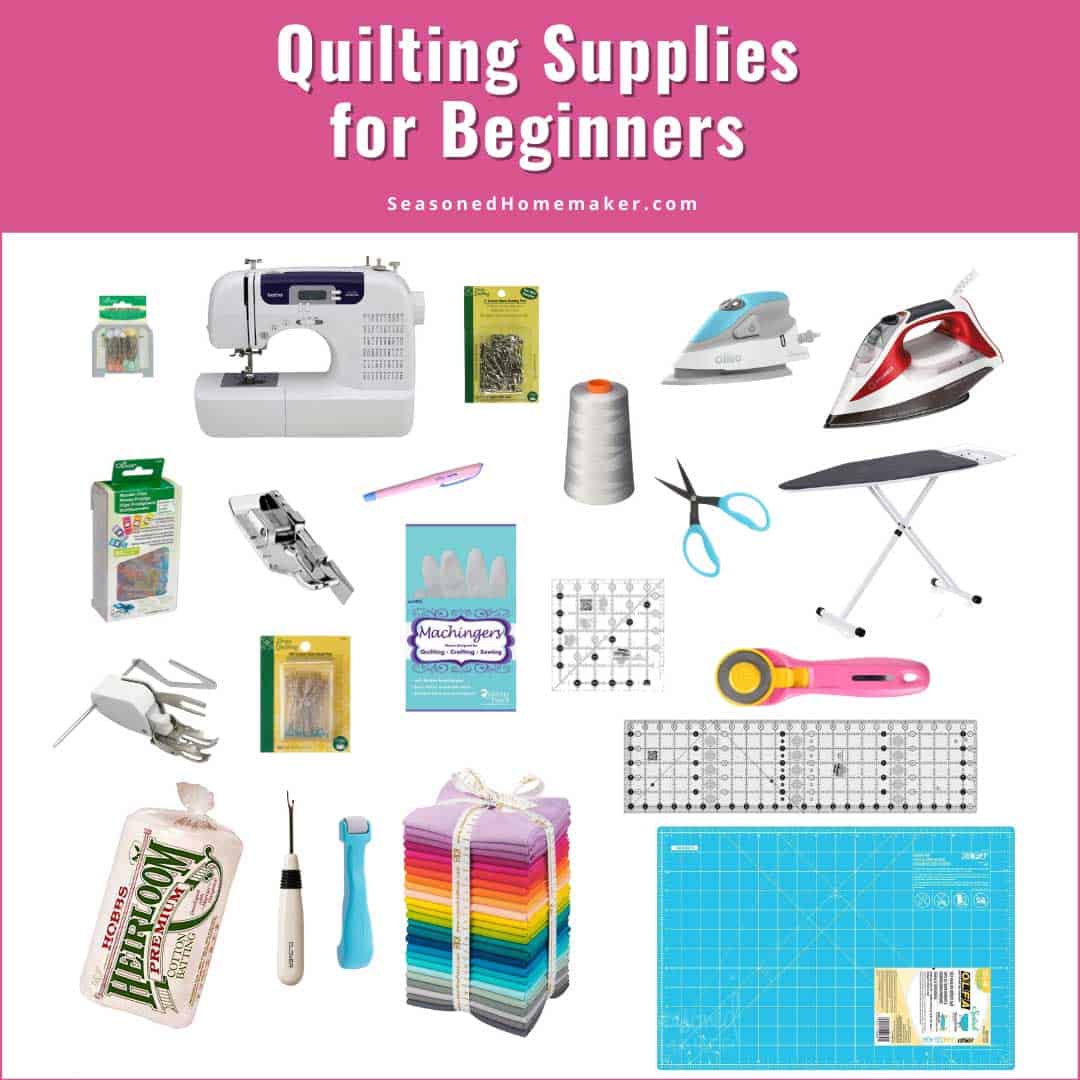
Materials Needed
| Item | Quantity |
|---|---|
| Fabric | Enough to cover the quilt |
| Batting | Enough to cover the quilt |
| Thread | Matching or contrasting |
| Needles | 1–2 hand quilting needles |
| Thimble | Optional |
| Scissors | Sharp fabric scissors |
| Hoops | Optional |
| Quilting Ruler | Optional |
| Pins | Quilting pins |
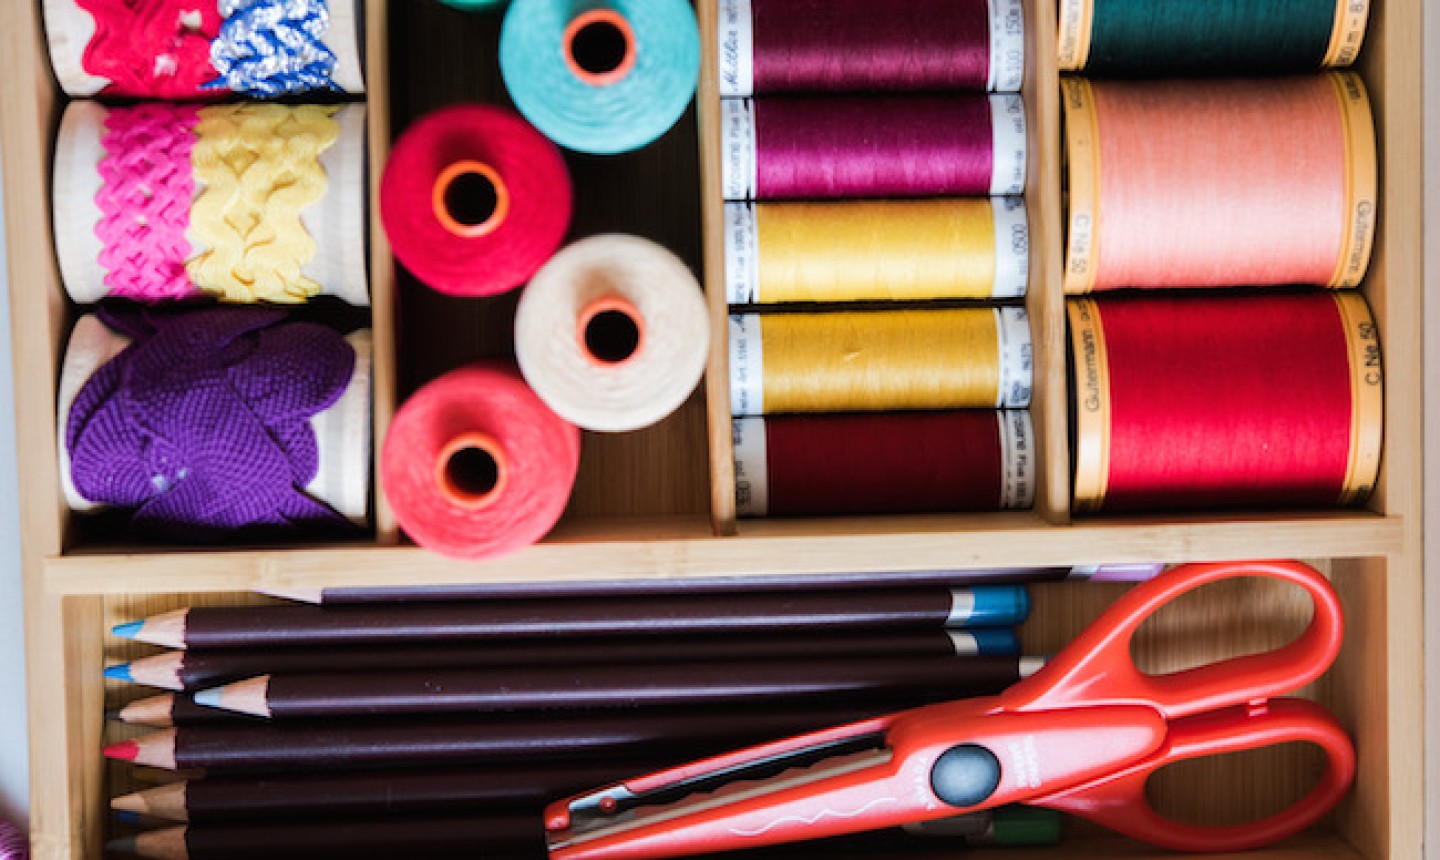
It is important to have the right materials available before beginning to hand quilt the edges of a quilt. The following materials are needed to complete the process: fabric, batting, thread, needles, thimble, scissors, hoops, quilting ruler, and pins. The fabric and batting must be enough to cover the entire quilt. The thread should match or contrast the fabrics used. Two hand quilting needles should be used for the project. A thimble is optional but helpful for the process. Sharp fabric scissors should be used to cut any excess fabric. Hoops are optional but can help keep the quilt in place. A quilting ruler is also optional but can be used to help with measurements. Finally, quilting pins should be used to keep the layers in place while quilting.
How to Prepare the Quilt
Marking the Quilt
Before you can start hand binding your quilt, it’s important to mark the quilt top to ensure all the pieces line up perfectly when you start to sew. If you’re using a quilting ruler, mark the quilt top with a water-soluble pen or marking pen. If you’re not using a ruler, use a tailor’s chalk.
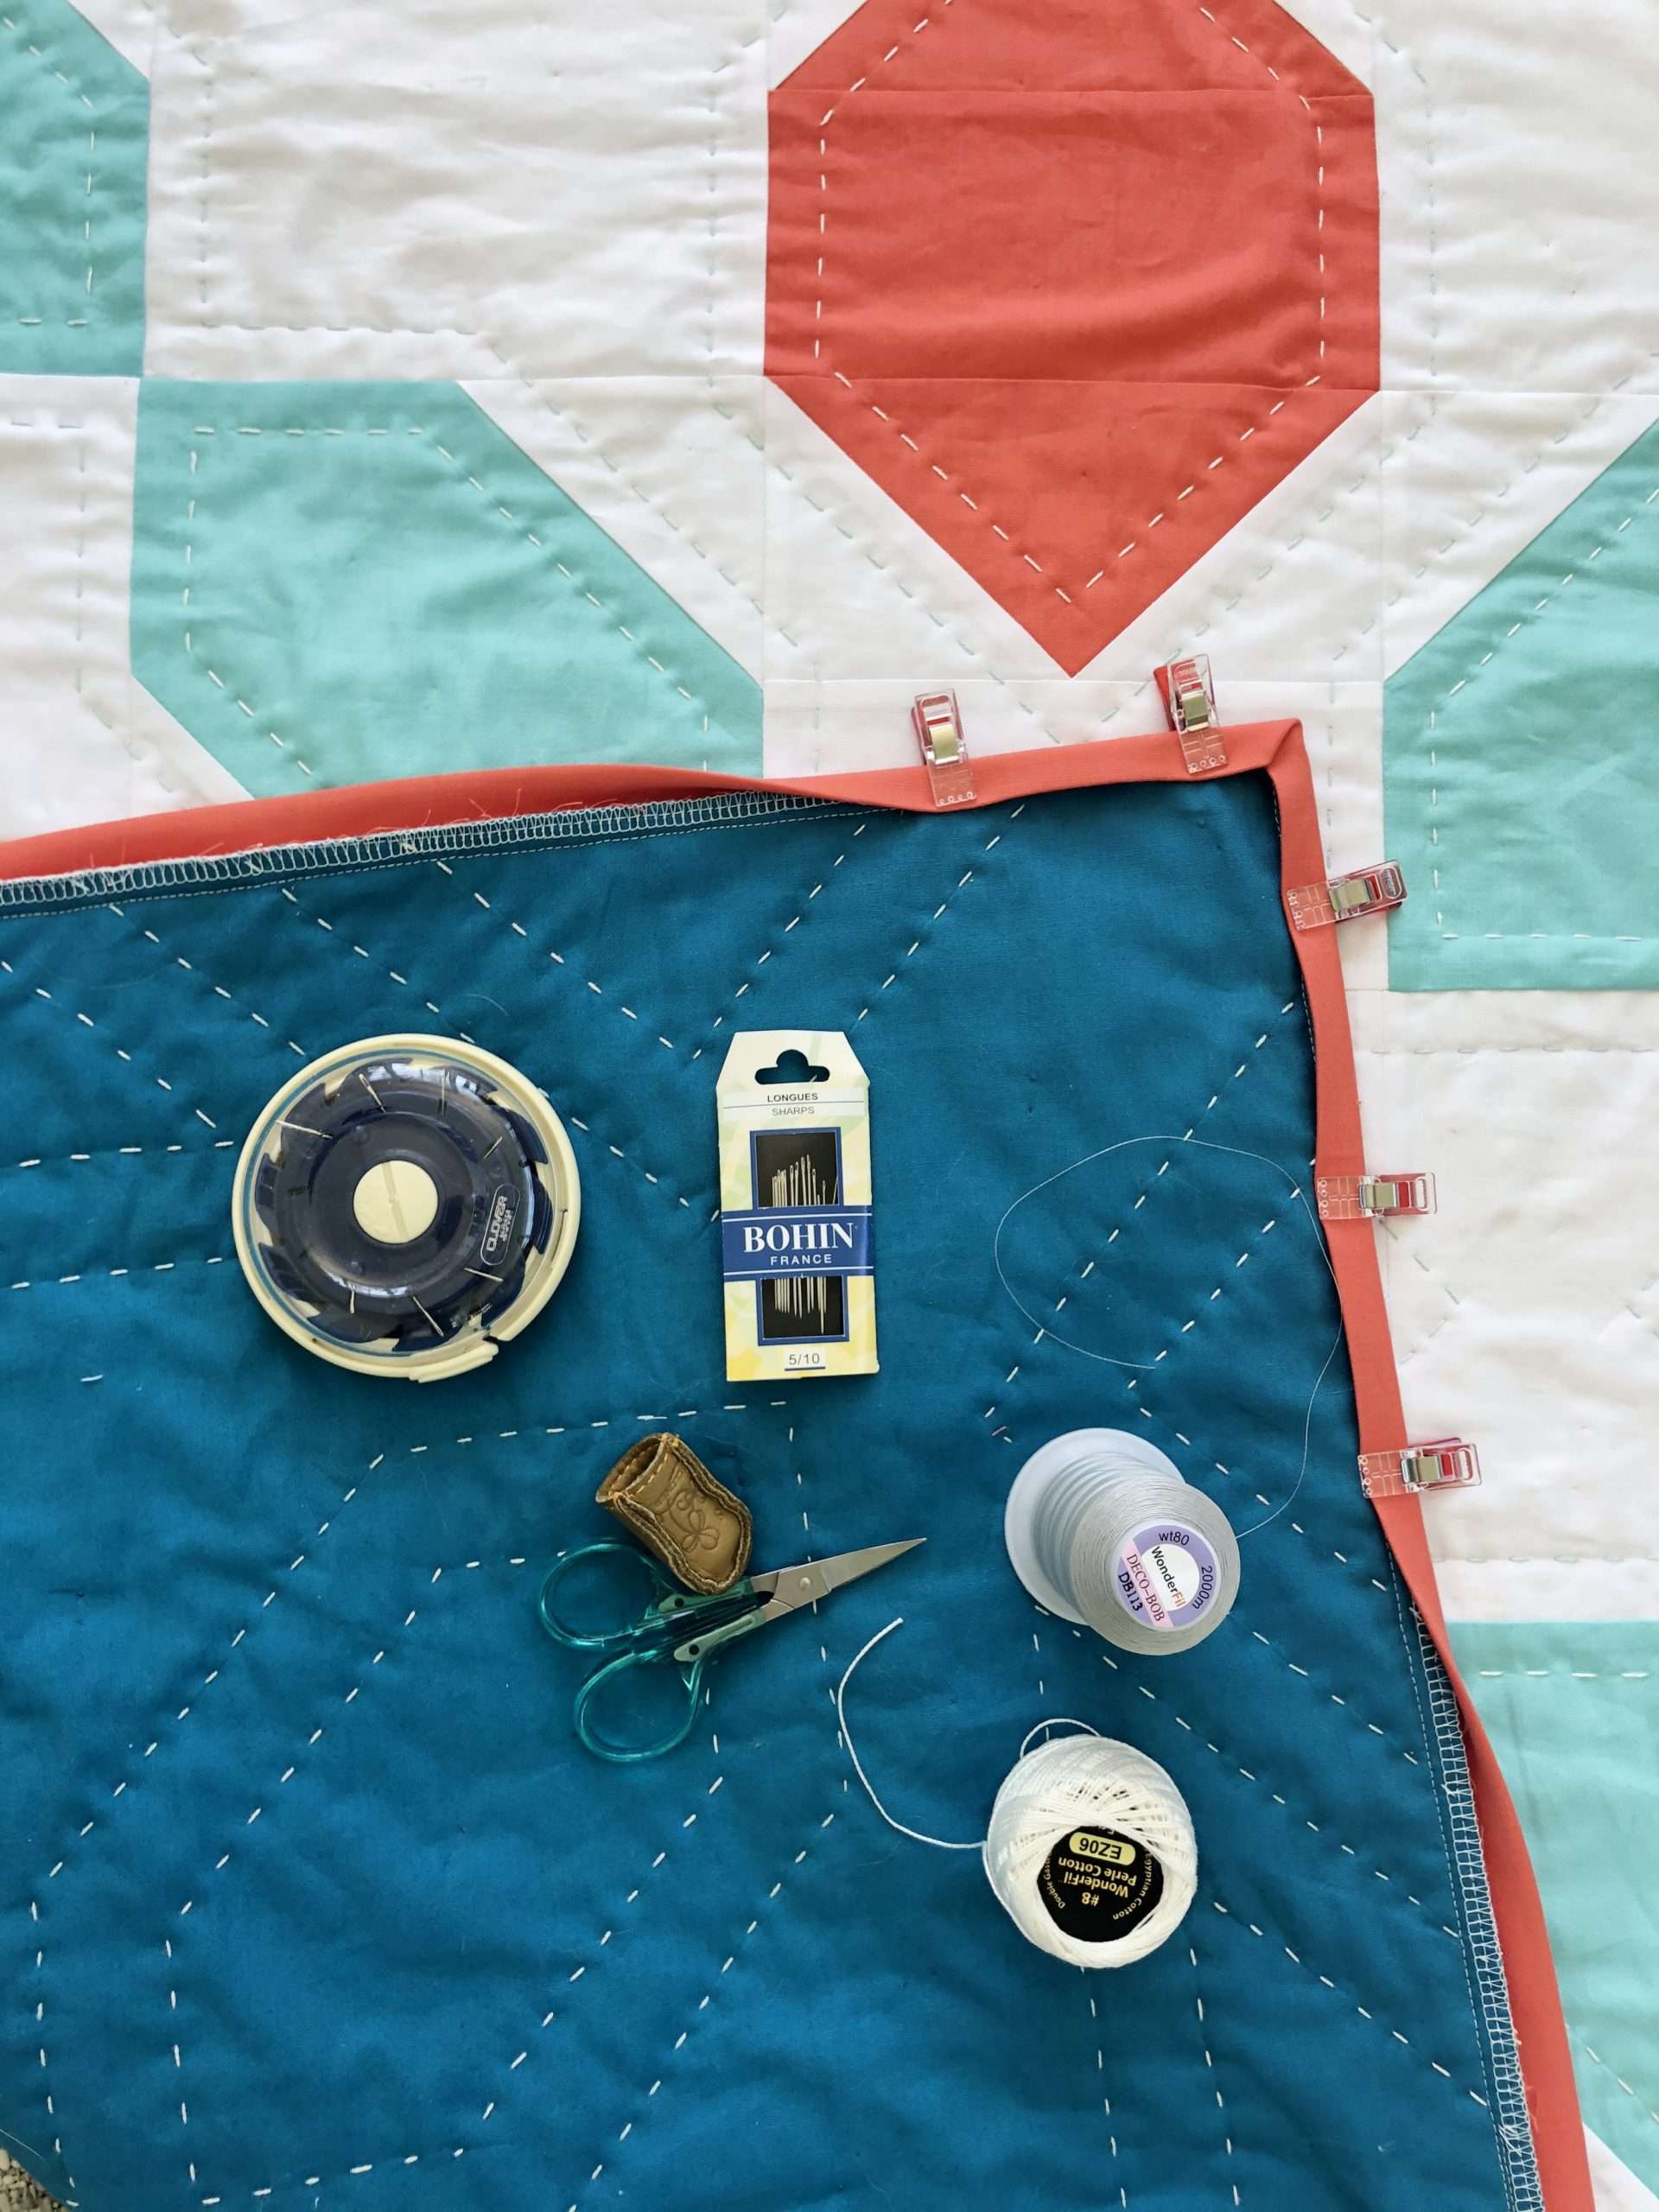
Gathering the Needed Supplies
Once your quilt top is marked, it’s time to gather all the supplies you need to finish your quilt. You’ll need a pair of scissors, a roll of bias tape, some thread, a quilting needle, and some quilting pins. If you plan on hand-sewing your quilt, you’ll also need a thimble.
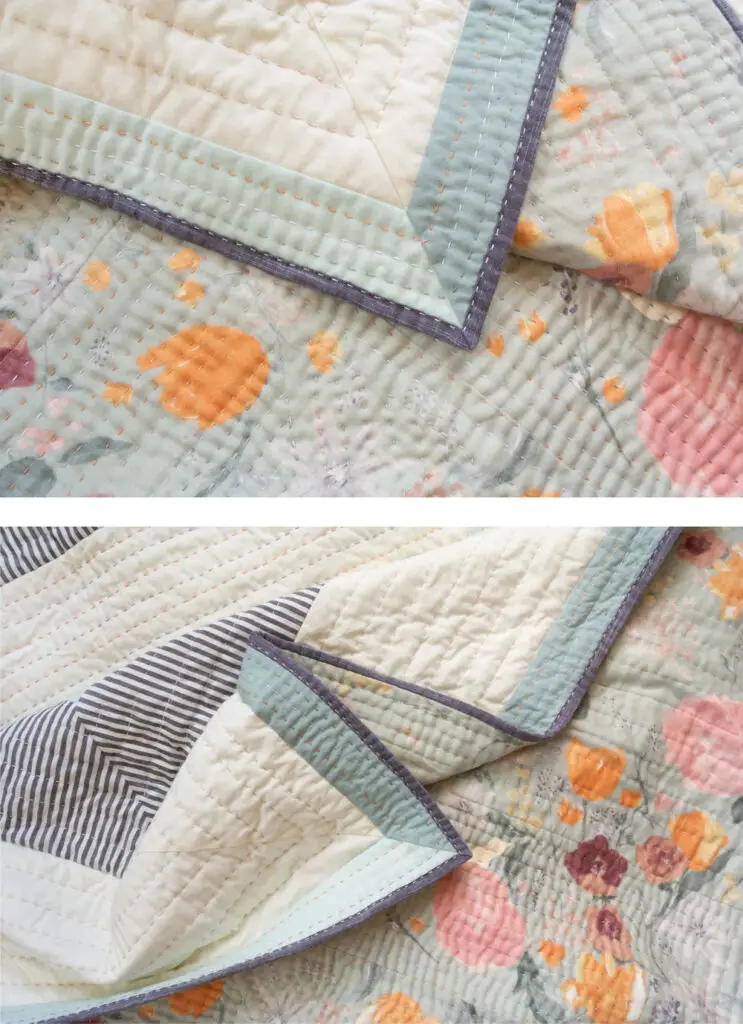
How to Hand Quilt the Edges of a Quilt
When finishing a quilt by hand, quilting the edges is an important step. This will secure the layers together and add a beautiful finishing touch. Here’s how to do it:
Step 1: Start by threading your needle with a quilting thread that matches the quilt.
Step 2: Start quilting from the middle of the quilt and work towards the edge. As you quilt, follow the stitching pattern you have chosen for your quilt.
Step 3: Once you have quilted the edges, turn the quilt over and tie knots in the back to secure the thread.
Step 4: Trim any excess thread and then turn the quilt over and admire your handiwork.
Quilting the edges of your quilt by hand will give it a professional look and ensure that the layers stay secure. With a bit of practice, you will be able to create beautiful quilts with a perfect finishing touch.
How to Choose the Right Thread
- Choose the Right Color: When selecting thread, it is important to choose a color that will blend with the fabric of the quilt. If the quilt has multiple colors, choose a neutral thread that will coordinate with all the colors.
- Choose the Right Weight: Thread weight is determined by the thickness of the thread. A heavier thread will provide more strength, but a lighter thread is easier to sew with. Consider the thickness of the fabric and the quilt pattern when deciding on the thread weight.
- Choose Between Natural and Synthetic: Natural fibers such as cotton, silk, and wool are best for quilts that need to be hand washed. Synthetic fibers such as polyester and nylon are more durable and can withstand machine washing. Consider the care instructions for the quilt before deciding on a thread type.
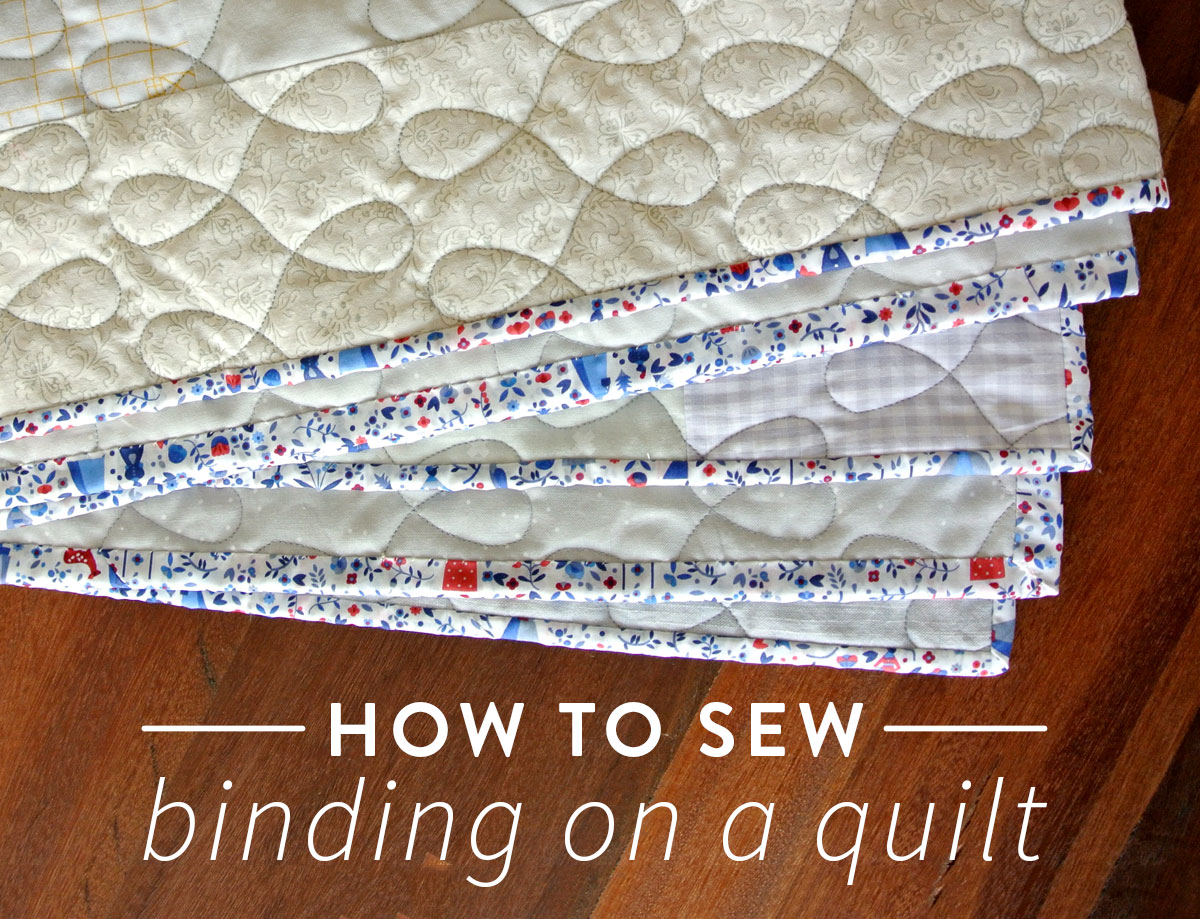
How to Hand Bind a Quilt
Hand binding a quilt is one of the traditional ways to finish a quilt. It ensures that the edges of the quilt are strong and durable. Hand binding also adds a decorative touch to the quilt. Here are the steps to hand bind a quilt:
| Step | Instructions |
|---|---|
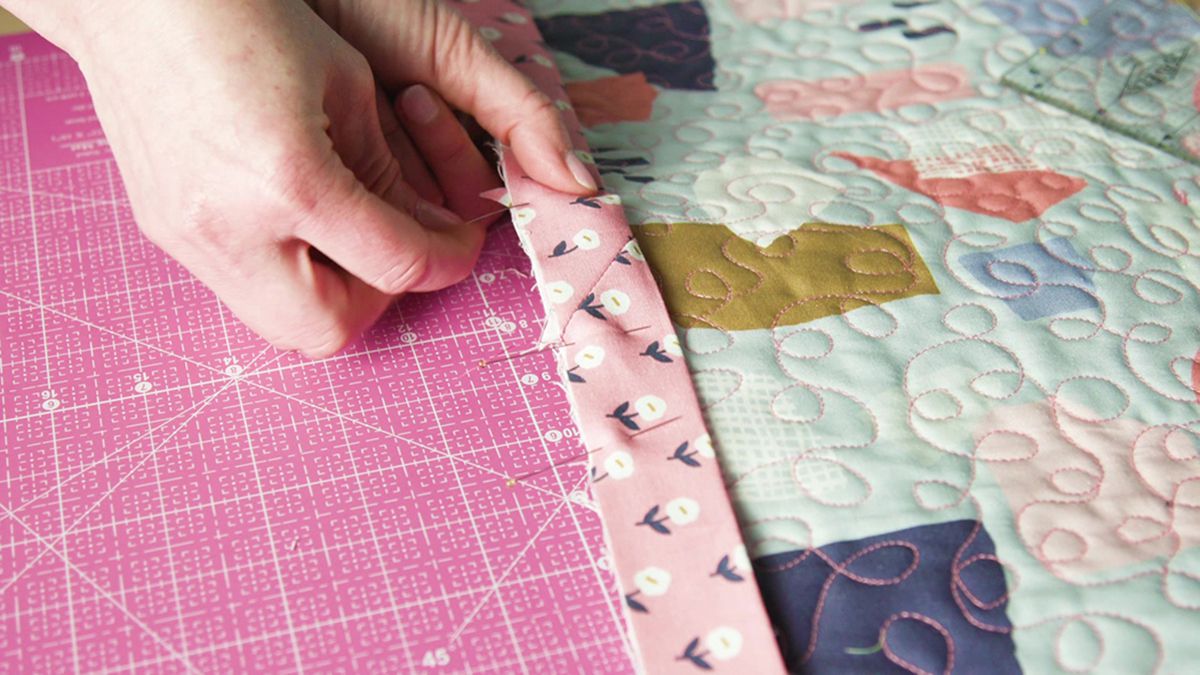
| 1 | Prepare the binding: Cut 2.5-inch strips of fabric from the same material used to make the quilt. Join the strips end-to-end with a diagonal seam, to make one long strip. |
| 2 | Attach the binding: Place the binding on the right side of the quilt. Line up the edges and pin in place. Sew the binding to the quilt using a ¼-inch seam allowance. |
| 3 | Join the binding: When you reach the end of the quilt, join the ends of the binding together. Trim the excess fabric, leaving a ¼-inch seam allowance. |
| 4 | Fold the binding: Fold the binding to the back of the quilt. Pin in place and stitch the binding to the quilt, about ⅛-inch from the edge. |
| 5 | Finish the binding: Fold the binding over the raw edge of the quilt and hand stitch in place. |
Hand binding a quilt is a relatively simple process that adds a beautiful and professional touch to the quilt. With a little practice and patience, you can finish your quilt with a beautiful hand binding.
How to Sew the Binding to the Quilt
Step 1: Prepare the quilt top, backing, and batting. Layer the backing, batting, and quilt top together and pin them together in place.
Step 2: Using a rotary cutter and ruler, trim the edges of the quilt so that they are even.
Step 3: Cut the binding strips from the fabric. The strips should be 2 1/2 inches by the width of the fabric (usually 44/45 inches).
Step 4: Sew the binding strips together end to end. Press the seams open or to the side.
Step 5: Fold the binding in half lengthwise and press.
Step 6: Pin the binding to the quilt, starting in the middle of one side. Make sure to leave a tail at the beginning and end of the binding.
Step 7: Sew the binding to the quilt, using a 1/4 inch seam allowance. Sew around the entire quilt, stopping and starting at the tails.
Step 8: Trim the tails and miter the corners of the binding.
Step 9: Fold the binding to the back side of the quilt and hand stitch the binding in place.
Finishing the Binding by Hand
- Turn the quilt over so the wrong side is facing up.
- Cut the binding strips 2 1/2 inches wide.
- Stitch the binding strips together end to end, using a diagonal seam.
- Press the seam open.
- Fold the binding in half lengthwise, wrong sides together.
- Starting at one corner, pin the binding to the quilt.
- Sew the binding to the quilt with a 1/4 inch seam allowance, stopping every 10 inches to tie off the thread.
- At the corners, fold the binding back on itself to create a nice miter.
- When you reach the beginning of the binding, overlap the ends and trim the excess.
- Fold the binding over the raw edge of the quilt and stitch it down by hand with a slipstitch.
Finishing the Quilt
Quilting the edges is the main step in finishing a quilt by hand.
- Start by threading a quilting needle with a medium-weight thread.
- Then, knot the end of the thread.
- Measure and mark the quilting lines on the quilt top and batting.
- Stitch the quilt top and batting together by hand following the marked quilting lines.
- Tie off the thread when you reach the end of the line.
- Continue quilting until all the quilting marking lines are stitched.
Binding the edges of the quilt is the next step in completing a quilt by hand.
- Cut 2” wide strips of fabric for binding.
- Fold the strips in half lengthwise and press.
- Sew the binding strips together, end to end, to form a continuous strip.
- Fold the binding strip in half again and press.
- Attach the binding strip to the edge of the quilt, starting at one corner.
- Sew the binding strip onto the edge of the quilt, using a ¼” seam allowance.
- Continue sewing the binding strip until you reach the corner.
- Secure the binding strip at the corner with a few stitches.
- Continue sewing the binding strip around the edge of the quilt, stopping 1” before the starting point.
- Fold the binding strip over the edge of the quilt and pin in place.
- Sew the binding strip to the quilt, using a ¼” seam allowance.
- Repeat the process until all the edges of the quilt are bound.
- Secure the end of the binding strip with a few stitches.
Your hand quilting and binding is now complete and you can enjoy your beautiful quilt for years to come!
Frequently Asked Questions
What tools and materials do I need to hand quilt a quilt?
- Thread: Use 100% cotton thread for hand quilting.
- Needles: Choose between a smaller size 10 or 11 quilting needle.
- Thimble: A thimble may be necessary to protect your finger.
- Hoops or frames: A quilting hoop or frame can help keep your quilt straight and taut.
- Basting supplies: Use basting pins or spray to hold the quilt top, batting, and backing together.
- Scissors: Small scissors are necessary for snipping threads.
What is the Best Way to Get Even Stitches When Hand Quilting?
Achieving even stitches when hand quilting is largely a matter of practice and patience. Begin by choosing a good quality quilting thread and a quilting needle that suits the thickness of the fabric. To ensure even stitches, pull the thread taut and keep the needle at the same depth as it enters and exits the fabric. In addition, use even pressure when pulling the thread and keep the stitches the same length. A thimble can be used to help push the needle through the fabric. Finally, take frequent breaks and remember to relax the hands.
What techniques can I use to make sure I don’t miss any areas when quilting?
- Mark the quilt: Before beginning, mark the quilting lines on the quilt with a marking pen, washable fabric marker, or water-soluble marker. This will help you keep track of the areas that you have already quilted and will help you avoid missing any sections.
- Use a quilting guide: A quilting guide is a small plastic template that is placed on the quilt and then used as a guide for stitching. This will help ensure that you don’t miss any areas of the quilt.
- Utilize a quilting hoop: A quilting hoop helps to keep the quilt taut and makes it easier to see the entire quilt at once. This will make it easier to spot any areas that have not been quilted.
- Take breaks: Take frequent breaks while quilting to give your eyes a rest and allow you to check your progress. This will help you make sure that you didn’t miss any sections.
- Check regularly: Check the quilt regularly to make sure that you haven’t missed any sections. If you find any areas that have not been quilted, mark them with a marking pen and quilt them.
How do I know when I am finished Hand Quilting a Quilt?
Once you have quilted all the layers together, you can assess the quilt for any unfinished areas or areas that need to be reinforced. You should quilt around the edges of the quilt to keep the layers together and provide a nice finished look. Once you have finished quilting all the layers, examine the quilt for any loose threads that need to be cut or tied off. If the quilt is properly quilted, the backing fabric should not be visible. If the backing fabric is visible, you may need to go back and add more quilting stitches to the areas to ensure that the quilt is securely quilted together and the backing fabric is properly hidden. Once you are satisfied with the quilting, you can trim any excess threads, press the quilt and bind the edges.
What is the Best Way to Secure the Threads When I am Finished Hand Quilting?
The best way to secure threads when hand quilting is to tie off each thread with a knot. To do this, bring the needle up through the fabric and tie a small knot in the thread. Then, take the needle back down through the quilt and cut the thread close to the knot. This will ensure that the thread will not unravel or come loose. Additionally, using a small dab of fabric glue can help to further secure the thread in place.
Conclusion
Quilting by hand is a great way to create a unique and beautiful quilt. With the right techniques and materials, you can make a quilt that will be a cherished family heirloom. With patience and practice, you can become an expert in hand quilting and make perfect quilts every time.


