Are you looking to make a beautiful and unique quilt? Clamshell quilts are a great option to consider. This type of quilt is a fun and easy project that is perfect for beginner quilters. In this article, we’ll provide a step-by-step guide on how to make a clamshell quilt. We’ll cover everything you need to know, from gathering your supplies to finishing your quilt. By the end of this article, you’ll have a completed clamshell quilt of your own. So let’s get started!
Preparing to Make a Clamshell Quilt
Gathering Materials
Before making a clamshell quilt, gather the materials you will need. This includes fabric for the top and the backing, batting, a ruler, a rotary cutter, and pins. Additionally, you will need a sewing machine and thread in the same color as the fabric for the top.
Cutting Clamshells
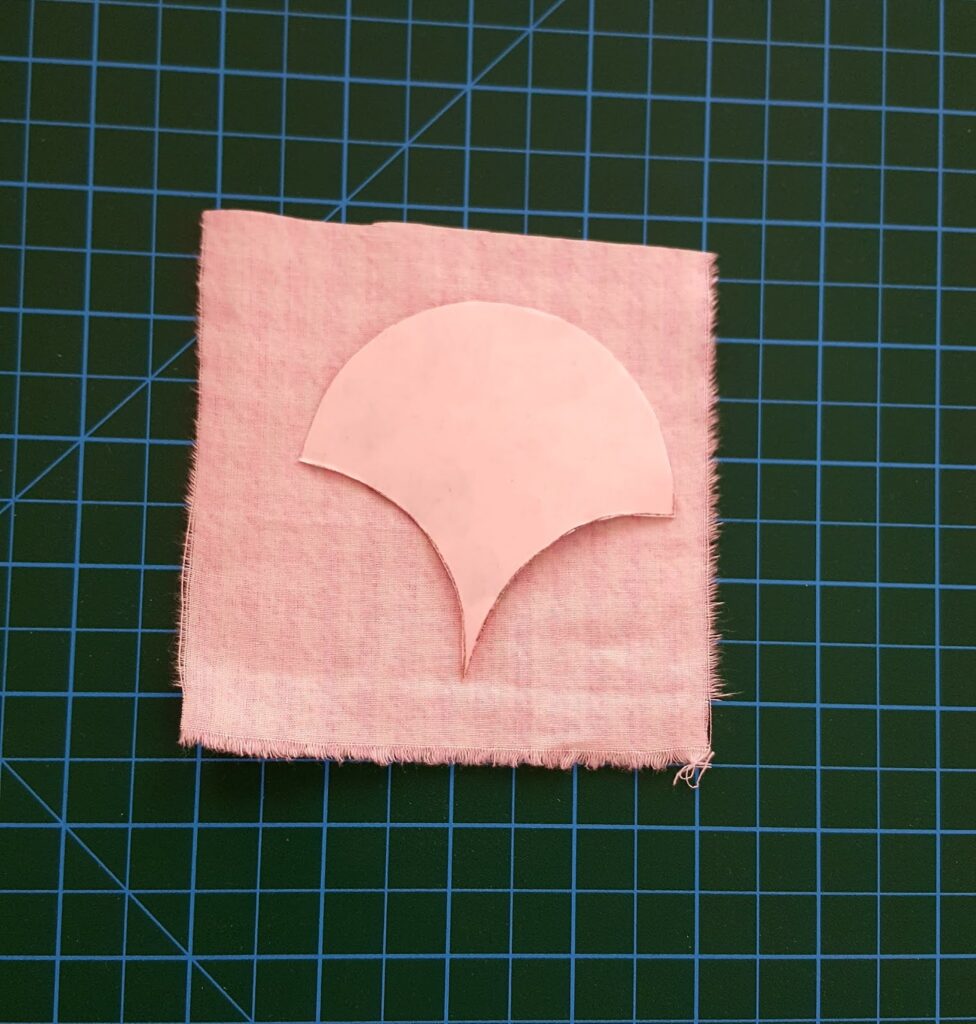
For the clamshells, you will need to measure and cut the fabric. With a ruler, measure out 2-inch squares and use a rotary cutter to make the cuts. After measuring and cutting the fabric, use pins to fasten the pieces together. Then, use the sewing machine to stitch the pieces together.
Once you have the clamshells complete, you are ready to assemble the quilt. Machine piece the clamshells together to form the top of the quilt. Then, layer the batting and backing and quilt the three layers together to complete the quilt.
Machine Piecing Clamshell Quilt
Cutting Fabric: Cut fabric into 4 1/2 inch squares. You will need two squares for each clamshell.
Sewing Clamshells Together
Sewing Clamshells Together
Using a 1/4 inch seam allowance, join the two squares together by sewing a diagonal line across each pair of squares. Make sure to backstitch at the beginning and end of each seam.
Assembling Clamshell Blocks
Once all the clamshells are sewn together, arrange them in a block formation and sew them together. Make sure to use a 1/4 inch seam allowance throughout. When all the clamshells are sewn together, press the quilt top. Your clamshell quilt is now ready to quilt and bind.
For a professional-looking quilt, use the same fabric for all the clamshells and take care to line up the points of the clamshells when sewing them together. Following these steps will help you create a beautiful and unique clamshell quilt.
Sewing a Clamshell Quilt
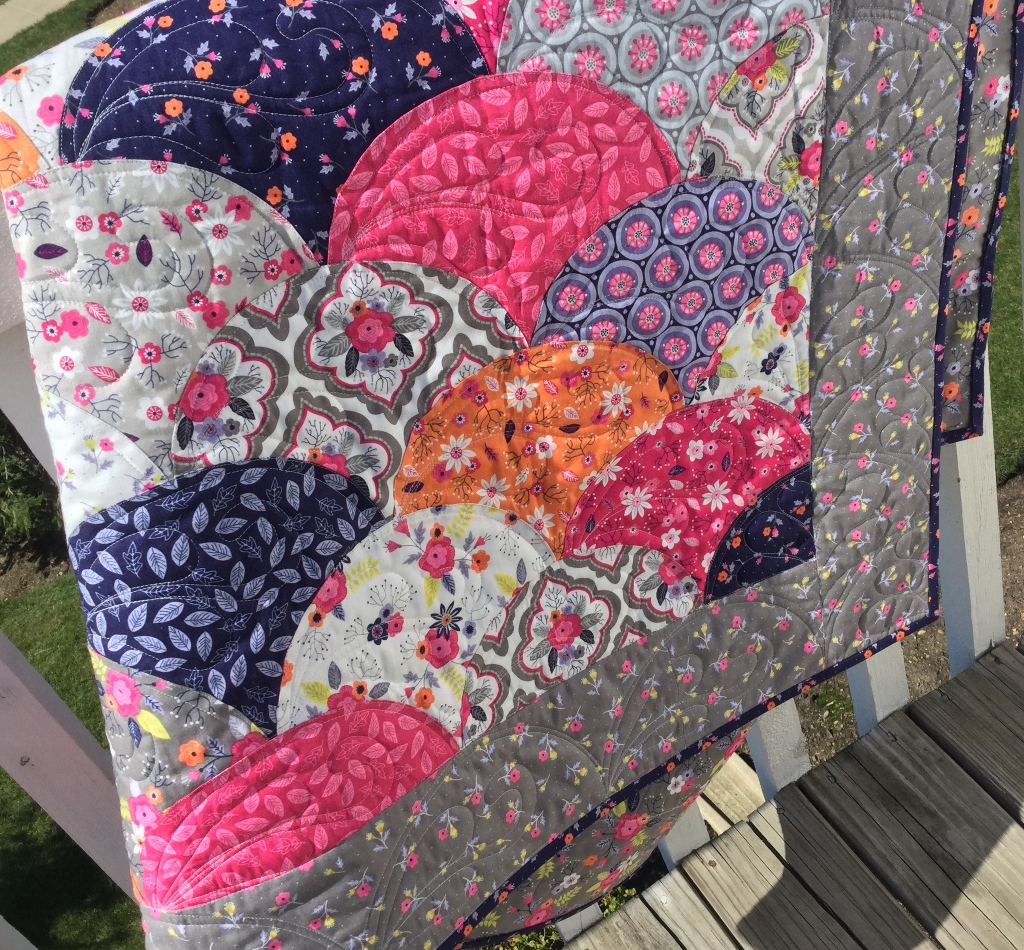
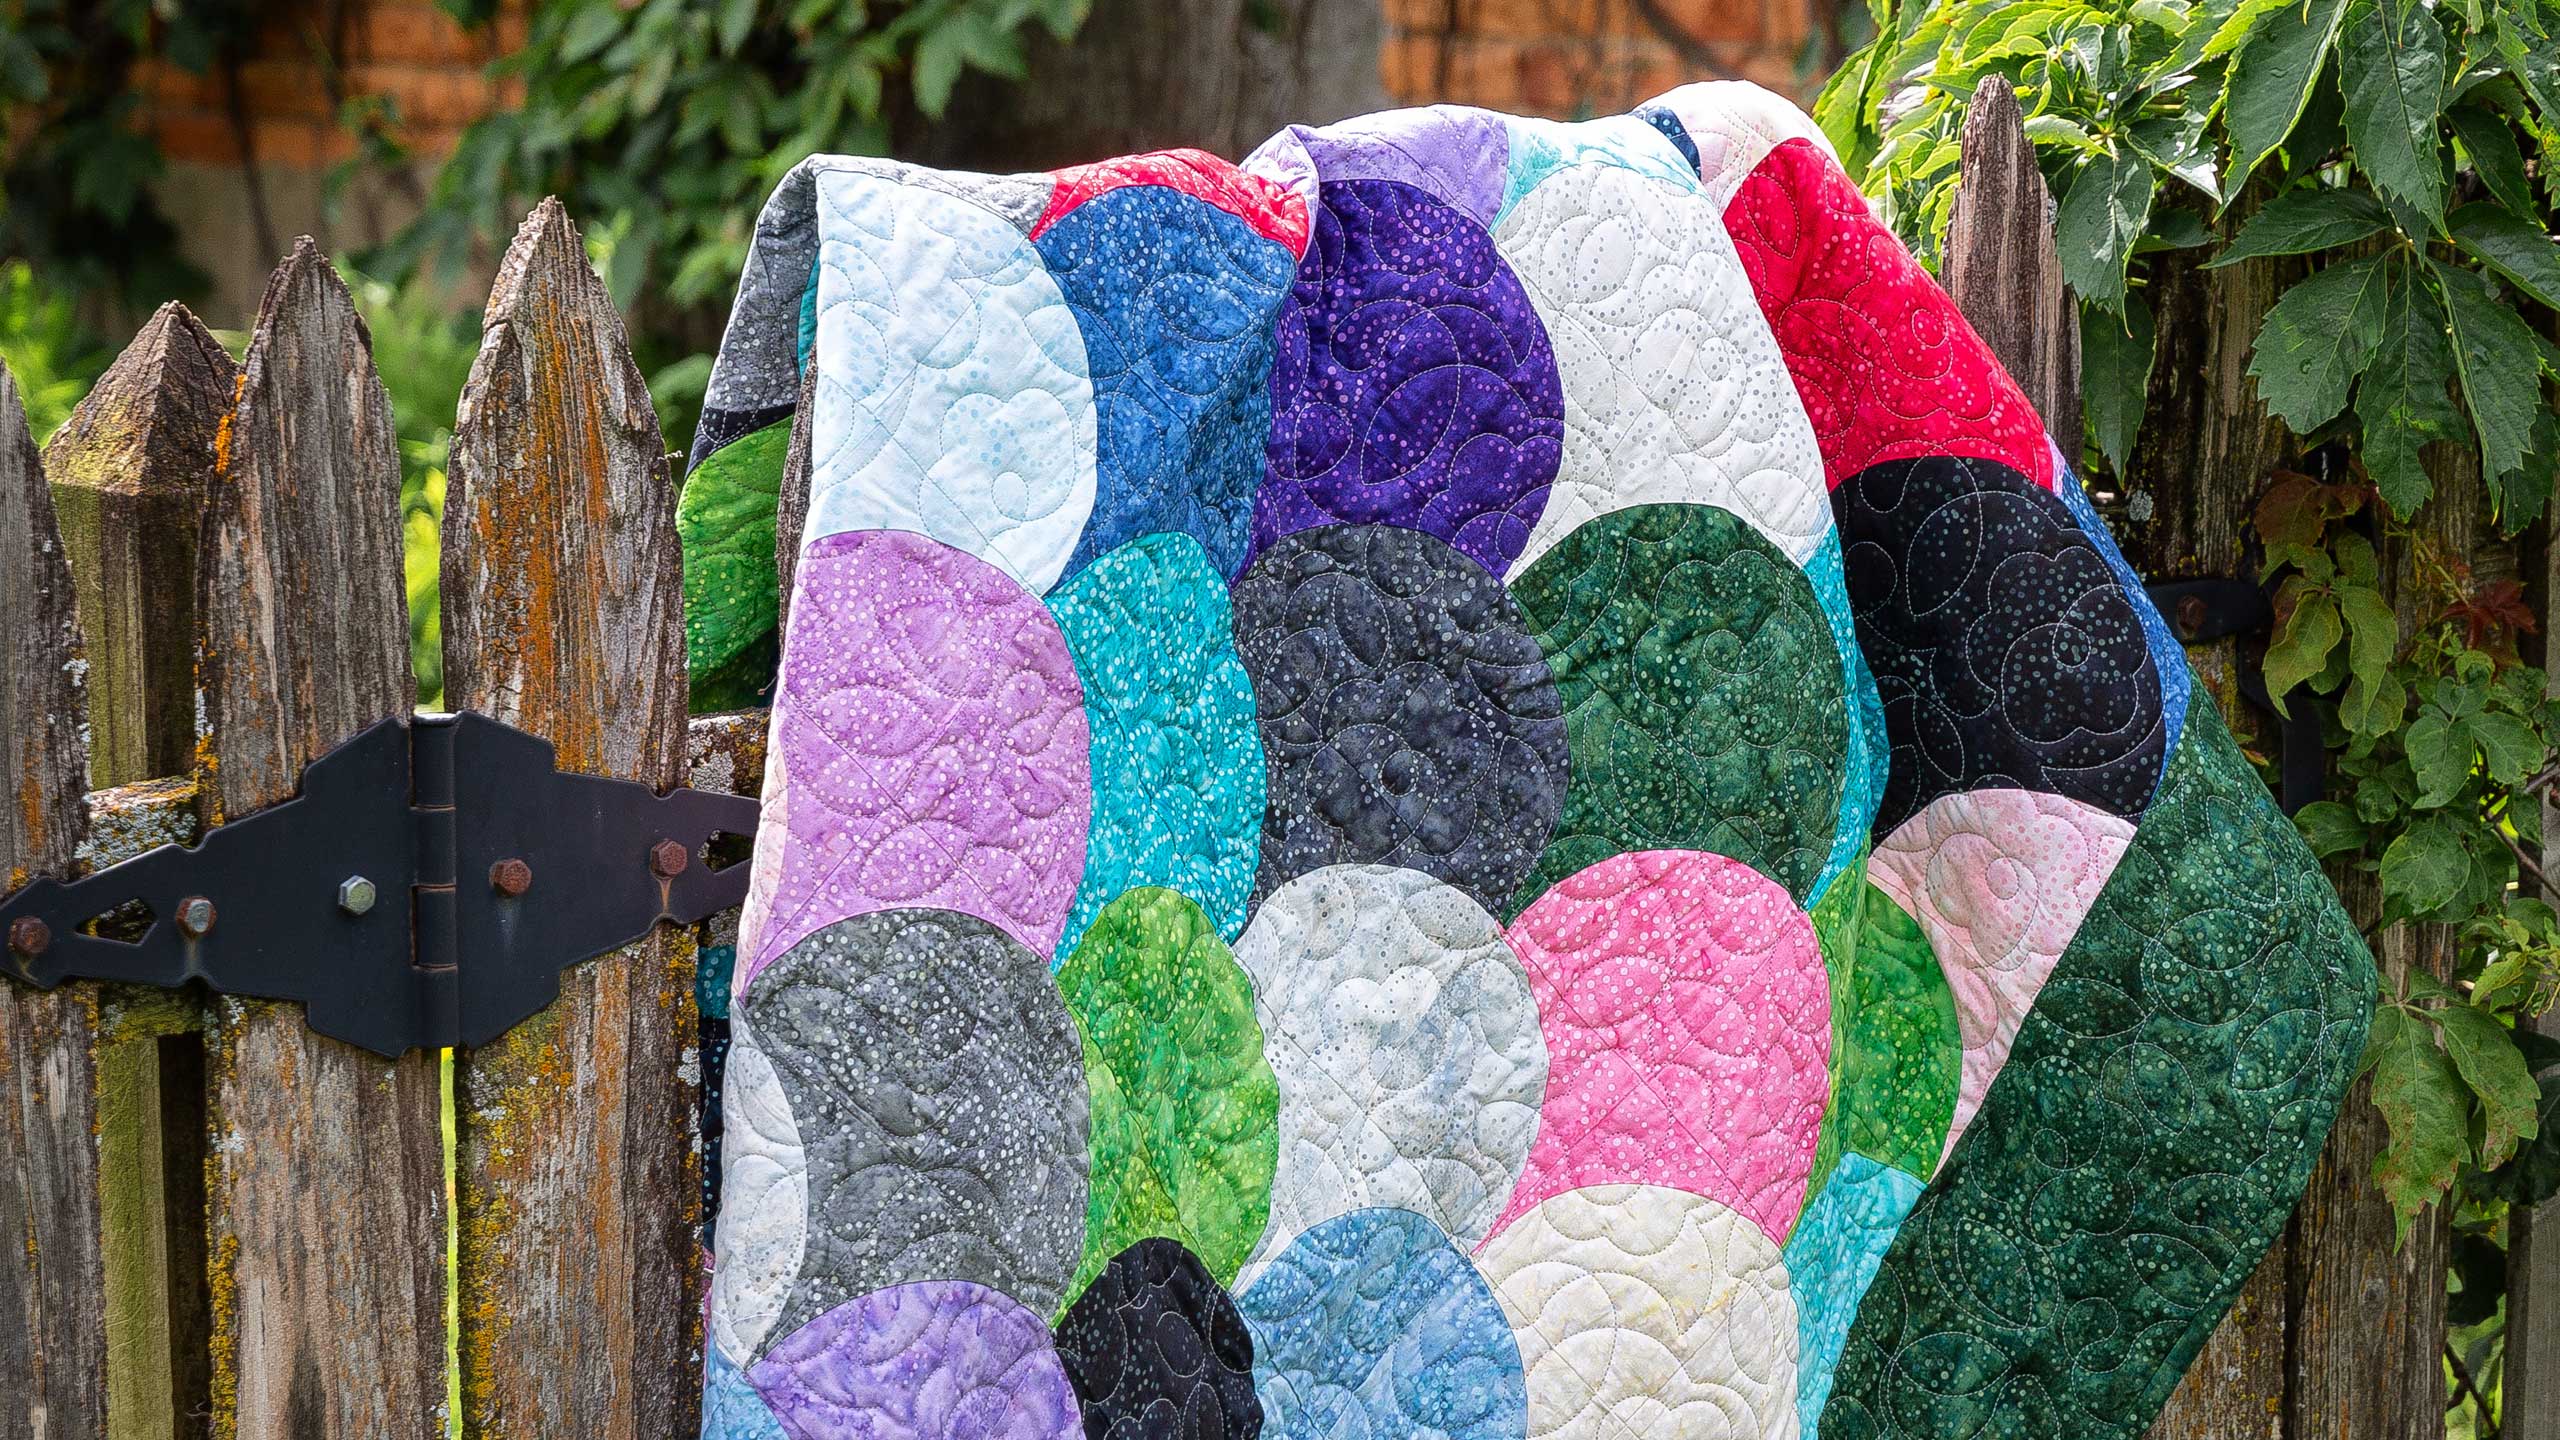
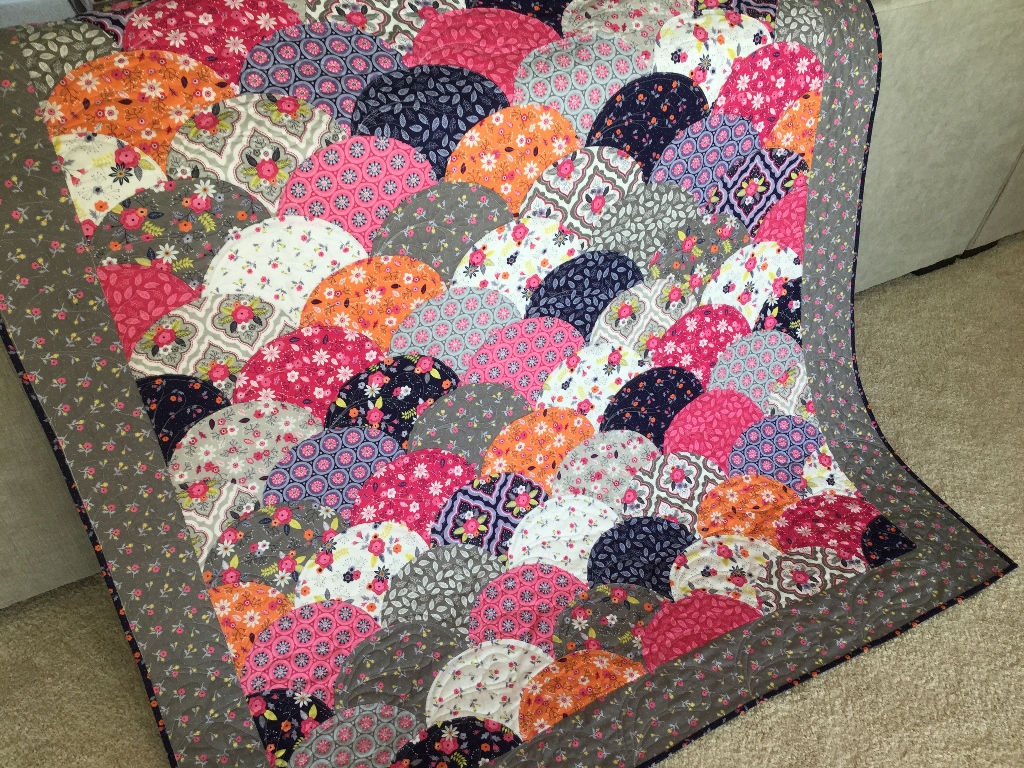
Clamshell quilts are a beautiful way to show off fabric prints and colors. The quilt is made with clamshell blocks, which are shaped like a scallop shell. Sewing clamshell quilts is easy enough for a beginner quilter, and the end result is sure to be a conversation piece.
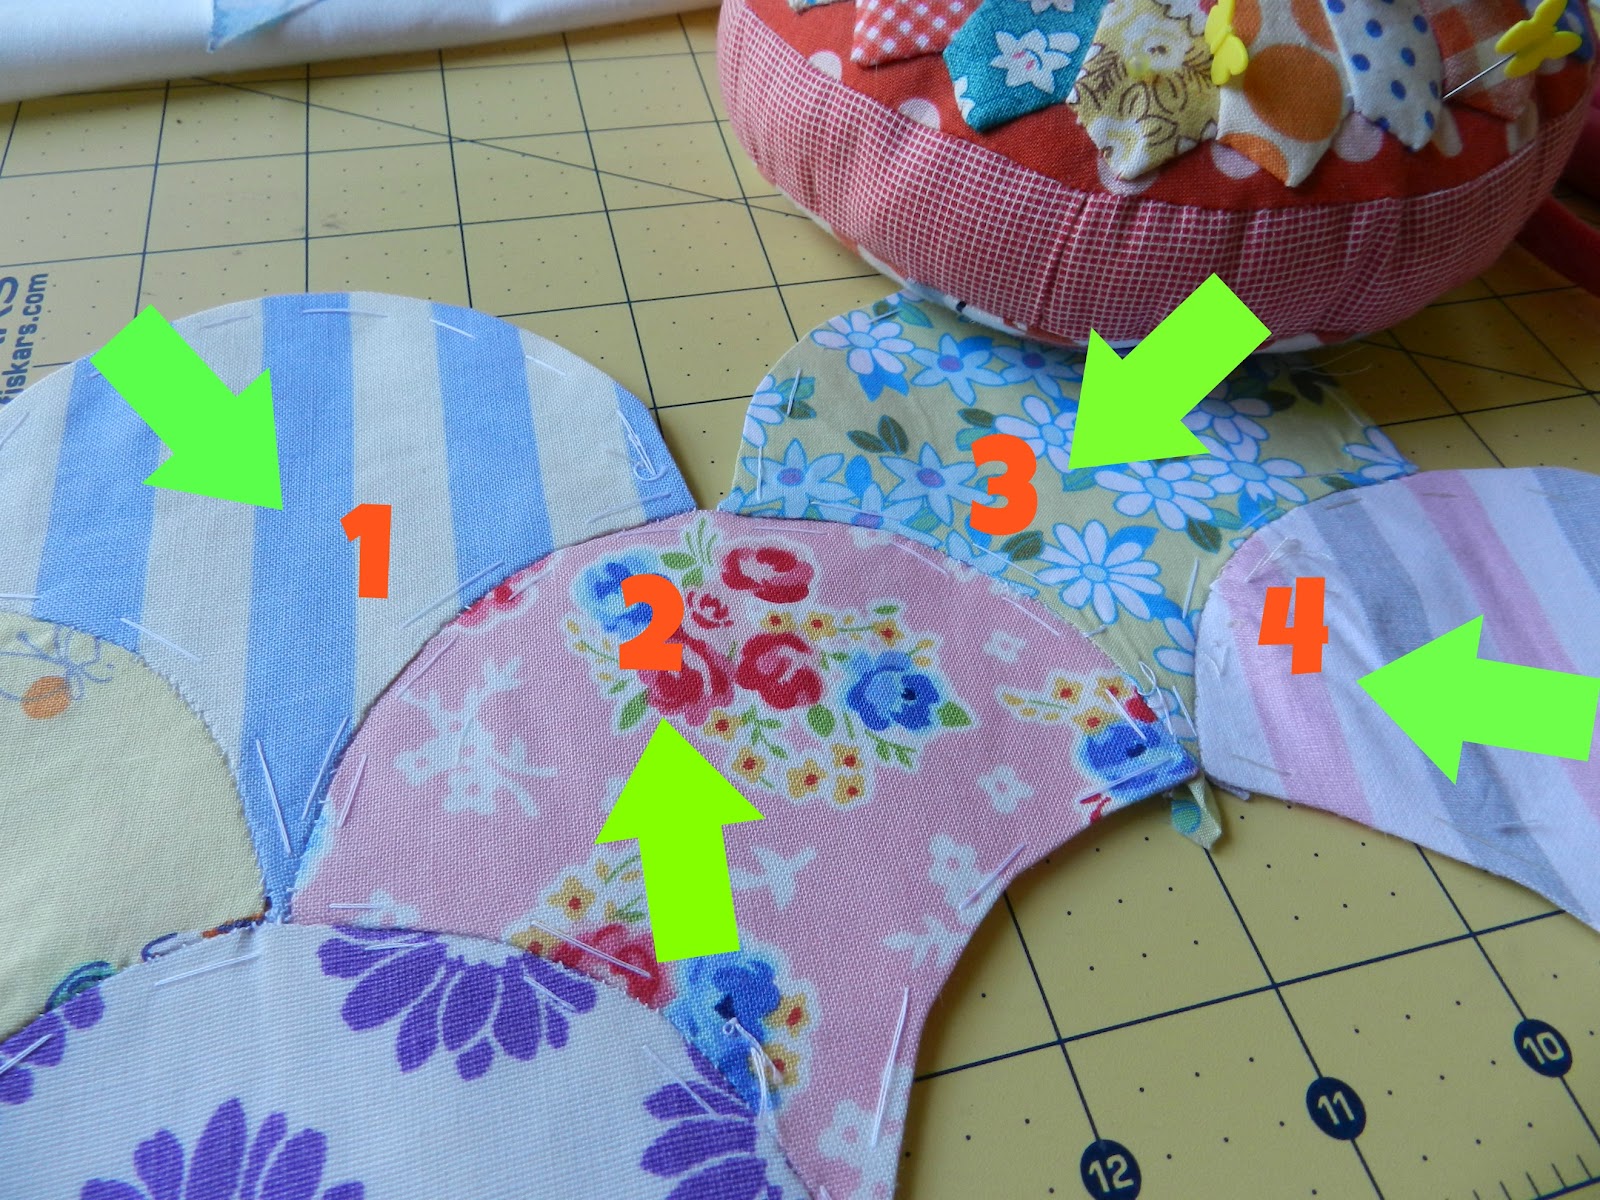
Joining Clamshell Blocks
The first step in making a clamshell quilt is to join the clamshell blocks. Start by sewing one clamshell block to another, right sides together. Sew along the straight edges, then press the seams open. Continue this process until all the blocks are joined together into one large quilt top.
Finishing the Edges
Once the clamshell blocks have been joined together, it’s time to finish the edges. Start by trimming the quilt top to make sure all the edges are even. Then, use a quarter inch seam to join the quilt top to a backing fabric. Finally, add batting and a quilt binding to finish the quilt.
Making a clamshell quilt is a great way to show off your quilting skills. With a few simple steps, you can create a beautiful quilt that you can be proud of. So, grab your fabric and get started on your own how to quilt clamshells masterpiece!
Quilting Clamshells
Marking the Quilt
To begin, use a washable fabric marker to draw the clamshell design on the top of the quilt. The design should be the same on each side of the quilt, with the same spacing and size. To ensure the clamshells are even, use a ruler to draw a grid pattern on the fabric that will be used as a guideline for the quilting design.
Quilting the Design
After the fabric is marked, use a sewing machine to quilt the clamshells. Start by stitching the center of each clamshell, then move outward to stitch the lines that divide each clamshell. To make sure each clamshell is quilted evenly, use the grid pattern on the fabric as a guide. For a neat finish, sew a line around the outside of the quilt to secure the edges.
When finished, trim any excess fabric and tie the quilt with yarn or thread.
Finishing the Quilt
Binding the Quilt
Binding is the final step in creating a quilt. It will give the quilt a finished look and help protect it from wear and tear. To bind the quilt, start by cutting strips of fabric 2 ½ inches wide. Sew the strips together lengthwise and then iron the seams flat. Trim the edges of the binding to make them even. Next, pin the binding to the quilt, right side down, and sew it in place. Finally, fold the binding over to the back of the quilt and hand-stitch it down.
Frequently Asked Questions
What Materials Are Needed to Make a Clamshell Quilt?
Fabric – Choose a variety of colors and textures for the quilt top. The number of fabrics you will need will depend on the size of your quilt.
Batting – Batting is the material that goes between the quilt top and the backing fabric.
Backing Fabric – Choose a single fabric for the back. The quilt backing should be slightly larger than the quilt top.
Rotary Cutter, Ruler, and Mat – These will be used to cut the fabric into the clamshell shape.
Thread – Choose a thread color that will match the fabrics used in the quilt top.
Sewing Machine – Used to sew the clamshells together.
How Long Does it Take to Complete a Clamshell Quilt?
The time it takes to complete a clamshell quilt will depend on the size of the quilt, the skill level of the quilter, and the complexity of the design. Generally, a clamshell quilt can take anywhere from 8 to 16 hours to complete. It is important to plan ahead and consider all factors before beginning a clamshell quilt project.
Are There Any Special Tools Needed to Make a Clamshell Quilt?
A clamshell quilt requires a few basic tools, such as a rotary cutter, a ruler, and a cutting mat. Additionally, a quilting ruler can be useful for marking and cutting the fabric pieces accurately. Other helpful tools include a seam ripper, a sewing machine, pins, and a presser foot. An iron can also help press seams and fabric to ensure accurate piecing.
What is the Best Way to Measure and Cut the Fabric Pieces?
Accurate measuring and cutting of fabric pieces is essential to creating a successful clamshell quilt. Use a quilter’s ruler and rotary cutter to measure and cut fabric pieces. When measuring, ensure that each fabric piece is the same size and shape. When cutting, make sure to use a new and sharp rotary cutter blade for precise and clean edges. Additionally, use a cutting mat to protect your work surface.
Is it Possible to Make a Clamshell Quilt Without a Sewing Machine?
Yes, it is possible to make a clamshell quilt without a sewing machine. You can hand stitch the quilt using a whip stitch or blanket stitch. Start by cutting the fabric into the desired shape and size. Then, using pins, position the two pieces of fabric together and stitch around the curves. Trim off any excess fabric and finish with a pressed hem. This technique requires more time and patience, but it is possible to make a clamshell quilt without a sewing machine.
Conclusion
Making a clamshell quilt is a creative and fun way to show off your quilting skills. With the right supplies and equipment, you can easily create a beautiful quilt that any quilter would be proud to display. Following the step-by-step guide provided, you can create your own clamshell quilt with ease.


