
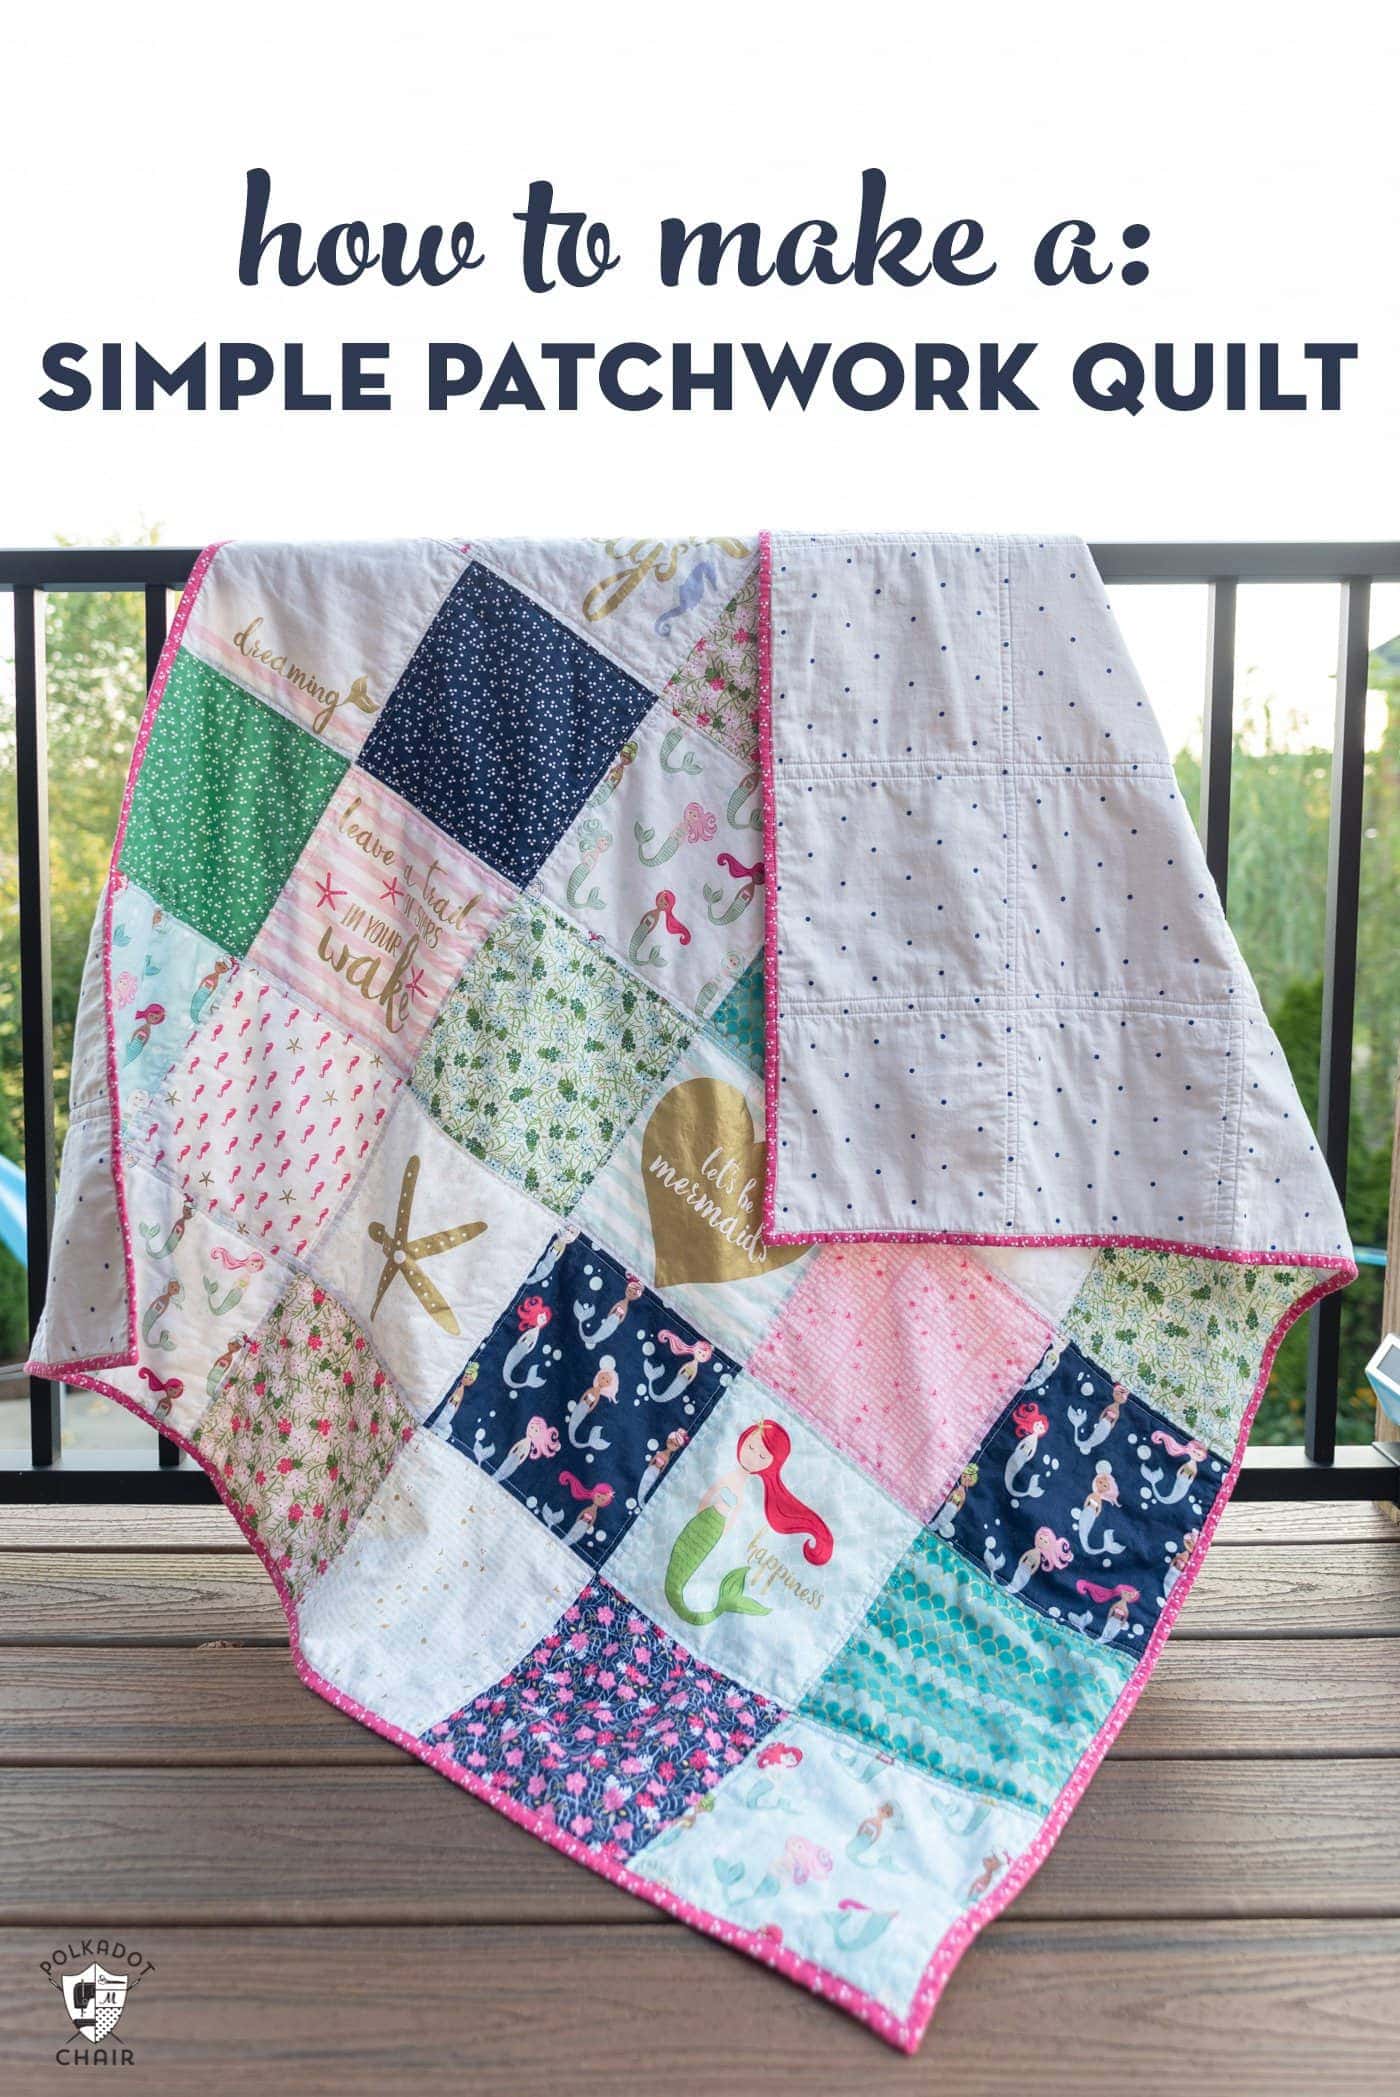
Are you looking for a way to create a beautiful quilt? If so, this step-by-step guide on how to piece a quilt will provide you with the knowledge and skills needed to successfully make your own quilt. You’ll learn the basic steps to piecing a quilt, from choosing the right fabrics and cutting the pieces to piecing the quilt top and finishing the quilt. With these instructions and a little patience, you’ll have a gorgeous quilt that you’ll be proud to display in your home.
Materials Needed
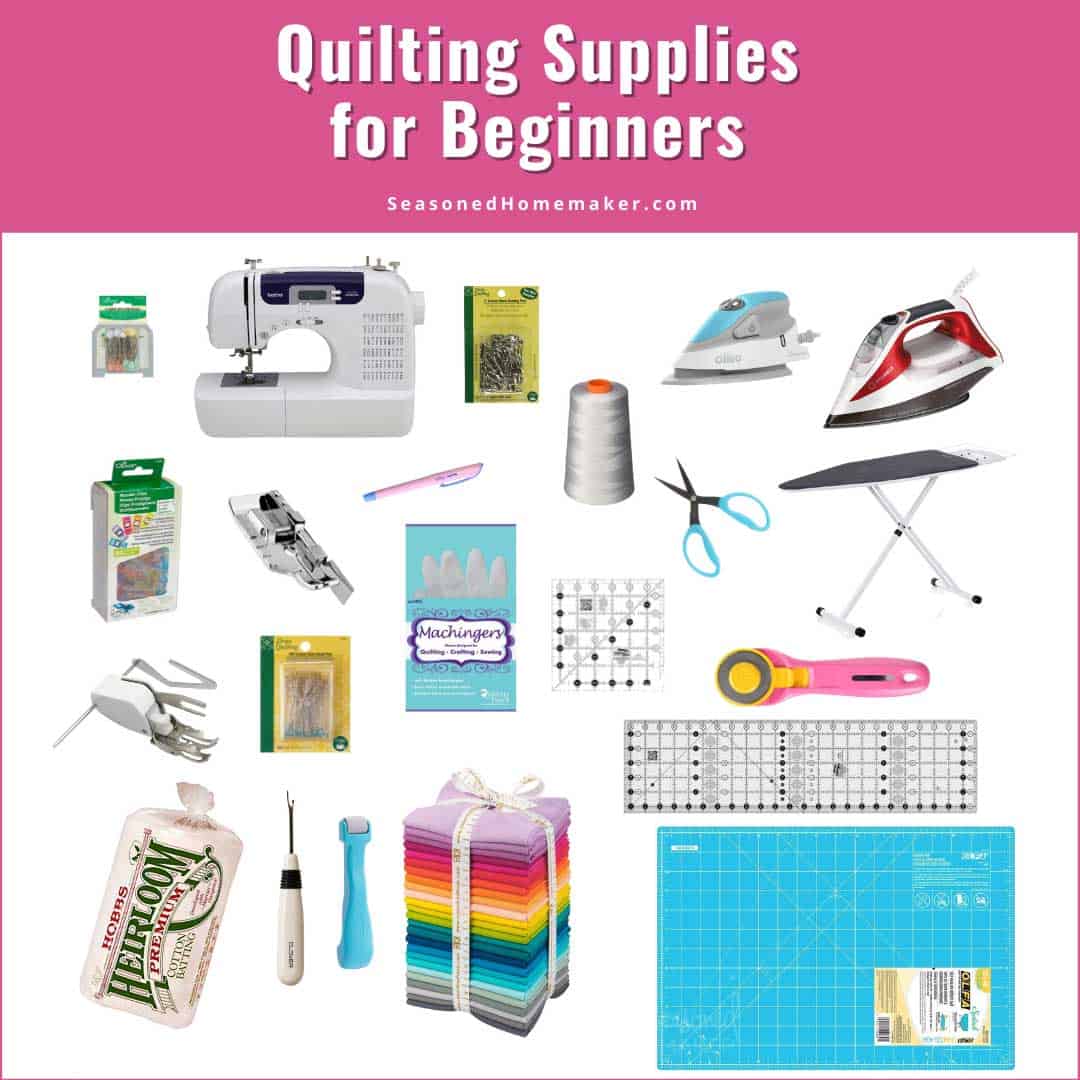
- Fabric: At least three different fabrics are needed to make a quilt top – a backing, batting, and the quilt top itself. Choose fabrics of varying weights, colors and textures for an interesting effect.
- Rotary Cutter: A rotary cutter is the most efficient tool for cutting quilt pieces, as it can quickly and accurately make multiple cuts at once.
- Ruler: A ruler is necessary for measuring and cutting pieces of fabric for the quilt top.
- Pins: Sewing pins are helpful for holding the quilt pieces in place as you piece them together.
- Thread: Quilting thread is the best choice for sewing the quilt top together.
- Sewing Machine: A sewing machine is essential for piecing together the quilt top.
- Iron: An iron is required to press the pieces of fabric as they are sewn together.
Preparing the Fabric
- Wash and Dry – Before piecing, fabrics should be washed and dried. This helps to pre-shrink the fabric and removes any dirt or chemicals.
- Press – Iron fabric to remove wrinkles and straighten the edges. Pressing helps to ensure accurate piecing.
- Cut – Use a rotary cutter and mat to cut fabric into different sizes as per the pattern.
- Mark and Label – Mark fabric pieces with the pattern name or other identification information. This helps to keep track of the pieces.
- Organize – Arrange the fabric pieces in the order of the quilt pattern.
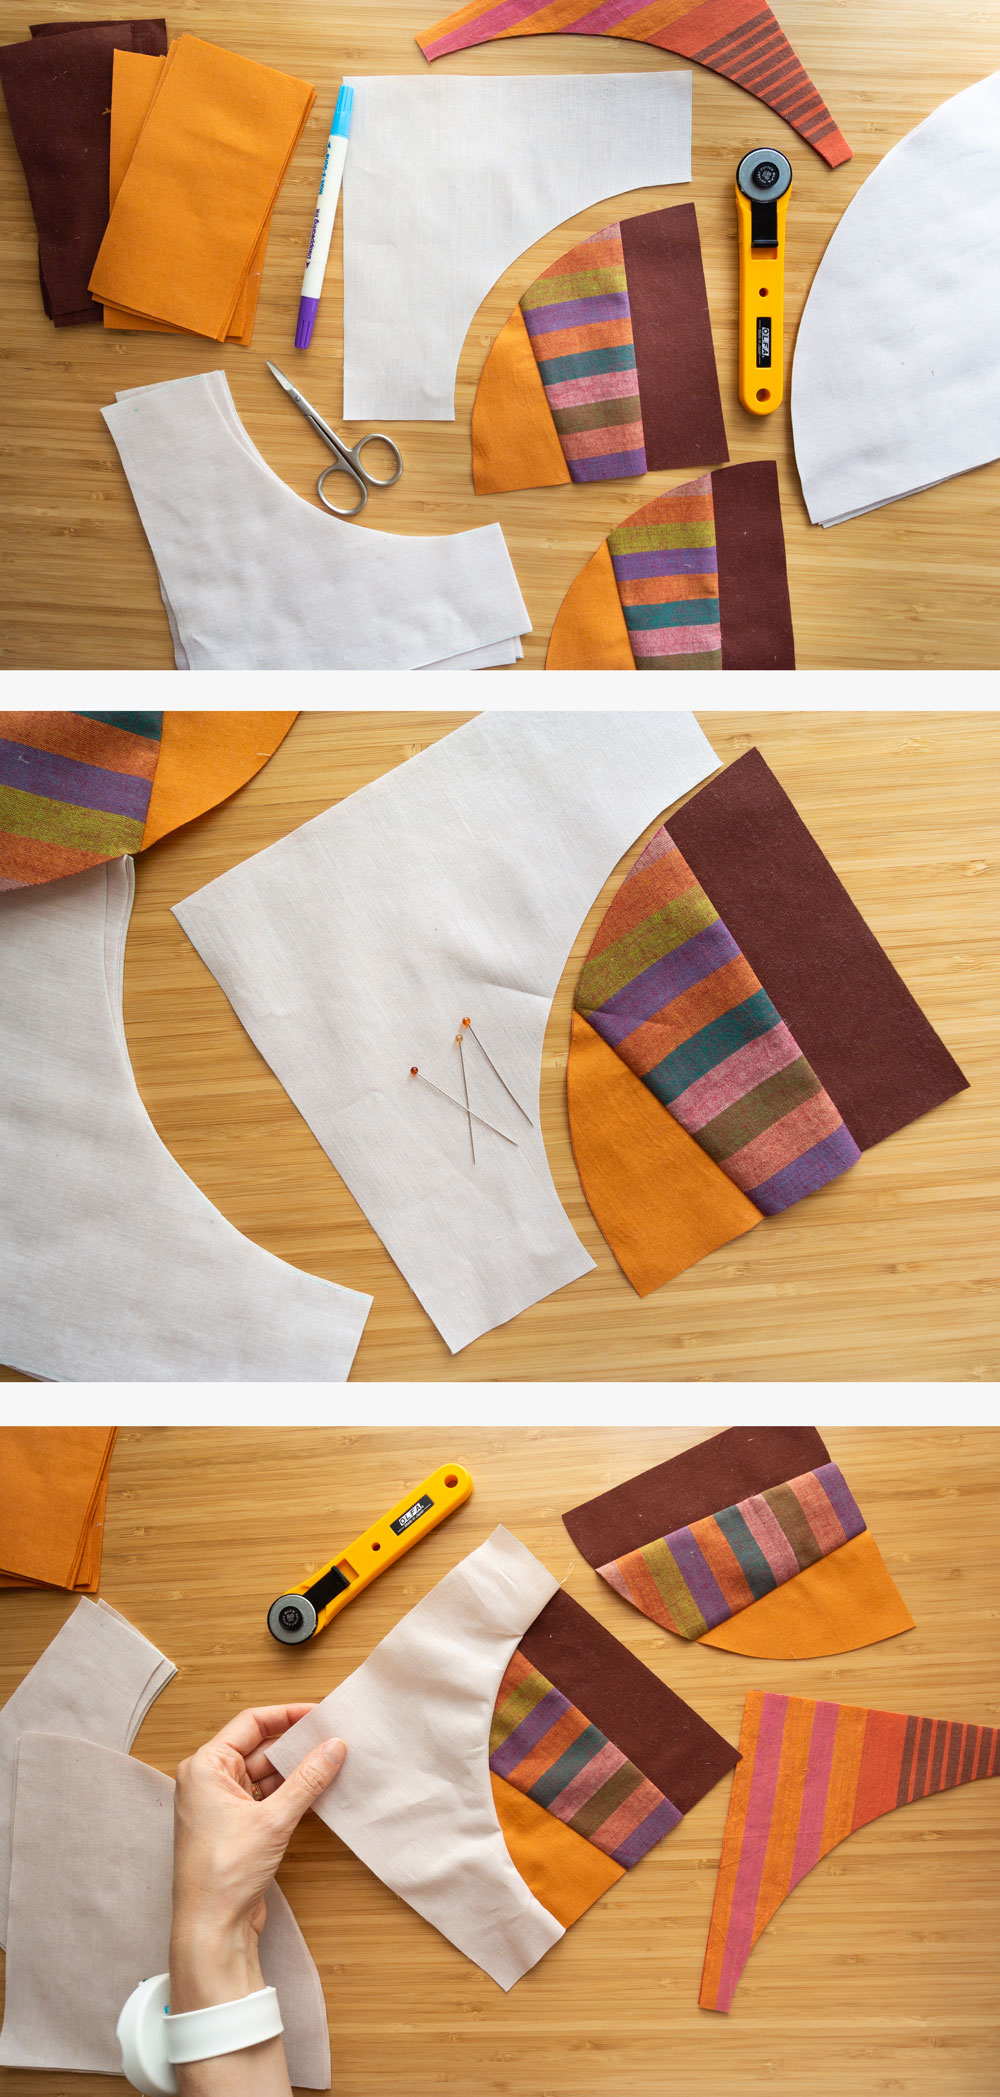
Cutting the Pieces
- Choose the fabric: Select the fabric that you are going to use for the quilt top.
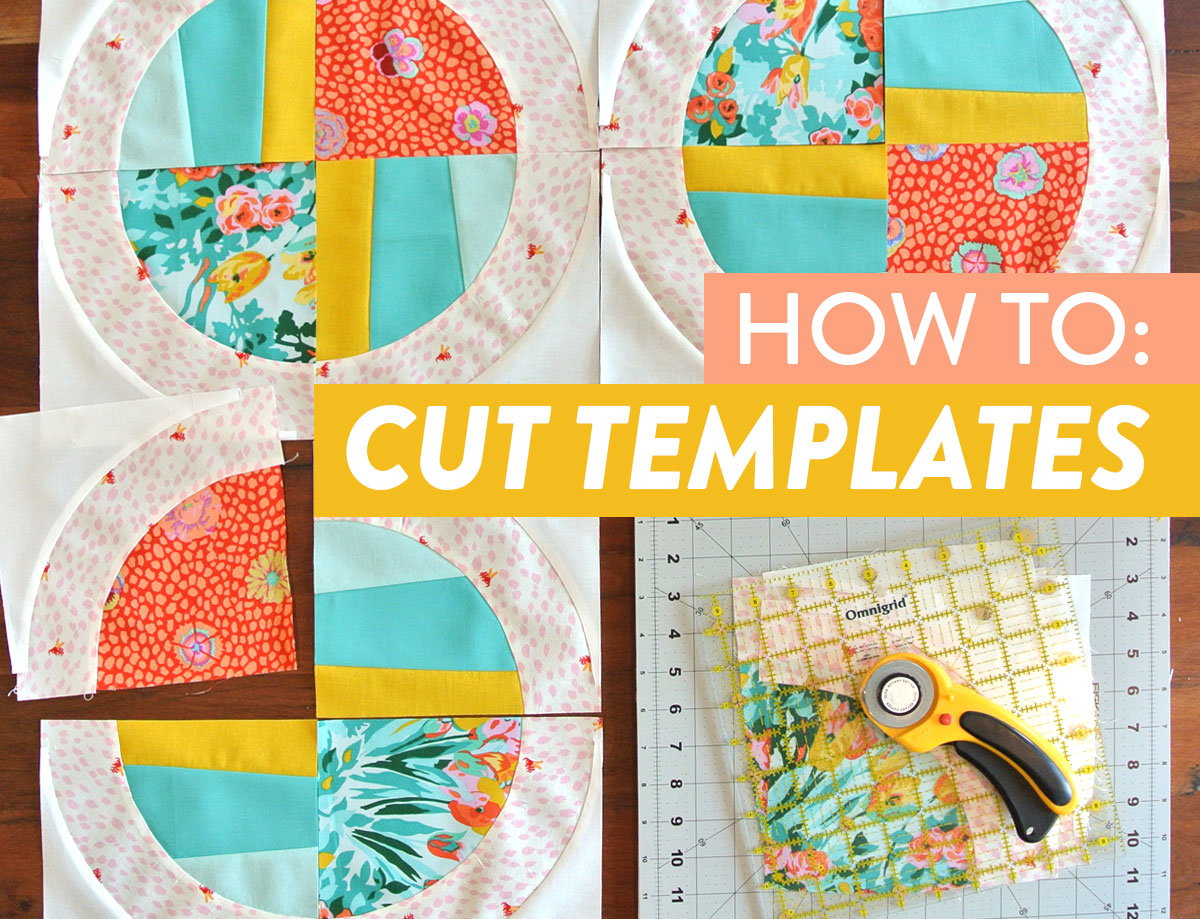
- Cut the pieces: Using a rotary cutter or scissors, cut the fabric into the designated sizes.
- Mark the pieces: To avoid confusion, mark the right side of each piece with a quilting pen or tailor’s chalk.
- Organize the pieces: Organize the pieces into piles of like shapes and sizes.
Layout and Design
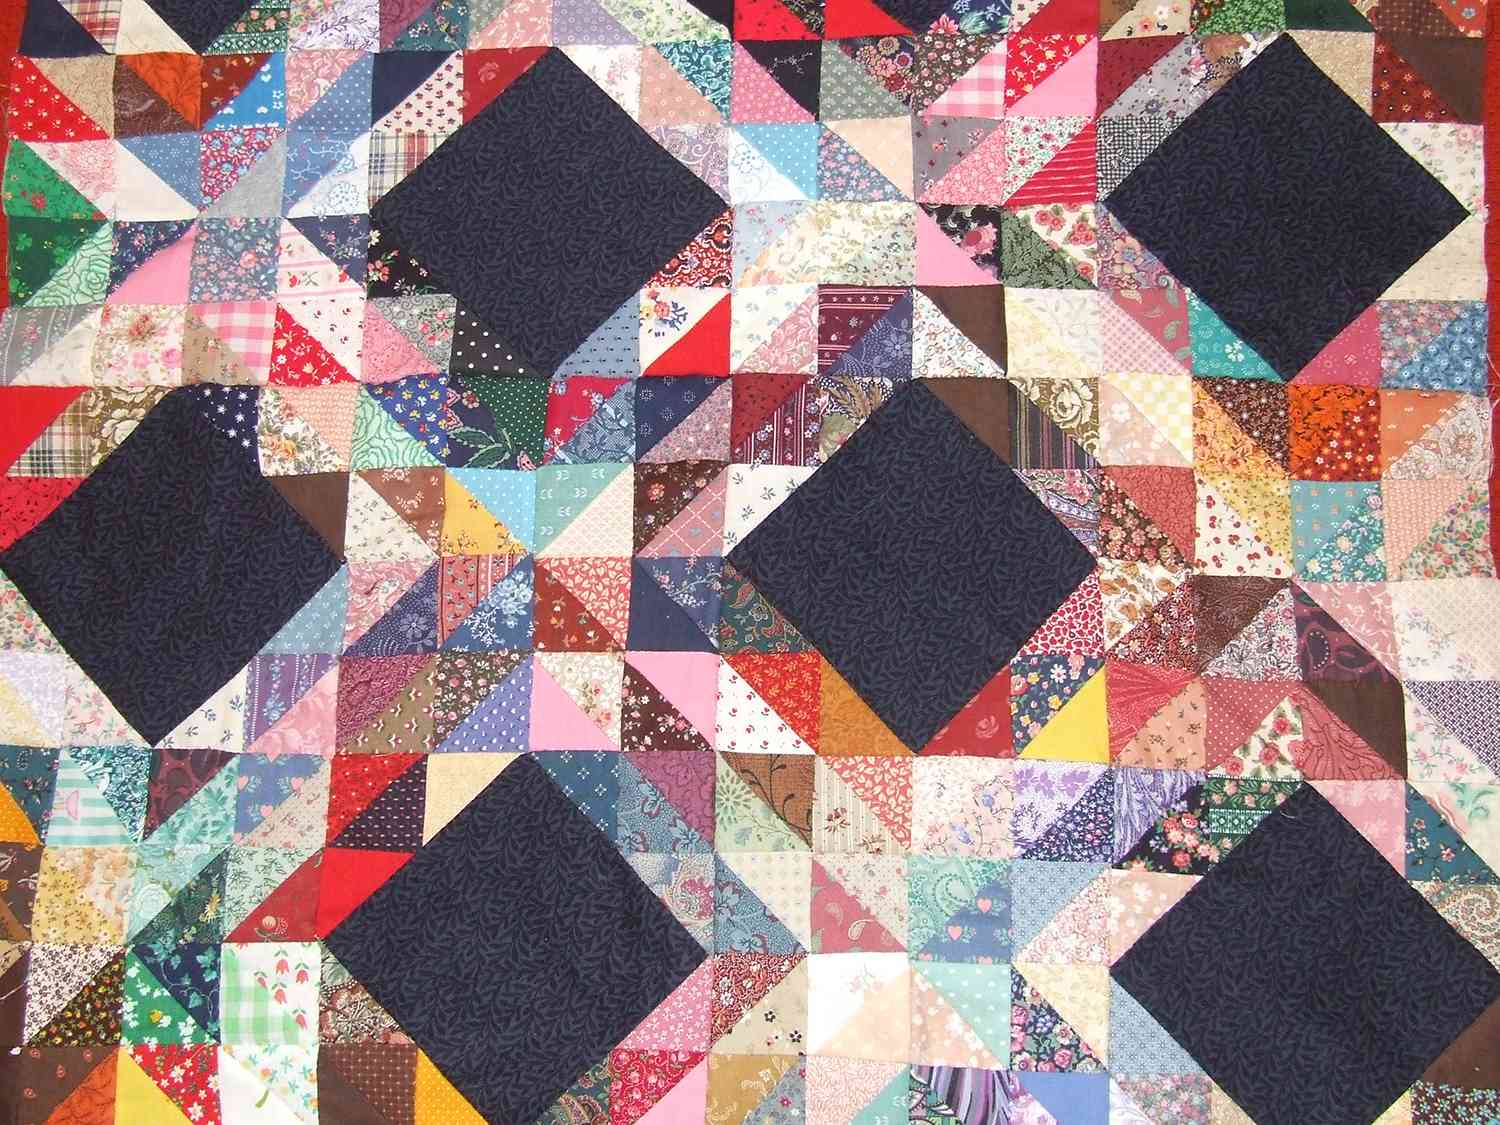
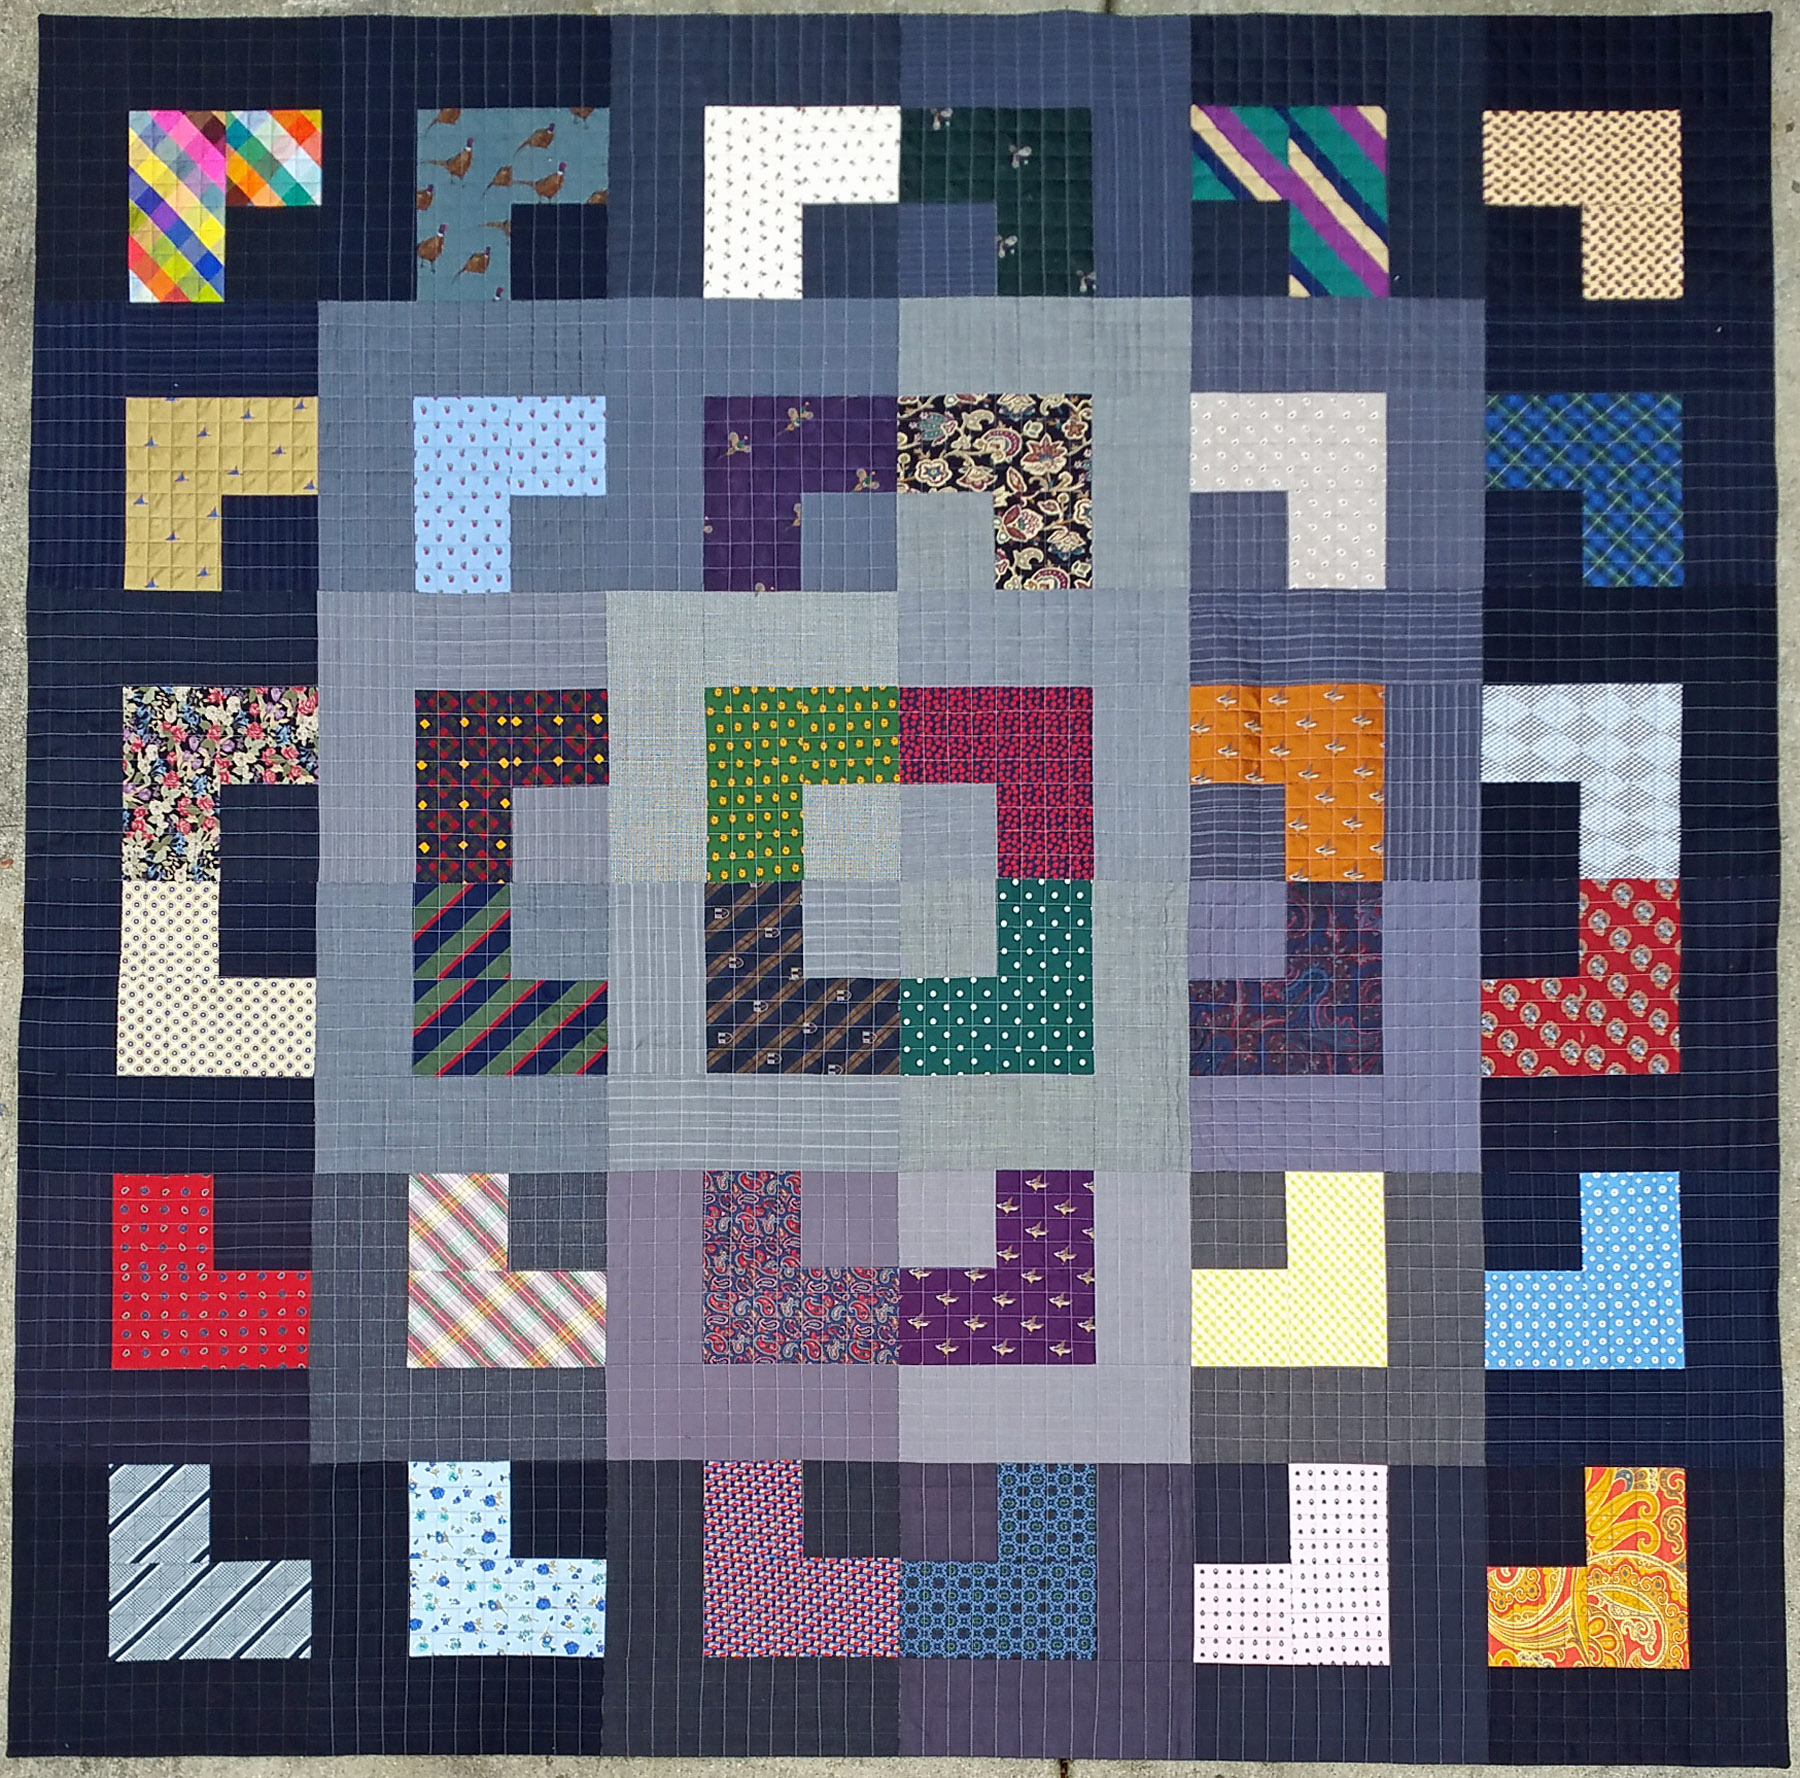
- Choosing a pattern – When designing a quilt, the first step is to determine the pattern and layout of the quilt. Popular quilting patterns include patchwork, log cabin, and rail fence.
- Fabric selection – Once the quilt pattern is determined, the next step is to select the fabrics for the quilt. It is important to select fabrics with a range of colors and textures that will work with the quilt pattern.
- Cutting the fabric – After the fabrics are selected, the next step is to cut the fabric into the necessary sizes and shapes for the quilt. This step requires precision and accuracy to ensure the pieces fit together correctly in the quilt.
- Assembling the quilt – The pieces of the quilt are then assembled according to the quilt pattern. Careful attention must be paid to the arrangement of the fabrics in the quilt to achieve the desired pattern.
- Quilting – The last step in the quilt-making process is the quilting. This involves stitching the pieces of the quilt together to form the finished product.
Pinning the Pieces

- Secure the Pieces: Pinning the pieces of the quilt top together ensures that the fabric pieces remain in their proper position while you are sewing them together.
- Find the Right Size Pin: Use pins that are small enough to easily fit through the fabric layers and long enough to hold them in place.
- Place the Pins in the Middle: Place the pins in the middle of the seam allowance so that they do not interfere with the sewing machine needle.
- Put the Pins at an Angle: Place the pins at an angle so that they can be easily removed when it’s time to sew the pieces together.
- Place the Pins Close Together: Place the pins close together so that they securely hold the fabric pieces in place.
- Remove the Pins Before Sewing: Be sure to remove the pins before you begin to sew the pieces together.
Sewing the Pieces
Start by laying out your quilt pieces in the desired order, making sure that the right sides are facing up. With a sharp needle and thread, start to sew the pieces together, starting with two pieces and making sure that the edges are lined up. Stitch a ¼ inch seam allowance and then press the seam open. Continue adding the pieces, pressing the seams open as you go. When all of the pieces are sewn together, press the quilt top once more. To add additional strength to the quilt, use a zigzag stitch across the seams.
| Step | Instructions |
|---|---|
| 1 | Lay out quilt pieces in desired order |
| 2 | Using needle and thread, Start sewing pieces together with ¼ inch seam allowance |
| 3 | Press seams open as you go |
| 4 | Press quilt top once more |
| 5 | Optional: Use zigzag stitch across seams for additional strength |
Finishing the Quilt Top
| Step | Instructions |
|---|---|
| 1 | Press all seams open, using the iron. |
| 2 | Lay out the quilt top on a flat surface. |
| 3 | Make sure the seams line up and the points of the blocks meet. |
| 4 | Pin the quilt top together. |
| 5 | Sew the quilt top together, using a ¼ inch seam allowance. |
| 6 | Press the quilt top. |
| 7 | Trim any excess fabric from the edges of the quilt top. |
Once all the blocks are sewn together, you can finish the quilt top. Press all seams open, using the iron. Lay out the quilt top on a flat surface and make sure the seams line up and the points of the blocks meet. Pin the quilt top together and sew the quilt top together, using a ¼ inch seam allowance. Press the quilt top, then trim any excess fabric from the edges of the quilt top.
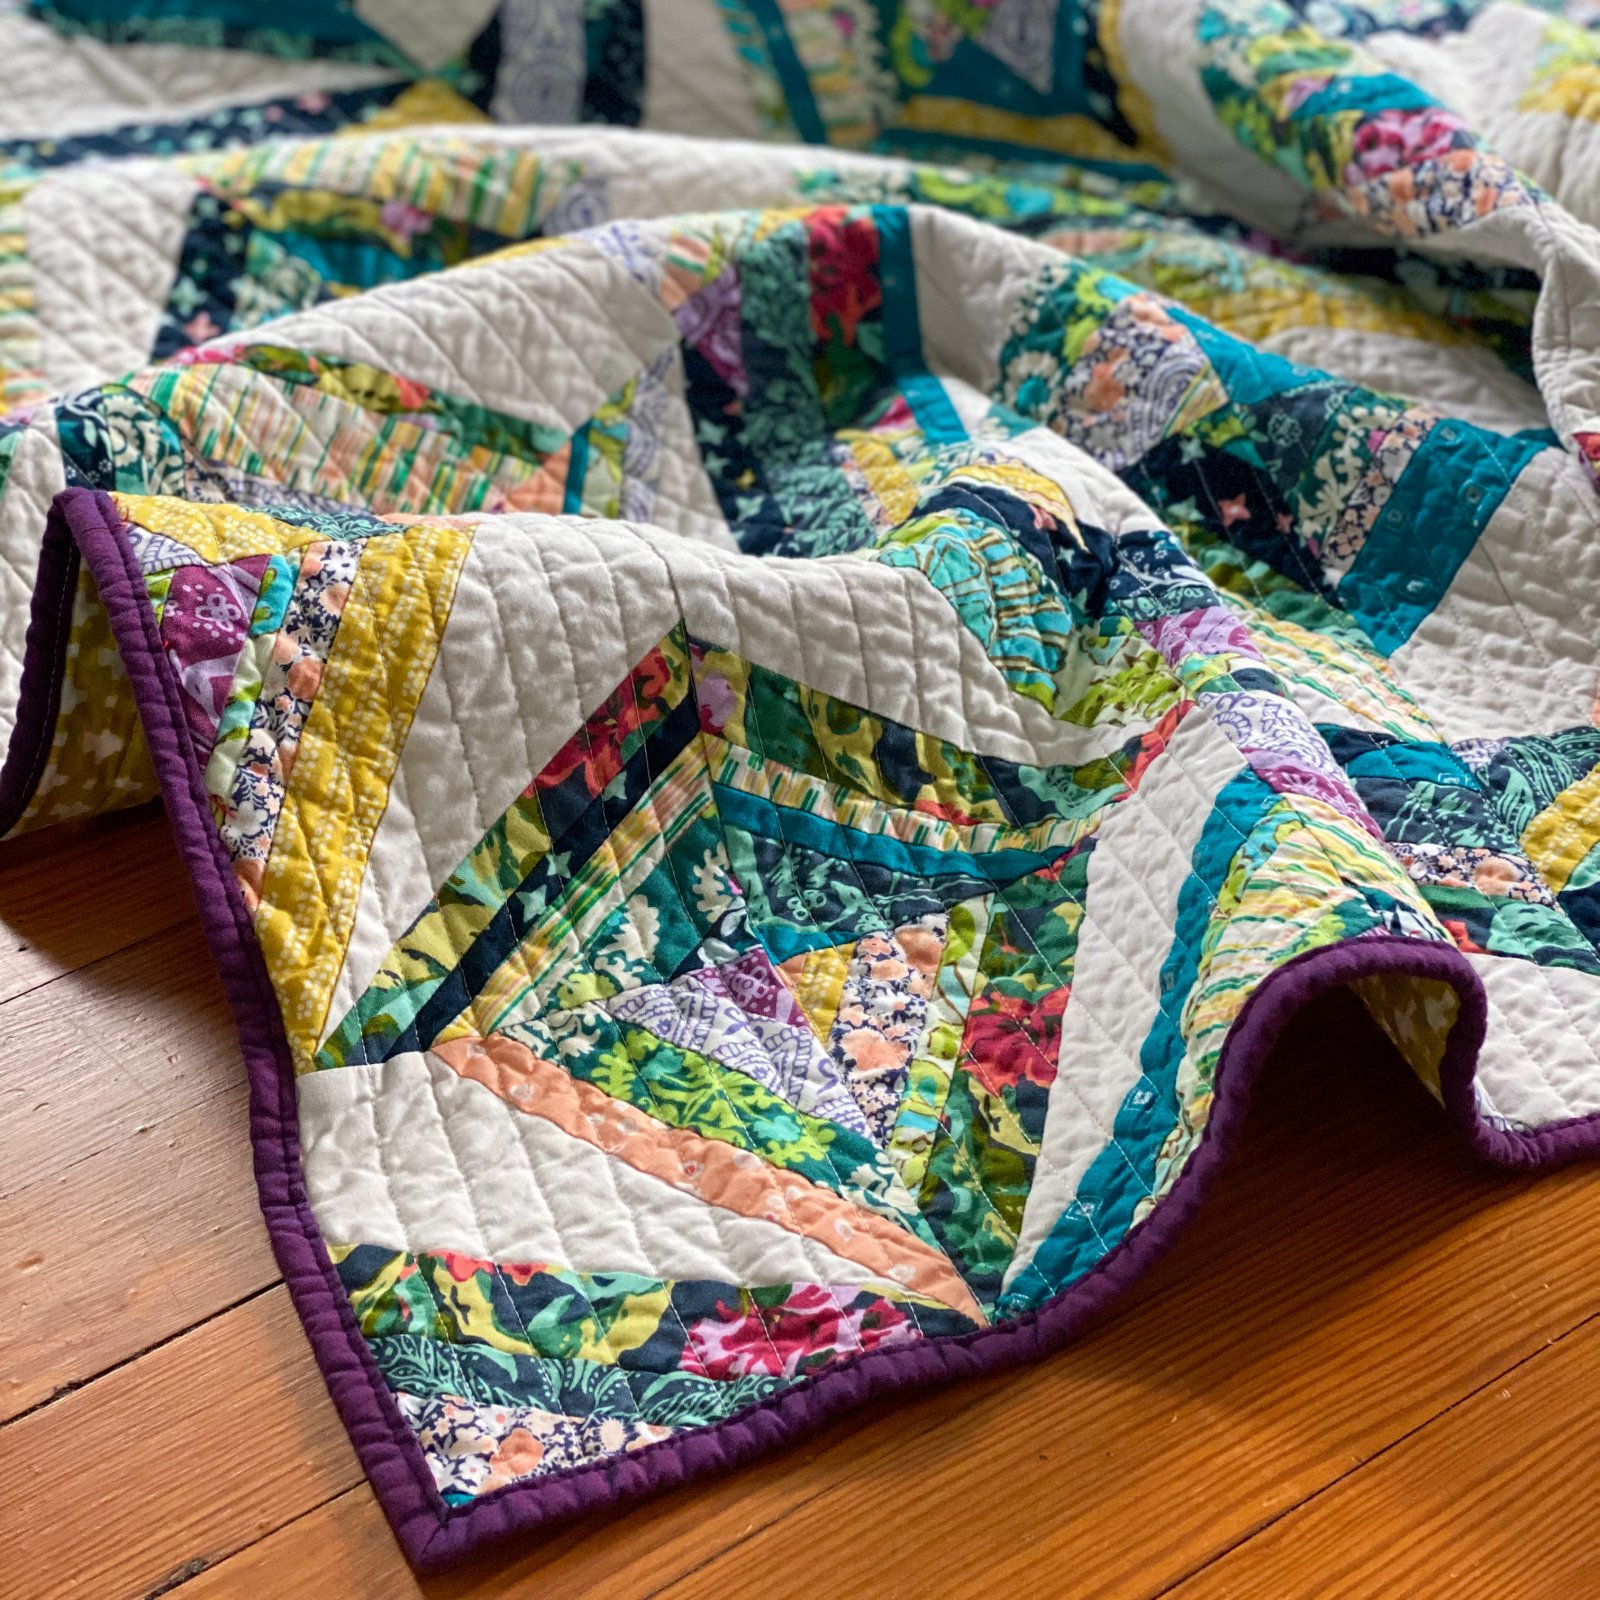
Quilting the Quilt
After piecing the quilt top together, it’s time to quilt the quilt. Quilting involves layering a quilt sandwich with batting and a backing and stitching the layers together. It not only secures the quilt, but adds texture and dimension too.
Start by pressing the quilt top and the backing fabric. Make sure all seams are pressed flat. Layer the quilt top and batting together and baste the layers together with safety pins. Layer the backing fabric on the bottom and baste it to the batting.
Select a quilting pattern that complements the quilt top. Start quilting from the center of the quilt and move outward. Use a walking foot to avoid puckering or shifting. Use a layer of tissue paper between the presser foot and the quilt to help the quilt feed evenly.
After quilting, trim the backing fabric to the same size as the quilt top. Finish the edges of the quilt with a binding. The binding should overlap the backing fabric by ¼”. Sew the binding to the quilt by hand or machine.
Finally, steam press the quilt to remove any puckers or wrinkles. Now your quilt is finished and ready to be enjoyed.
Binding the Quilt
- Choose the binding fabric. The binding fabric should be the same or similar to the quilt top. If the quilt top has multiple colors, then choose a binding fabric that complements the colors in the quilt top.
- Cut the binding fabric. Cut four 2.5-inch strips from the binding fabric.
- Sew the binding strips together. Place two strips together (right sides facing each other) and sew along the long edges. Press the seam open. Repeat for the other two strips. Once all the strips have been joined, press the whole binding strip.
- Attach the binding strip to the quilt. Match the raw edges of the binding strip to the raw edges of the quilt and pin in place. Sew the binding strip in place using a ¼-inch seam allowance.
- Fold the binding over the quilt. Trim any excess fabric from the binding strip. Fold the binding over the quilt and press. Sew the binding to the back of the quilt using an even seam allowance.
- Sew the binding ends together. Trim the binding ends to make sure they meet together at a right angle (90 degrees). Pin the ends together and sew in place. Press the seam and then press the binding.
When piecing a quilt, binding the quilt is the last step. Binding the quilt adds a finished look and also helps protect the quilt from fraying. Follow the steps above to learn how to bind a quilt top together and complete your quilt.
Frequently Asked Questions
What Size Quilts are Easiest to Piece?
Small quilts, like crib or lap sizes, are the easiest to piece. They require fewer pieces, so they’re quicker and easier to sew together. Additionally, they usually require fewer tools and supplies, making them more affordable and simpler to assemble.
What Type of Thread Should I Use to Piece the Quilt?
- Cotton Thread – Cotton thread is the most common choice for piecing quilts. It is strong and durable, and comes in a variety of colors and weights. Choose a color that is similar to the fabric used for the quilt top.
- Polyester Thread – Polyester thread is another popular choice for quilting. It is strong and does not break easily. It is also more resistant to fading due to exposure to sunlight.
- Invisible Thread – For intricate quilting designs, invisible thread is often used. This type of thread is nearly invisible when sewn, creating a neat, professional look.
- Metallic Thread – Metallic thread can be used to add a bit of sparkle or shine to a quilt. It is also stronger than other types of thread, making it a good choice for quilting designs that require extra strength.
Is it necessary to use a quilting frame when piecing a quilt?
No. Piecing a quilt does not necessarily require the use of a quilting frame. It is, however, beneficial to use one in order to ensure accuracy and evenness in the quilt’s pattern.
- Using a quilting frame will help keep the quilt’s top layer taut and wrinkle-free, and will make it easier to accurately align the quilt’s pieces.
- The frame will also help you keep your seam allowances consistent, so that all of the pieces fit together perfectly.
- Using a quilting frame will also make it easier to do a “quilt as you go” project, where the quilting is done while the quilt is being pieced.
Ultimately, whether or not to use a quilting frame when piecing a quilt is up to the individual quilter. If you choose not to use one, you may just have to take extra care to ensure that your quilt pieces are properly aligned and that your seam allowances are consistent.
How do I choose fabric for my quilt?
When selecting fabric for your quilt, consider the overall design and colour scheme. Think about the size of the quilt and the type of fabric that will work best for that size. Consider the type of pattern and how it will look when pieced together. Look for fabric that is colourfast and durable. Choose fabrics that are pre-washed, as this will help to prevent shrinkage and colour fading. Consider the right weight of fabric for the quilt – heavier fabrics are better for quilts that will be used and washed frequently.
What Types of Quilting Patterns Can I Use?
Quilting patterns vary from basic to complex, with options for all skill levels. Popular patterns include traditional patchwork, curves and circles, log cabin, stars, paper piecing, and applique. You can also use a combination of techniques to create unique designs. Popular stitching techniques include straight line quilting, free motion quilting, and quilting with a walking foot. To learn more about quilting techniques, take a look at quilting tutorials online.
Conclusion
Piecing a quilt is an enjoyable and creative activity that can be done by sewers of all skill levels. With the right supplies and instructions, you can create a beautiful quilt that you and your family can enjoy for years to come.


