Are you looking for a professional-level finishing touch for your quilt? If so, then learning how to make bias binding for a quilt is the perfect way to add a special touch to your project. Bias binding provides a great way to frame and frame your quilt, and it provides a creative way to add color and texture to the design. In this article, you’ll learn all the tips and tricks needed to make bias binding for a quilt with a professional-level finish.
What You’ll Need
| Materials | Quantity |
|---|---|
| Fabric | 1/4 yard |
| Ruler | 1 |
| Seam ripper | 1 |
| Scissors | 1 |
| Pins | Several |
| Sewing machine | 1 |
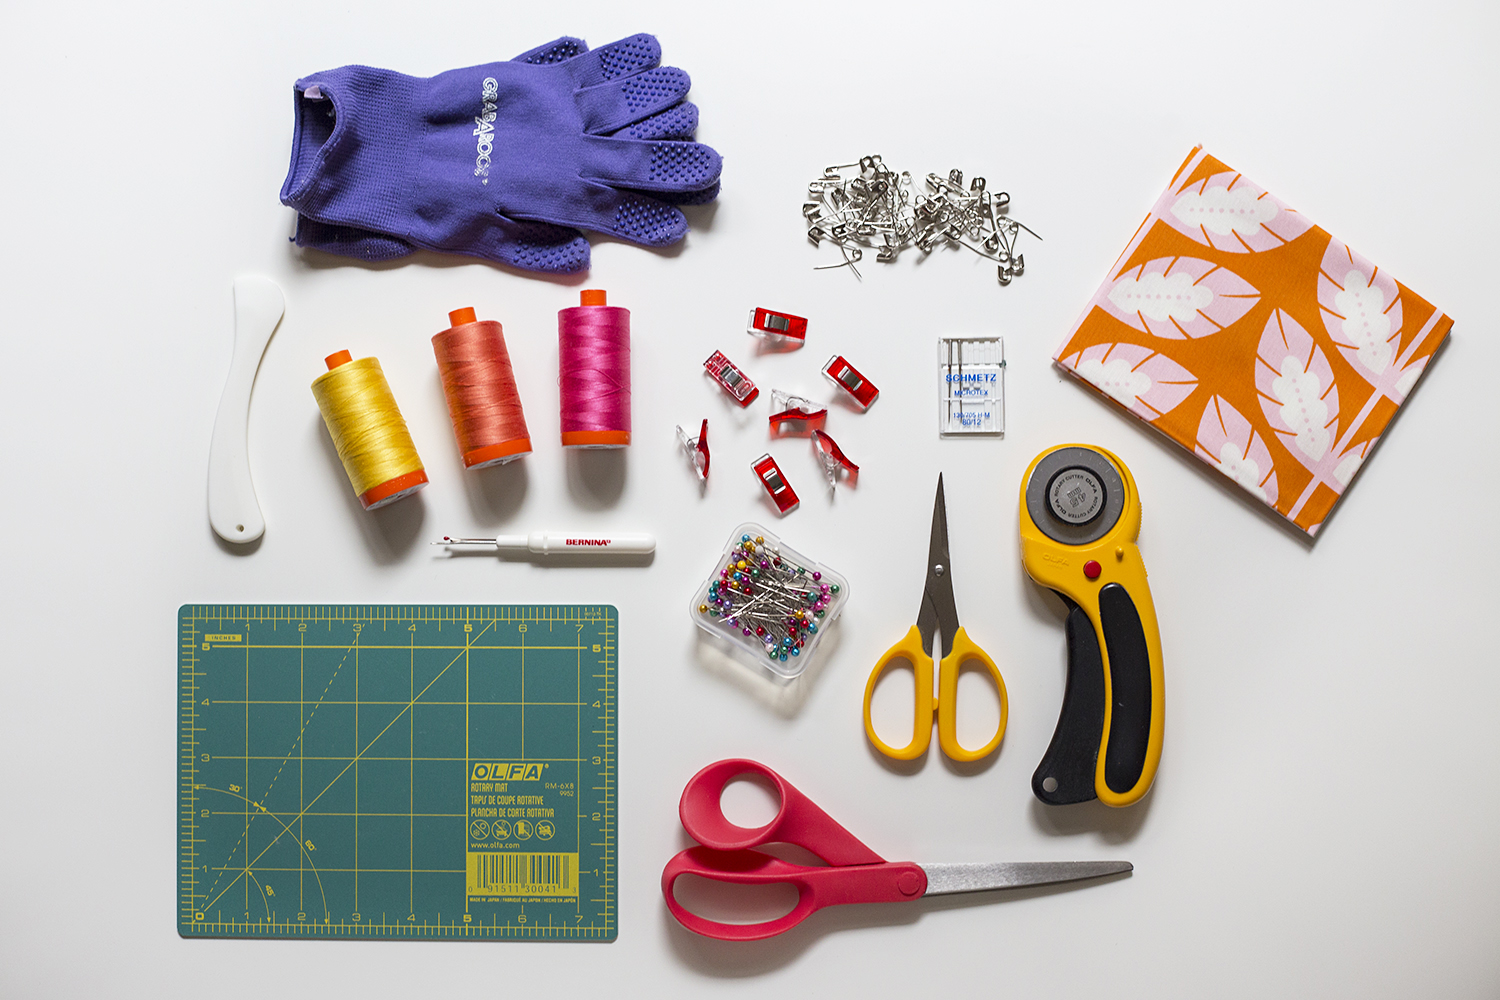
Cutting bias quilt binding is a great way to add a decorative touch to quilts. To get started, you will need fabric, a ruler, a seam ripper, scissors, pins, and a sewing machine. The amount of fabric needed will vary depending on the size of the quilt, but 1/4 yard should be enough for most projects.
How to Cut Bias Quilt Binding
Cutting bias binding is the final step in the process of how to make bias tape for a quilt. Bias binding can be cut from fabric strips or purchased already made.
From Fabric Strips
| Step | Instructions |
|---|---|
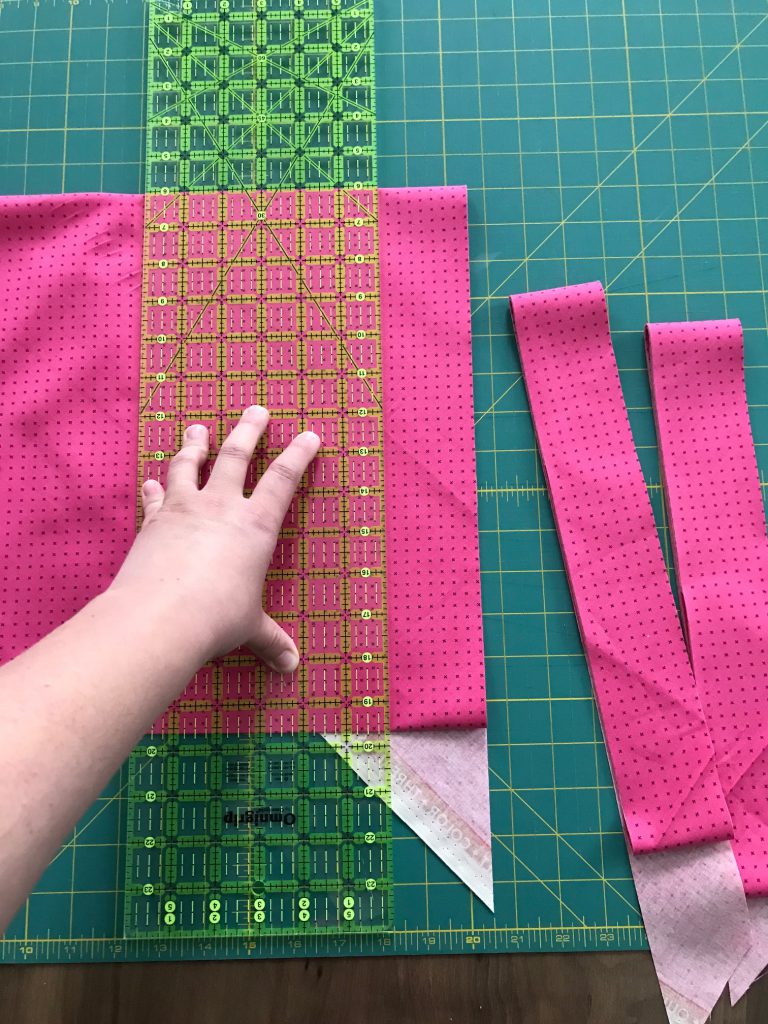
| 1 | Cut strips of fabric 2¼” wide, using the 45-degree angle on the cutting mat. |
| 2 | Lay the strips on top of each other so that the edges are at a 45-degree angle. |
| 3 | Cut the strips into 2¼”-wide lengths. |
| 4 | Repeat until you have the desired amount of bias binding. |
Pre-Made Bias Binding
| Step | Instructions |
|---|---|
| 1 | Measure the size of the quilt and subtract 2”. |
| 2 | Cut the bias binding to the desired length. |
| 3 | Fold the binding in half lengthwise and press. |
| 4 | Unfold the binding and press it in half again. |
Cutting bias binding is the last step to complete how to make bias tape for a quilt. With the right tools and some practice, you can easily cut bias binding to the desired length and width.
How to Make Bias Tape for a Quilt
Bias tape is used to bind a quilt together, as well as provide a neat, finished look. Making your own bias tape is relatively easy, and can save you money in the long run. Here are the steps you need to take to make your own bias tape for a quilt.
Step 1: Cut the fabric into strips. The strips should be 2-3 inches wide and cut on the bias (at a 45-degree angle in relation to the grain of the fabric).
Step 2: With the right sides of the fabric together, sew the strips together end-to-end. Make sure to sew with a ¼ inch seam allowance.
Step 3: Take the fabric strip and fold it in half lengthwise, with the wrong sides together.
Step 4: Iron the folded bias tape flat.
Step 5: Open the folded bias tape and press each side in towards the center fold.
Step 6: Fold the bias tape in half again, with the edges meeting in the center.
Step 7: Iron the bias tape flat, and you’re done!
Your bias tape can be used to bind a quilt in the same way as you would with pre-made bias tape. To learn how to bind a mini quilt with premade seam binding check out our other article.
How to Bind a Mini Quilt with Premade Seam Binding
Materials Needed:
- Mini quilt
- Premade seam binding
- Sewing machine
- Thread
- Iron
Instructions:
- Iron the seam binding so that it’s flat and the edges are crisp.
- Lay the seam binding along one side of the quilt wrong side up, making sure the binding overlaps the edge of the quilt by roughly 1/4-inch.
- Set the stitch length to 2.5 and stitch along the edge of the seam binding, using a 1/4-inch seam allowance.
- Fold the seam binding over to the wrong side of the quilt and press with an iron.
- Fold the excess seam binding over the back of the quilt and press again.
- Stitch in the ditch (the crease of the seam binding) using a matching thread color.
- Repeat steps 1-6 for each side of the quilt.
- To finish the binding, lay the binding along the edge of the quilt, overlapping the ends by 1/4-inch.
- Stitch the binding in place and press with an iron.
- Fold the binding over to the wrong side of the quilt and press with an iron.
- Stitch in the ditch to complete the binding.
Making bias binding for a quilt can be time consuming. An easier option is to use pre-made seam binding. This method is perfect for small quilts, such as mini quilts. With the right materials, you can easily bind a mini quilt with pre-made seam binding in no time. Follow the above steps to learn how to sew on pre folded bias tape quilt edging and complete your project.
How to Sew on Pre Folded Bias Tape Quilt Edging
Once you have created the bias binding for your quilt, it is time to attach it to the edges of the quilt. Using pre-folded bias tape is the easiest way to give your quilt a professional, neat finish. Here are the steps to follow:
- Lay your quilt on a flat surface and measure the length of each edge of the quilt.
- Cut the bias binding to the right length, allowing extra for the corners. Make sure that the binding is long enough to cover all the edges of your quilt.
- Press the binding in half lengthwise with the wrong sides together and crease the fold.
- Open up the bias binding and place it on the wrong side of the quilt, with raw edges together and the folded edge of the binding facing to the top edge of the quilt.
- Pin the binding to the quilt, making sure that the binding is centred on the edge.
- Using a sewing machine, stitch the binding to the quilt, starting at one end and stitching to the other end. To ensure an even stitch, you can use a sewing foot guide.
- Once you reach the corner, stop sewing and lift the needle. Turn the quilt and the binding up and to the right, so that the binding is now perpendicular to the quilt edge.
- Fold the binding back on itself, so that the folded edge meets the raw edge. Pin in place.
- Continue sewing the binding to the quilt, taking care to keep the folded edge of the binding on the top edge of the quilt.
- Continue around the other edges of the quilt, repeating steps 7-9. Once you reach the end, overlap the binding and trim the excess binding.
- Turn the binding to the front side of the quilt and pin in place.
- Using a hand-sewing needle and thread, blind stitch the binding to the quilt. Make sure that the stitches are tiny and secure.
- Your quilt bias binding is now complete and your quilt is ready to be enjoyed.
What to Do With Quilt Bias Binding
Once you have made your bias binding for your quilt, it is time to attach it to the quilt. The process of attaching bias binding to a quilt is relatively simple and straight-forward.
Step 1: Begin by pinning the bias binding on one side of the quilt. Make sure that the bias binding is aligned properly with the edges of the quilt and that the raw edges of the binding are facing outwards.
Step 2: Stitch the bias binding onto the quilt using a sewing machine. Start by stitching near the edge of the quilt and work your way around. Make sure to keep the binding even and straight as you stitch.
Step 3: For the corners, fold the bias binding in a triangle and then stitch it down. This will create a clean, finished look for your quilt.
Step 4: When you reach the end of the bias binding, fold the end inwards and stitch it down. This will create a neat and tidy finish.
Step 5: Once you have finished stitching the bias binding onto the quilt, press the binding flat with an iron. This will give your quilt a nice, crisp finish.
By following these steps, you will be able to easily attach bias binding to your quilt. This will give your quilt a professional and polished look that you will be proud of.
Tips and Tricks for Working with Bias Binding
- Choose the Right Fabric: When making bias binding for a quilt, it’s important to choose the right fabric. A fabric with a soft drape will create a more flexible binding that can easily be shaped around curves.
- Cutting the Strips: Cut the strips on the bias so they have a bit of stretch to them. To make sure the strips are the same width, use a quilting ruler and rotary cutter.
- Pinning the Strips Together: Pin the strips together at a 45-degree angle. This will keep the strips in place while they are being sewn together.
- Using a Bias Tape Maker: Using a bias tape maker can help speed up the process of making bias binding. This tool creates a continuous strip of binding, which can then be used to bind the edges of the quilt.
- Pressing the Binding: After the binding is sewn, it’s important to press it. This will help the binding lay flat and create a neat finish.
Frequently Asked Questions
What Type of Fabric is Best for Making Bias Binding?
Cotton is the best fabric for making bias binding because it is strong, lightweight, and has good flexibility. Polyester and rayon are also suitable for bias binding as they both provide a smooth finish and good drape. Silk is not recommended for bias binding as it is weak and prone to fraying. When selecting a fabric for bias binding, it is important to choose one that is lightweight, has good flexibility and a smooth finish.
What tools are required to make bias binding for a quilt?
- Fabric: Enough fabric to make bias binding strips.
- Ruler: A clear ruler with a 45-degree angle line.
- Rotary Cutter: A rotary cutter with a new blade.
- Cutting Mat: A non-slip, self-healing cutting mat.
- Iron and Ironing Board: An iron and ironing board for pressing.
- Sewing Machine: A sewing machine for stitching the binding.
- Thread: Thread to match the fabric.
How Much Fabric is Needed to Make Bias Binding for a Quilt?
To determine how much fabric is needed for bias binding for a quilt, measure the perimeter of the quilt, then add about 10-15% for seam allowance and for extra binding for corners and curves. For a standard size quilt, at least 2 yards of fabric is usually needed. If the quilt is particularly large, you may need more fabric. For example, a king size quilt would need at least 3.5 yards of fabric. Additionally, if the quilt has a lot of curves or corners, you may need additional fabric.
What is the Best Way to Join Bias Binding Pieces?
The best way to join bias binding pieces together is by using a diagonal seam. This technique involves overlapping the two pieces of binding at a 45-degree angle and then stitching them together. A diagonal seam ensures that the binding will lay flat and won’t cause any gaps or puckers in the quilt. Before stitching, use pins or clips to hold the two pieces of binding in place. Once the seam is sewn, press it flat for a finished look.
How can I ensure the bias binding is secured to the quilt?
Secure the binding to the quilt by stitching it in place with a sewing machine. Use a ¼ inch seam allowance when stitching the binding. After stitching the binding, press it towards the back of the quilt and then hand stitch it in place. Make sure to use a thread that matches the binding fabric so that the stitches do not show.
Conclusion
Bias binding is a great way to add a professional-level finishing touch to any quilt. With the right tools and fabrics, it’s easy to make your own bias binding, allowing you to customize the look of your quilt. Whether you’re making a small quilt or a large one, binding is an essential step to making your quilt look finished. With practice and patience, bias binding will become an essential part of your quilt-making repertoire.
References
- Types of Bias Binding (craftsy.com)
- How to Make Bias Binding for Quilts (quiltingdaily.com)
- Binding Quilts (extension.iastate.edu)


