
Are you interested in learning how to make a yoyo quilt? If so, you’re in luck! This article will provide an easy, step-by-step guide on how to make a yoyo quilt. With simple instructions, you’ll be able to create a beautiful quilt that will be a cherished heirloom for years to come. Read on to learn the secrets of how to make a yoyo quilt!
What is a Yo Yo Quilt?

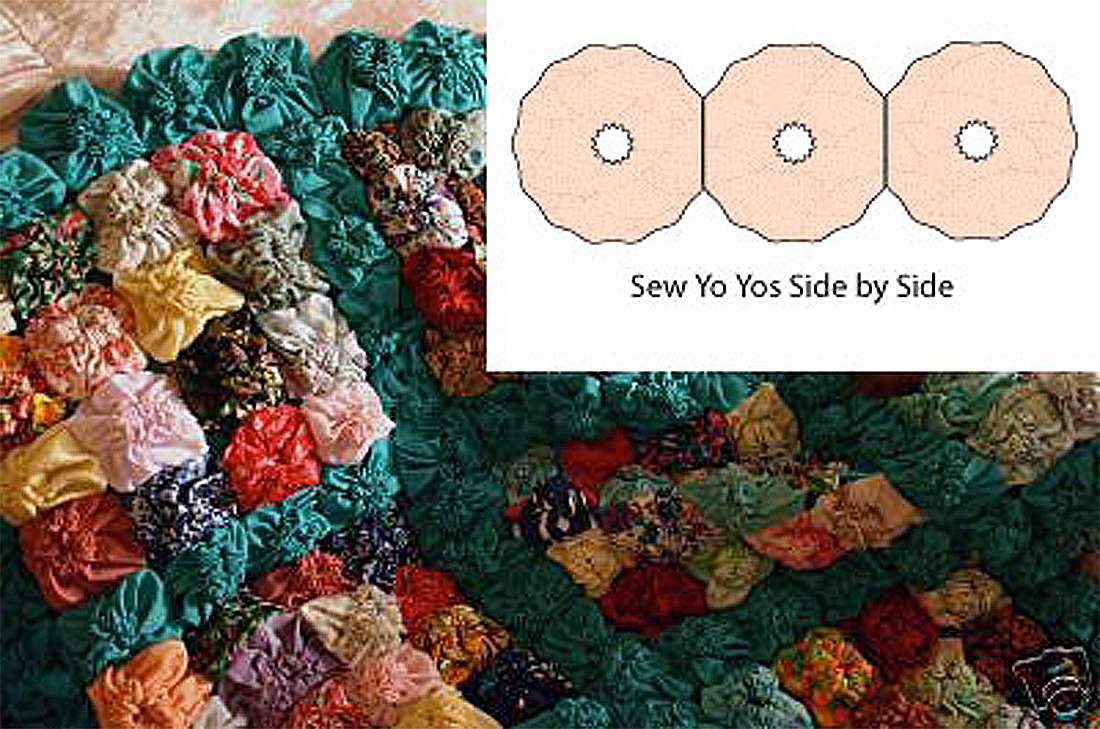
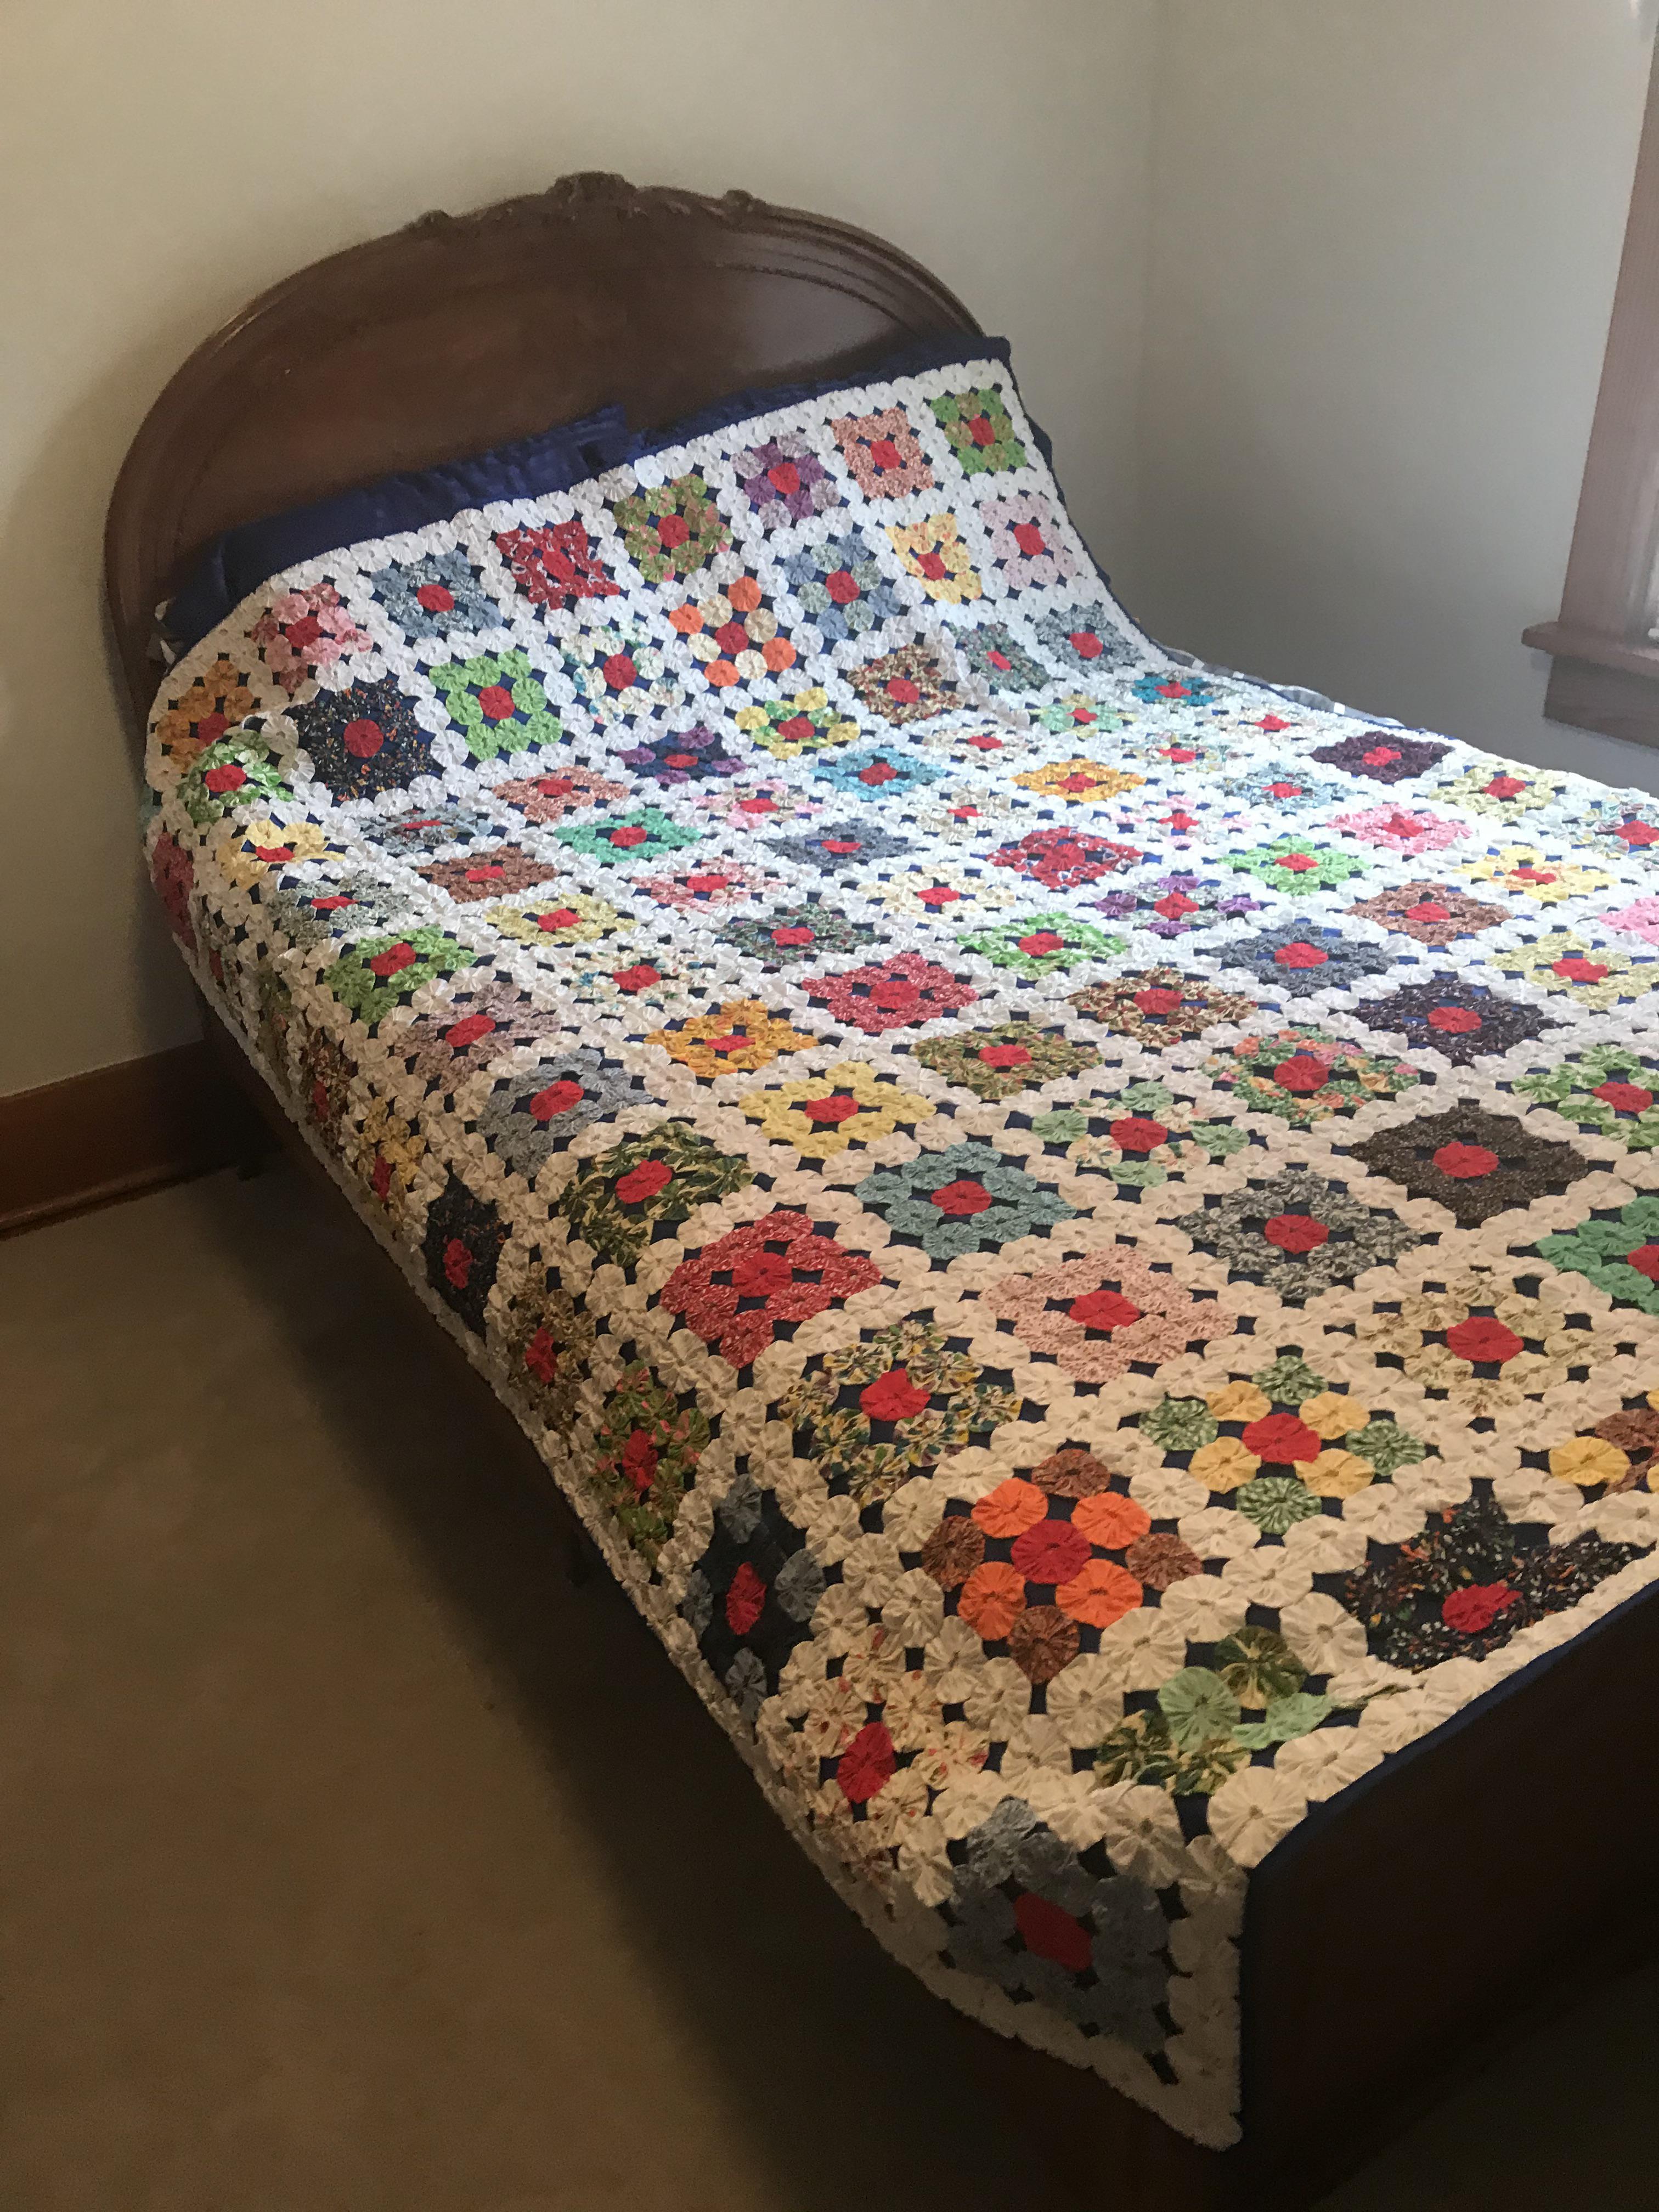
A Yo Yo Quilt is a type of quilt made up of fabric circles (or yo yos) joined together to create a unique and colorful pattern. The fabric circles are created by gathering fabric around a circle template, and then securely stitching them together. Once the yo yos are all sewn together, they are then joined together by hand or machine to create a quilt top. The quilt is then completed by backing the top with batting and fabric and quilting it together.
When making a Yo Yo Quilt, it is important to use a high quality batting and a strong thread to ensure that the quilt holds its shape and is durable. It is also important to use the correct size template when gathering the fabric circles, as this will affect the overall appearance of the quilt. Once the quilt is finished, you can use an adhesive backing to secure the quilt and make it easier to hang or place on a bed or sofa.
To make a Yo Yo Quilt, you will need templates for gathering the fabric circles, fabric of your choice, thread, batting, adhesive backing, and a sewing machine. Start by gathering the fabric circles using the templates. Once all the circles are gathered, join them together by hand or machine and then back the quilt top with batting and fabric. Finally, quilt the top together and add an adhesive backing to the back of the quilt to make it easier to hang or place on a bed or sofa. With the right materials and a bit of patience, you’ll be able to create a beautiful Yo Yo Quilt.
What Supplies are Needed to Make a Yo Yo Quilt?
- Fabric: Enough fabric for your quilt top and backing, plus extra fabric for the yo yos. If you are using a single fabric, you will need one yard plus extra.
- Thread: Thread to match the fabric you are using.
- Template: A yo yo template or circle cutter.
- Batting: Enough batting for your quilt top.
- Needles: Hand-sewing needles.
- Pins: Pins to hold the yo yos in place while sewing.
In order to connect the yo yos, you will also need a quilting needle and thread to hand-stitch the yo yos together.
What Size Circles Should be Used for a Yo Yo Quilt?
When making a yo yo quilt, it is important to consider the size of the circles. Yo yo quilts typically have small circles to give a more delicate and intricate look. Here are some tips on what size circles to use for your quilt:
- Smaller Circles: Smaller circles will give your quilt a more intricate and delicate look. Generally, a 2-3 inch circle is used for quilting projects. This size is perfect for a small quilt.
- Larger Circles: If you want your quilt to have a more bold look, you can use larger circles. A 4-6 inch circle is perfect for a larger quilt. This will also make it easier to stitch the circles together.
No matter what size circles you choose, yo yo quilts are a wonderful way to add a unique and interesting look to your quilting projects. With a bit of practice and patience, you can easily create a beautiful quilt with yoyos.
For more information on quilting how to make a small quilt with yoyos, check out our other articles and tutorials.
How to Back a Yo Yo Quilt?
Once you’ve finished making your yo yo quilt, it needs to be backed. Depending on what size circles you used for your yo yo quilt, you will choose different sizes for backing fabric.
| Yo Yo Quilt Size | Back Fabric Size |
|---|---|
| 2 inch (5 cm) yo yo circles | 3 yards (2.7 meters) |
| 3 inch (7.5 cm) yo yo circles | 4 yards (3.6 meters) |
| 4 inch (10 cm) yo yo circles | 5 yards (4.5 meters) |
Cutting the Back Fabric: Before cutting the back fabric, you should prewash and press it. Then, cut the fabric into two equal pieces, one for the top of the quilt and one for the bottom.
Attaching the Back Fabric: Place the quilt top face up on a flat surface. Place the bottom piece of back fabric face down on the quilt top. Pin the two pieces together. Sew the two pieces together using a 1/2 inch (1 cm) seam allowance.
Adding the Binding: Cut the remaining back fabric into 2.5 inch (6 cm) strips. Sew the strips together, end to end, to make one long piece. Fold the binding strip in half lengthwise and press it. Sew the binding strip to the quilt’s edge, using a 1/4 inch (6 mm) seam allowance.
Quilting: Place the quilt top over batting and backing fabric. Pin the layers together, and then quilt the layers together.
Finishing: Trim the batting and backing fabric to the same size as the quilt top. Fold the binding to the back of the quilt and hand stitch the binding to the back of the quilt.
How to Connect Quilt Yo Yos?
The easiest and most straightforward way to connect quilt Yo Yos is by using a needle and thread. To do this, lay the two pieces of fabric with the wrong sides facing each other and align the edges. Thread a needle with a length of thread and secure it with a knot at one end. Begin sewing the Yo Yos together at the center and work your way outwards. When you reach the end, secure the thread with a knot and trim off any excess thread.
An alternative way to join Yo Yos is to use a sewing machine. To do this, place the two pieces of fabric right sides facing each other and align the edges. Sew the pieces together using a straight stitch and a small stitch length. This method is quicker than hand-sewing but requires a bit more expertise.
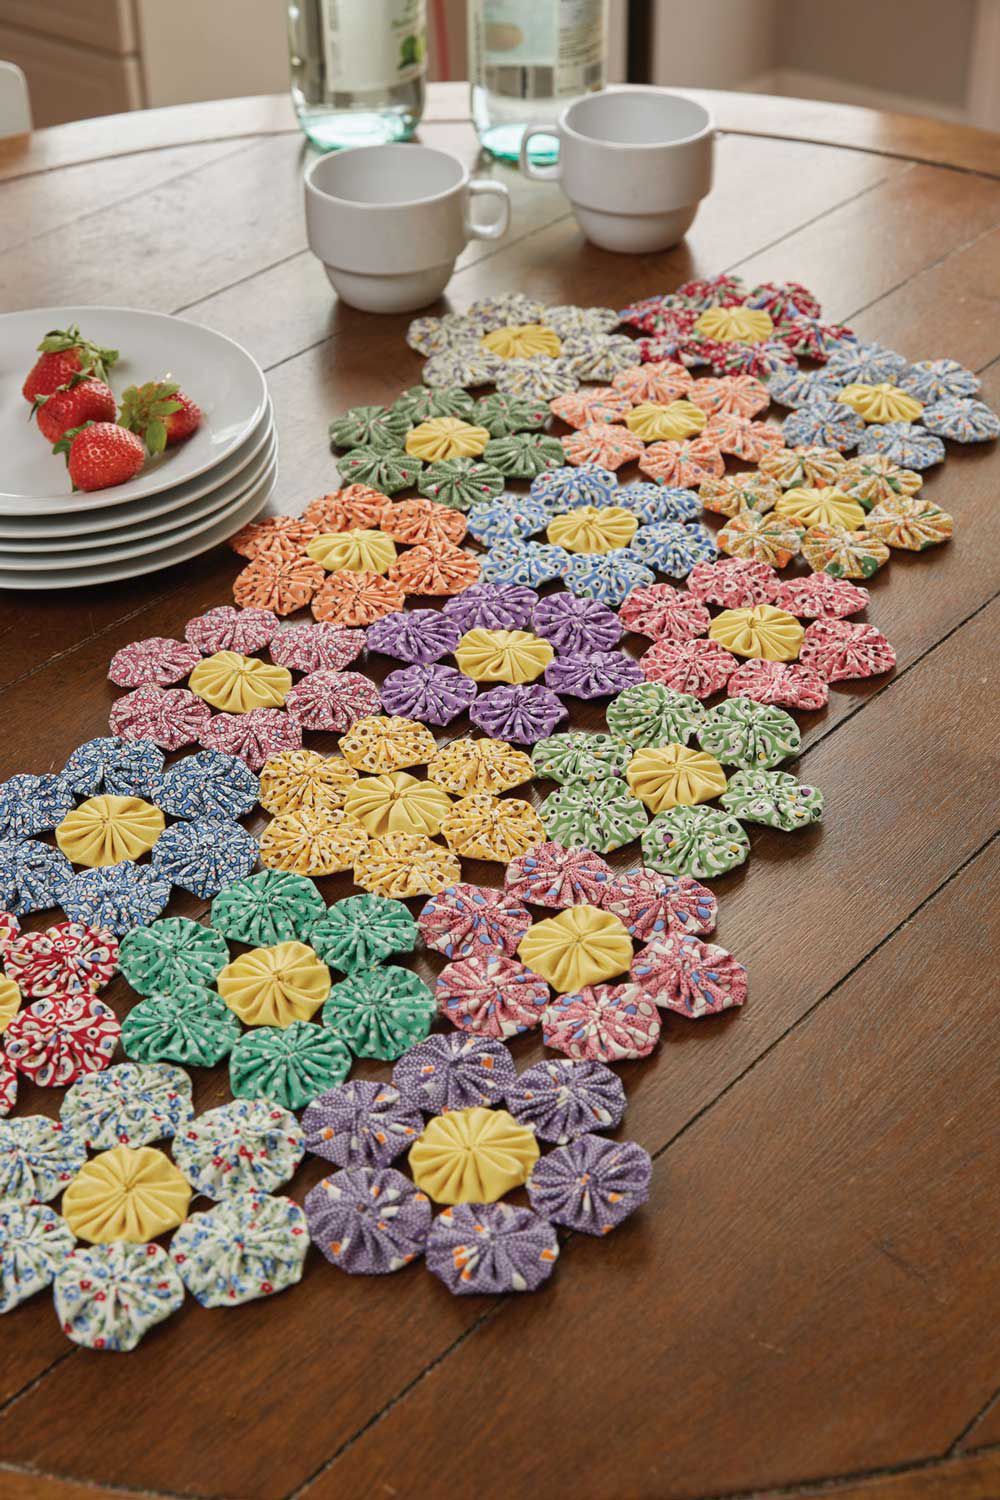
You can also make a Yo Yo quilt flower by connecting multiple Yo Yos together. To do this, use one of the methods above to join each Yo Yo, then use the same method to connect the Yo Yos to each other. Once all the Yo Yos are connected, you can embellish the quilt flower with an embroidery design or other decorations.
How to Make a Small Quilt with Yo Yos?
Making a small quilt with yo yos is a fun and creative way to make a quilt that can be used as a wall hanging, lap quilt, or bedspread. To make a yo yo quilt, you will need some fabric scraps, a sewing machine, and a few other supplies. Here is a step-by-step guide to making a small quilt with yo yos:
Step 1: Gather Supplies
| Supply | Quantity |
|---|---|
| Fabric scraps | 1/3 yard |
| Sewing machine | 1 |
| Thread | 1 spool |
| Scissors | 1 pair |
| Pins | 1 package |
| Ruler | 1 |
| Chalk | 1 stick |
Step 2: Cut Fabric Scraps
Cut the fabric scraps into small circles, using the ruler and chalk to measure the size of the circles. The size of the circles should be approximately the size of your fist.
Step 3: Sew Yo Yos
Sew the circles together to form yo yos. Use a straight stitch and sew around the edge of the circles, leaving a small opening at the top.
Step 4: Assemble Pieces
Arrange the yo yos in a pattern on a flat surface. Pin the yo yos in place and sew them together to form a quilt top.
Step 5: Quilt
Lay the quilt top on a flat surface and layer with batting and backing. Pin the layers together and quilt in a pattern of your choice.
Step 6: Finish the Quilt
Trim the edges of the quilt and sew a binding around the edges. You now have a small quilt with yo yos!
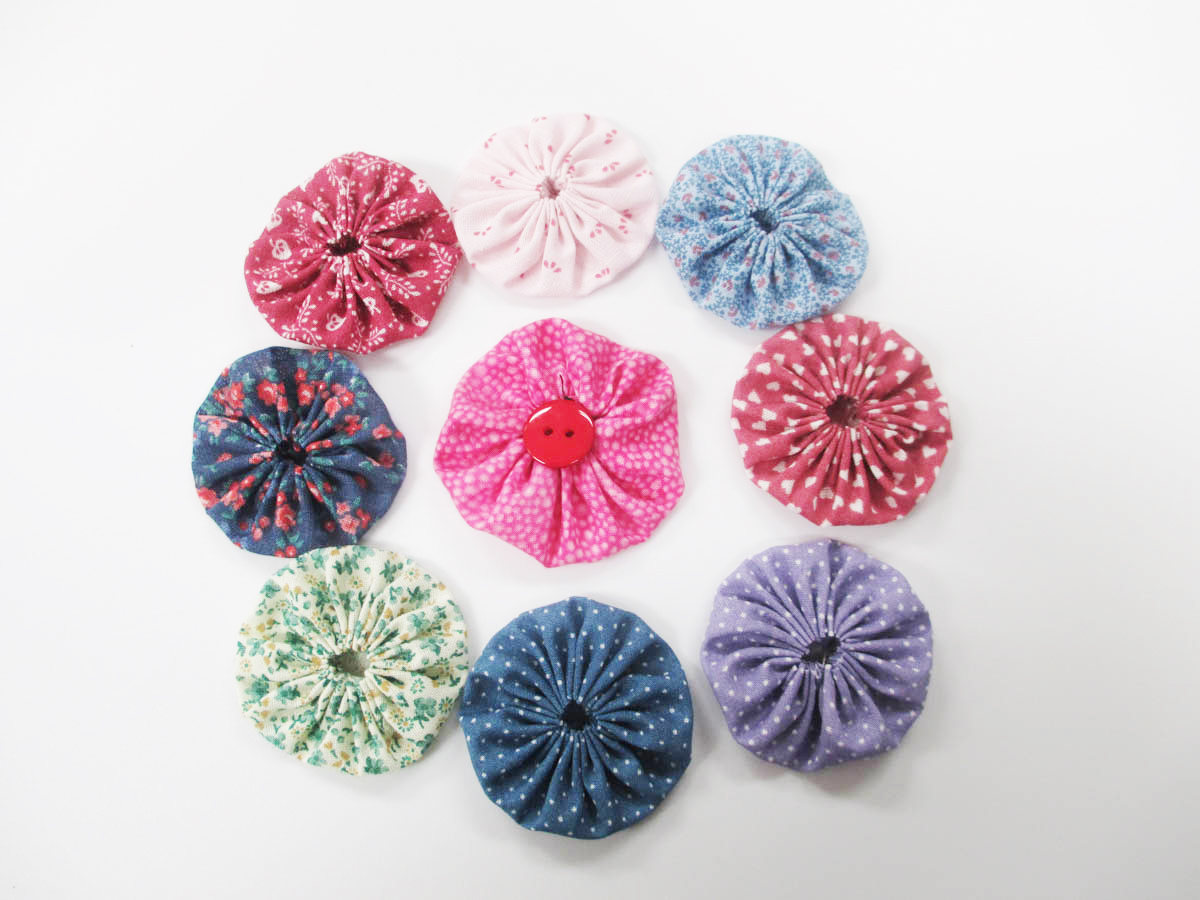
How to Make Yo Yo Quilt Flowers?
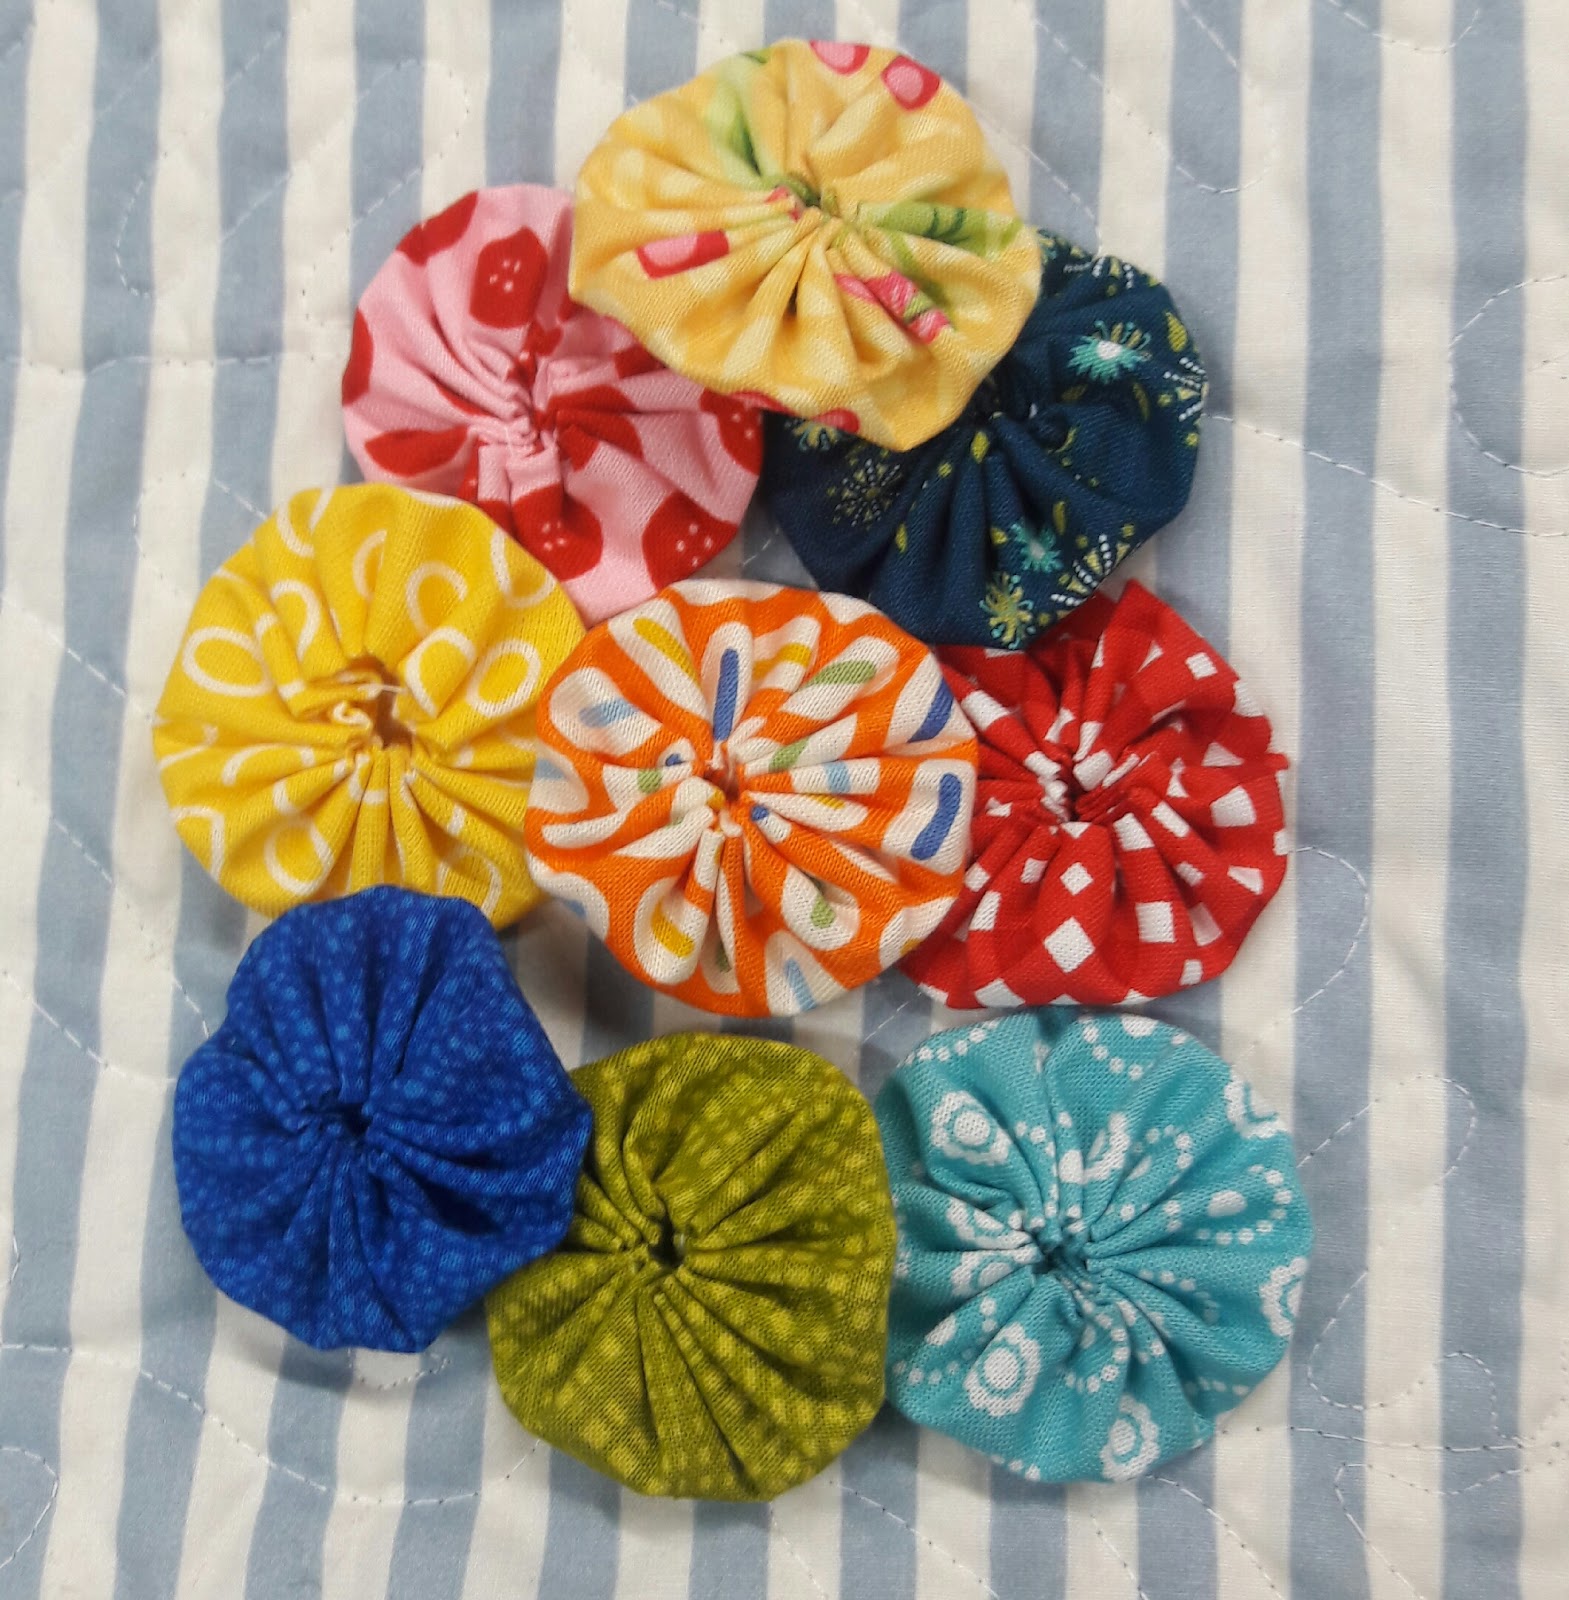
Yo yo quilt flowers are a beautiful way to add a touch of whimsy to any quilt. You can make them from scraps of fabric, or use the same fabric throughout for a unified look. Here are the steps to make your own yo yo quilt flowers:
- Cut Fabric Into Circles – Cut your fabric into circles with a diameter of approximately 2 inches. For a large yo yo flower, you can use circles with a diameter of up to 4 inches.
- Gather the Circle – Prepare a double strand of thread, and tie a knot at the end. Place the circle of fabric on top of the knot, and begin to gather the thread around the middle of the circle. Once it is gathered, tie a knot at the end of the thread to secure it.
- Secure the Yo Yo – Pass the needle through the centre of the yo yo to secure it. Once the yo yo is secure, tie a knot at the end of the thread, and cut off the excess thread.
- Make More Yo Yo’s – Make more yo yo’s in the same way, using different fabrics for a varied look.
- Assemble The Flower – Arrange the yo yo’s into the shape of a flower, and then sew the yo yo’s together.
- Attach the Flower to The Quilt – Use thread and a needle to attach the flower to the quilt.
With these easy steps, you can make your own yo yo quilt flowers and add a unique, decorative touch to your quilt. If you want to make larger gathered circles, the same process applies, but the diameter of the circles should be larger.
How to Assemble Pieces of a Yo Yo Quilt?

Once you have all of your yo yo quilt pieces complete, it’s time to assemble them into a quilt top. To start, lay out the yo yos in the pattern of your choice. Try to arrange the yoyos in a way that minimizes the number of seams you’ll have to sew.
Once you have the pieces laid out, you will need to connect the quilt yo yos. Do this by sewing a yarn or thread through the shank of the yo yos. If you are working on a small quilt, use a single strand of thread. If you are working on a larger quilt, use a double strand for added strength. For a decorative look, use a colorful thread that contrasts with the fabric of the circles.
Sewing the yo yos together is a process of connecting them in rows or columns. Start by connecting the yo yos in the first row or column. Then move to the next row or column and attach the yo yos to the ones in the previous row or column. Continue in this way until the yo yos are connected in all directions.
When quilting, you can use either a regular sewing machine or a specific quilting machine. If you are using a regular machine, use a zigzag stitch to connect the yoyos. If you are using a quilting machine, use a straight stitch.
When you’re assembling a yo yo quilt, it’s important to consider the size of the circles you are using. For a small quilt, use a small circle template and make the circles about 1.5 inches in diameter. For a larger quilt, use a larger circle template and make the circles about 4 inches in diameter.
To give your yo yo quilt a unique look, consider creating a yo yo quilt flower. To do this, sew a group of circles together in the center and then attach the petals to the center. You can also add a decorative button in the center of the flower for a finishing touch.
Once all of the pieces are assembled, you can back a yo yo quilt and bind the edges. To back the quilt, lay the quilt top on a piece of batting and cut it to the same size. Then lay the batting on the back side of the quilt top and pin it in place. Finally, sew the batting to the quilt top.
Once the quilt is backed, you can bind the edges by folding the fabric over the batting and stitching it in place. To finish, hand stitch the binding to the back of the quilt.
Assembling the pieces of a yo yo quilt can be a fun and creative process. With the right fabric and a few simple steps, you can create a beautiful quilt that will last for years to come.
How to Make Quilt Gathered Circles?
- Choose Fabric: Select lightweight cotton fabrics for your quilt gathered circles. Look for small prints and light colors to make your quilt look more delicate.
- Cut Circles: Using a template or quilting ruler, cut out circles from the fabric. Make sure that the circles are all the same size.
- Fold the Circles: For each circle, fold it in half and then in half again. Iron the fabric and make sure that the edges are even.
- Gather the Circles: Using a needle and thread, gather the edges of the circles. Once the edges are gathered, tie a knot to secure the circle.
- Repeat: Repeat the same steps for the other circles. Make sure that all the circles are the same size.
- Connect the Circles: Connect the circles together by sewing them together with the gathered edges. Make sure that the circles are evenly spaced.
- Quilt: Once the circles are connected, quilt the circles together. Use a quilting ruler to mark the quilting lines.
- Finish: Finish the quilt gathered circles by adding a backing and binding. Enjoy your quilt!
Frequently Asked Questions
What type of fabrics can be used to make a yoyo quilt?
For a yoyo quilt, fabrics such as cotton, linen, muslin, and even light-weight wool can be used. For a brighter look, fabrics like quilting cotton, cottons with flannel backings, and lightweight decorator fabrics are recommended. For a more traditional look, wool felt, wool blend felt, and cottons with flannel backings can be used. Avoid using fabrics that are too thick or stiff, as they won’t be able to form the circles properly. It is always recommended to use fabrics that are pre-washed to avoid any shrinkage that might occur.
How Many Yoyos Are Needed To Make A Yoyo Quilt?
At least 50-60 yoyos are required to make a yoyo quilt. The number of yoyos needed to make a quilt depends on the size of the quilt.
- For a baby quilt, 25-30 yoyos will be sufficient.
- For a lap quilt, 50-60 yoyos will be required.
- For a full-size quilt, 100-120 yoyos will be needed.
If you want to make a quilt with more intricate design and patterns, you will need to use more yoyos. For example, if you want to make a quilt with a petal-like pattern, you will need to use more yoyos than the normal number.
Is There a Maximum Size for a Yoyo Quilt?
No, there is no maximum size for a yoyo quilt. You can make your quilt as big as you want, depending on the amount of fabric and time you have available. Making a large quilt will require more fabric and more time, but with patience and dedication, you can make a beautiful quilt in any size you choose.
What type of needle and thread should be used?
- Machine Needle: For a yoyo quilt, a machine needle size 80/12 or 90/14 should be used.
- Thread: A strong thread such as cotton or polyester should be used.
Is it possible to add embellishments to the yoyo quilt?
Yes! Adding embellishments to the yoyo quilt is a great way to personalize your quilt and make it stand out. Here are some ideas for embellishments you can add:
- Buttons – use buttons strategically placed to make an eye-catching pattern
- Embroidery thread – use a variety of colors and stitches to create unique designs
- Fabric paint – use it to create simple or complex designs
- Ribbon – use it to create a decorative border or to attach two pieces of fabric together
- Sequins – use them to add sparkle to your quilt
- Tassels – use them to add texture and dimension to your quilt
You can also use other materials, such as beads, charms, and lace, to add an extra bit of flair to your yoyo quilt. Experiment with different materials and techniques to create a quilt that is truly your own.
Conclusion
By following these steps, you can make a beautiful yoyo quilt that will become a cherished heirloom. With some patience and careful craftsmanship, you can create a unique quilt that expresses your personal style and is sure to be enjoyed for years to come.


