Feather quilting is one of the most beautiful and intricate quilting techniques. It can transform a simple quilt into a stunning work of art. This article will provide a step-by-step guide on how to quilt feathers, so that you can create beautiful, unique quilts. You’ll learn the tools and techniques you need to get the perfect feather quilting look. So let’s get started and explore how to quilt feathers!
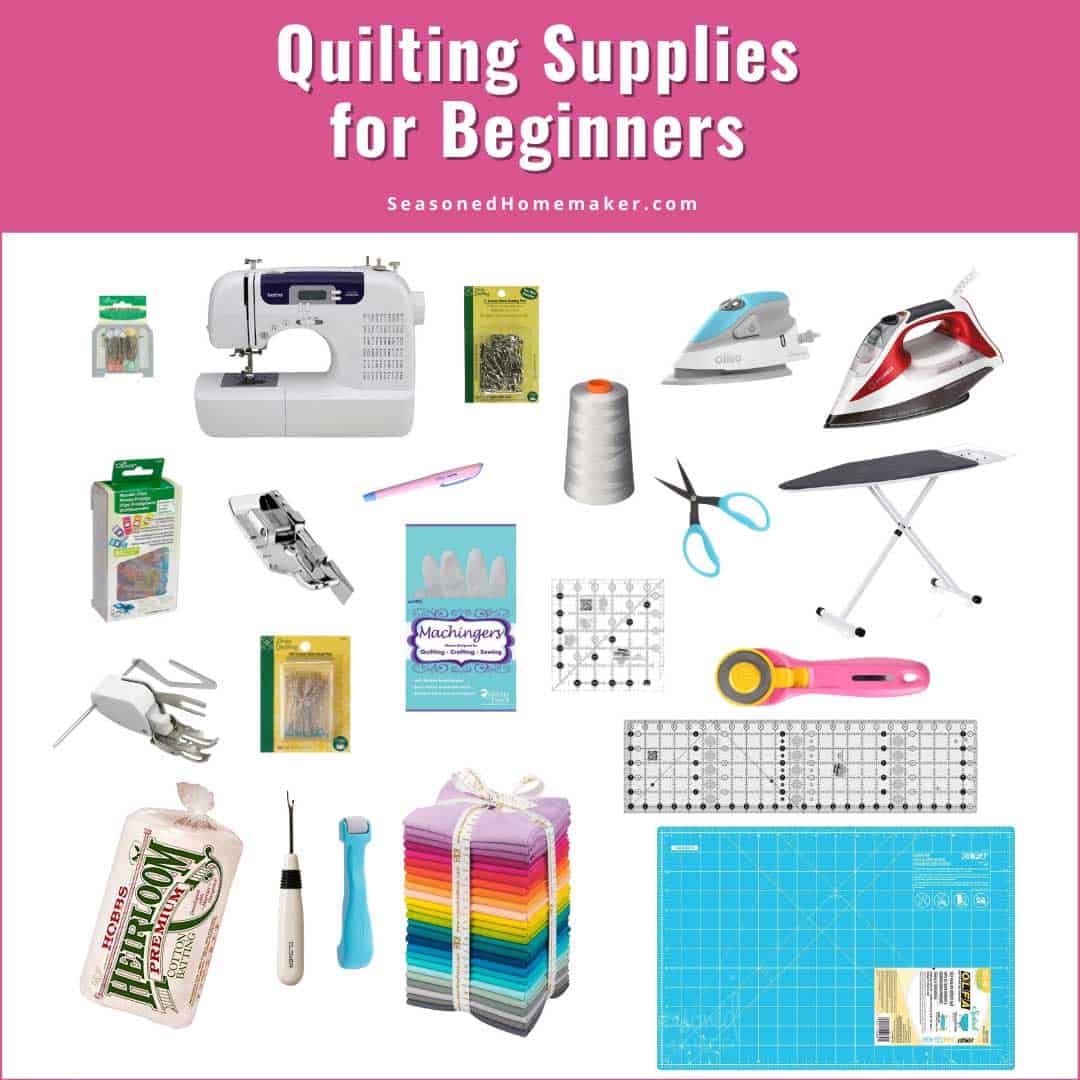
Materials and Tools
| Material | Amount |
|---|---|
| Fabric for quilt top | 1-1/2 yards |
| Fabric for quilt back | 3-1/2 yards |
| Batting | 1-1/2 yards |
| Thread | 1 spool |
| Rotary cutter | 1 |
| Ruler | 1 |
| Cutting mat | 1 |
| Iron | 1 |
| Sewing machine | 1 |
| Seam ripper | 1 |
| Pins | 1 box |
| Needles | 1 package |
These are the materials and tools needed to make a feather quilt.
Preparing the Fabric
To begin quilting feathers, start by selecting a 100% cotton fabric, such as a quilting cotton, for your quilt top. Pre-wash the fabric before cutting to prevent any shrinkage.
| Fabric | Amount |
|---|---|
| Background Fabric | 1 yard |
| Contrast Fabric | 1/4 yard |
| Backing Fabric | 2 yards |
| Batting | 1 yard |
Cut the pieces of fabric into the following sizes:
- Background fabric – one 18” x 22” rectangle
- Contrast fabric – one 4” x 22” rectangle
- Backing fabric – one 20” x 24” rectangle
- Batting – one 20” x 24” rectangle
Press the pieces with an iron to remove any wrinkles. Then, layer the background fabric, batting, and backing fabric with the right sides of the fabric facing up. Baste the layers together by hand or with a machine.
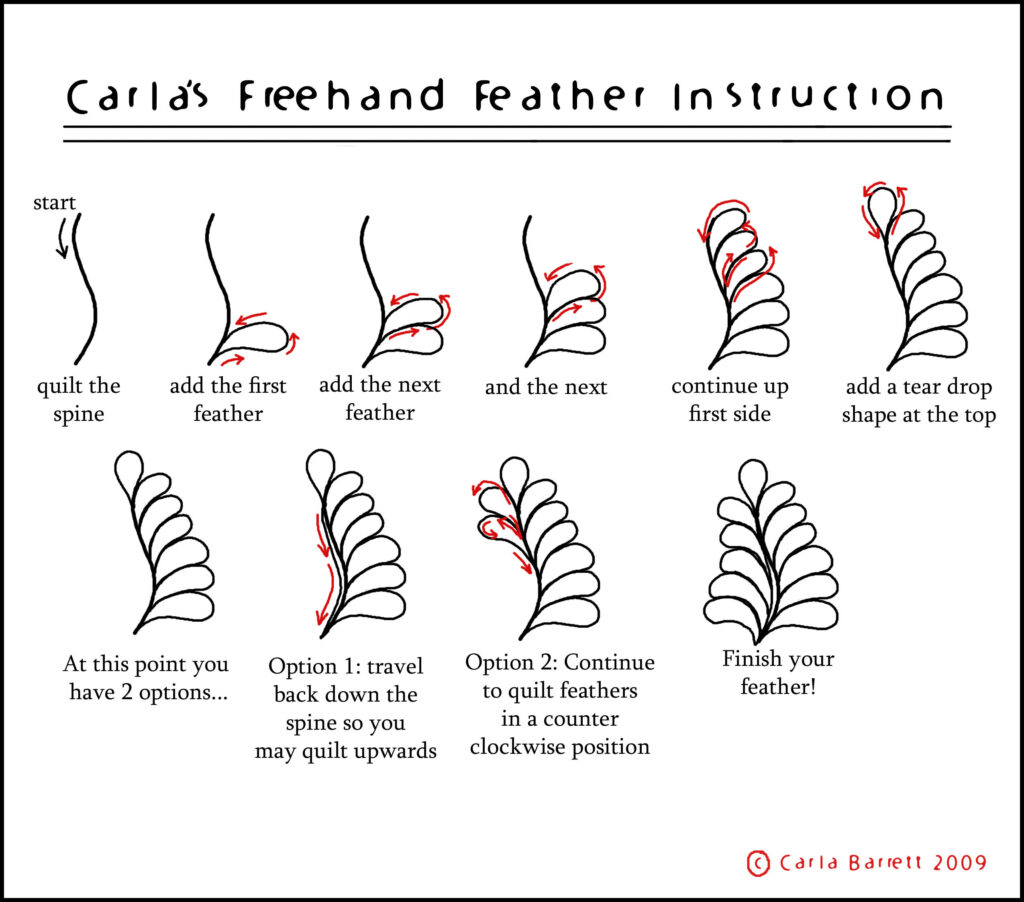
Beginner’s Guide to Making Feathers
Designing Feathers
First, you will need to plan your feather design. Feathers can be designed in a variety of shapes and sizes. You can create curved feathers, wavy feathers, or even straight feathers. Once you have settled on a design, you should draw it out onto paper to use as a template.
Cutting Feathers
Once you have designed your feather pattern, you will need to cut it out of fabric. You can use a rotary cutter, scissors, or any other type of cutting tool. Make sure to use a ruler or measuring tape to ensure that your feathers are cut to the same size and shape.
Sewing Feathers Together
After your feathers have been cut, you will need to sew them together. Start by placing two feathers together and pinning them in place. Then, use a sewing machine or a needle and thread to stitch the feathers together. Be sure to stitch securely, as this will ensure that your quilted feathers stay in place. Once all of your feathers have been sewn together, you can add batting and/or a backing to your quilt.
Advanced Guide to Making Feathers
Cutwork Quilting
Cutwork quilting is a great way to create intricate feather designs. It involves cutting small circles and triangles out of fabric and then stitching them together to create a feather shape. The finished design will have a unique texture and look that can be used to add a unique touch to any quilt.
Paper Piecing Feathers
Paper piecing is another option for making feather designs. To begin, draw the feather design onto paper. Then, cut the fabric pieces that will be used to create the feather using the paper as a guide. Finally, stitch the pieces together to form the feather.
Creating Appliqué Feathers
Appliqué is a great way to create intricate feather designs. Begin by drawing the feather design onto a piece of fabric. Then, cut out the fabric pieces that will be used to create the feather. Finally, stitch the pieces together to form the feather shape.
Finishing the Quilt
- Trim the quilt: Use a rotary cutter and ruler, trim the edges of the quilt so all the feathers are even and the edges are straight.
- Add the binding: Measure the quilt and cut the binding strips. Attach the binding to the quilt. Sew the binding to the quilt and turn it to the back.
- Quilt the back: Using a free motion quilting design, quilt the back of the quilt.
- Add the label: Add a label to the back of the quilt.
- Hand sew the binding: Hand stitch the binding to the back of the quilt.
Quilting Tips and Techniques
- Begin with a larger piece of fabric – Feathers are best quilted on a large piece of fabric, as it makes it easier to stitch the feathers together, and to layer and blend them together.
- Use a walking foot – A walking foot helps to keep the fabric from shifting while quilting. It also helps control the stretch of the fabric to prevent puckering.
- Choose the right needle size – Using a needle that is too small can cause the fabric to tear, while a needle that is too large can create holes in the fabric. A size 90/14 needle is recommended for quilting.
- Use a stabilizer – A stabilizer helps to reduce the amount of fabric shifting while quilting. It also helps to keep the quilting lines even and consistent.
- Draw the feather pattern – Start by lightly drawing the feather pattern onto the fabric. This will help guide you when quilting the feathers.
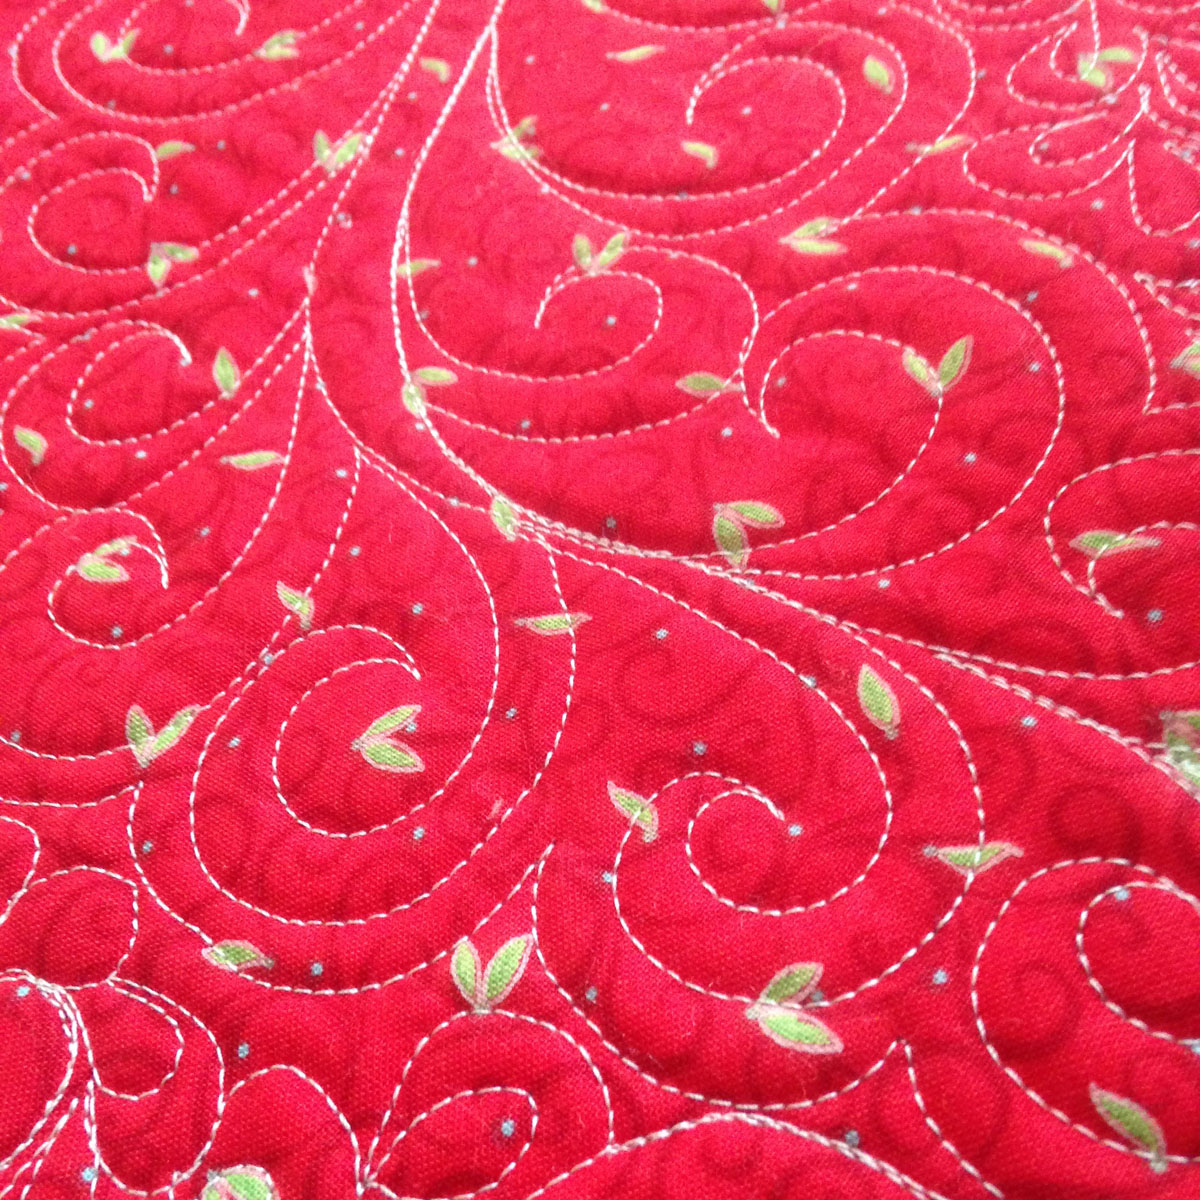
- Create the quilting lines – Begin by quilting the main feather lines. Then, quilt the “feathers” by creating a series of curved lines in the desired feather pattern.
- Blend the feathers – Once the feathers have been quilted, blend them together by quilting in small circular motions. This will give the feather pattern a more cohesive look.
Frequently Asked Questions
What tools do I need to quilt feathers?
- Rotary cutter – A rotary cutter is a must-have tool for quilting feathers. It allows you to make precise, clean cuts which will help you achieve the feathery look.
- Ruler – A ruler is essential for measuring and marking out the shapes you will cut with the rotary cutter.
- Fabric scissors – You will also need a pair of fabric scissors to trim the edges of your feather shapes.
- Marking pen or pencil – A marking pen or pencil is necessary for drawing the feather shapes onto the fabric.
- Iron – An iron is an essential tool for quilting feathers. You will need to press the fabric before and after quilting to ensure that the feathers look as crisp and neat as possible.
- Thread – You will need a good quality thread to quilt your feathers. A strong, thin thread is best.
- Needle – You will need a sharp, fine needle to quilt your feathers. A size 10 or 11 needle is ideal.
How Long Will it Take to Complete a Quilt with Feathers?
Completing a quilt with feathers is a time-consuming process, and the amount of time it takes to finish a quilt depends on the size, complexity of the design, and the skill level of the quilter. On average, a quilter with moderate experience should plan on dedicating 10-20 hours per quilt. For beginner quilters, or quilts with intricate designs and patterns, it can take upwards of 40 hours or more.
Are There Any Specific Techniques I Need to Learn to Quilt Feathers?
Quilting feathers requires some practice and technique to master the art. The main techniques to learn include: quilt markings, stitching in the ditch, Y-seams, and free-motion quilting. Quilt markings involve transferring a feather design onto the quilt fabric, which can be done with a pencil or a water-soluble marker. Stitching-in-the-ditch involves running a line of stitching along the seam line, which helps to secure the fabric pieces together. Y-seams are used to create the curved feathered shapes. Free-motion quilting is used to create the feather quilting design on the quilt top. Learning these techniques will help you master the art of quilting feathers.
What tips can I use to make my feathers look more realistic?
- Choose the right thread: Use a thread color that will best match the fabric you are using. The color of the thread should be close to the color of the fabric and should blend in with the feathers.
- Use the right stitch length: To get the look of feathers, use a shorter stitch length, preferably 1.5mm to 2mm.
- Use a walking foot: A walking foot helps to keep the fabric and thread in place, making it easier to stitch in a consistent manner.
- Press the fabric: Before stitching, press the fabric with an iron to make it easier to stitch.
- Stitch in layers: To make the feathers look more realistic, stitch in multiple layers. Start with the first feather layer and then add more layers on top.
- Be patient: Quilting feathers takes time and patience, so take your time and don’t rush the process.
Is there a way to make quilting with feathers easier?
Feather quilting can be a difficult and time-consuming process, but there are a few tips and tricks to make it easier. Using a rotary cutter to cut the feathers into small shapes can help make the process faster. An iron-on stabilizer can be used to keep the feathers in place while quilting. Basting glue can also be used to help secure the feathers to the background fabric. Additionally, using a walking foot or darning foot on your sewing machine can help ensure the feathers stay in place. Finally, using a feather template can help make the feather shapes more consistent.
Conclusion
Quilting feathers is a great way to create beautiful and unique quilts. With the right tools, patience, and practice, anyone can become a professional quilter. With the help of a step-by-step guide, quilting feathers can be a enjoyable and rewarding experience.


