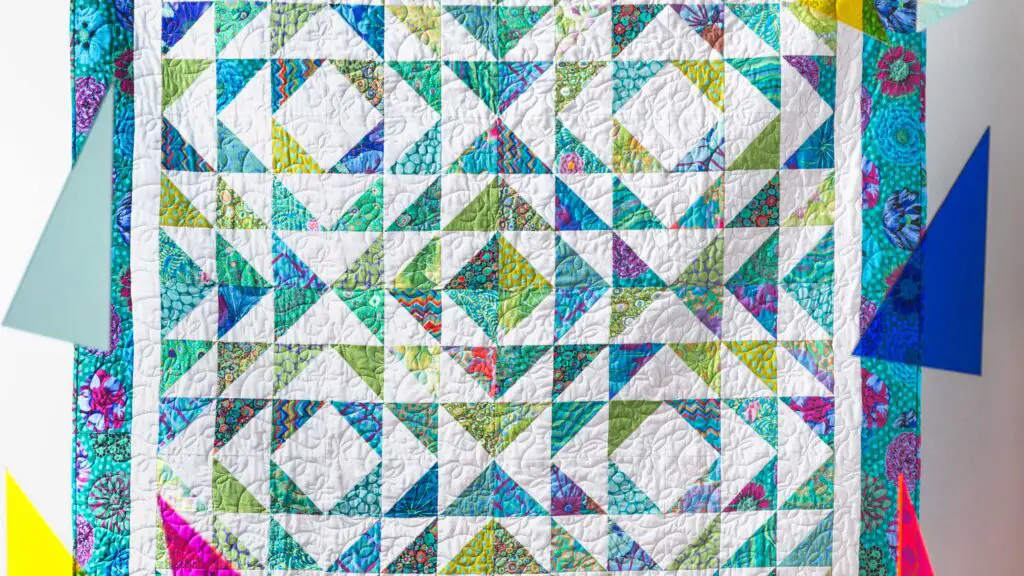
Are you interested in learning how to quilt triangles? Whether its for a quilt top, a wall hanging, or a fashion accessory, triangles are a great shape to use when quilting. With a few simple techniques, you can create beautiful and creative quilting projects with triangles. In this article, we’ll show you how to quilt triangles in easy and creative ways that are perfect for beginners.
Materials Needed
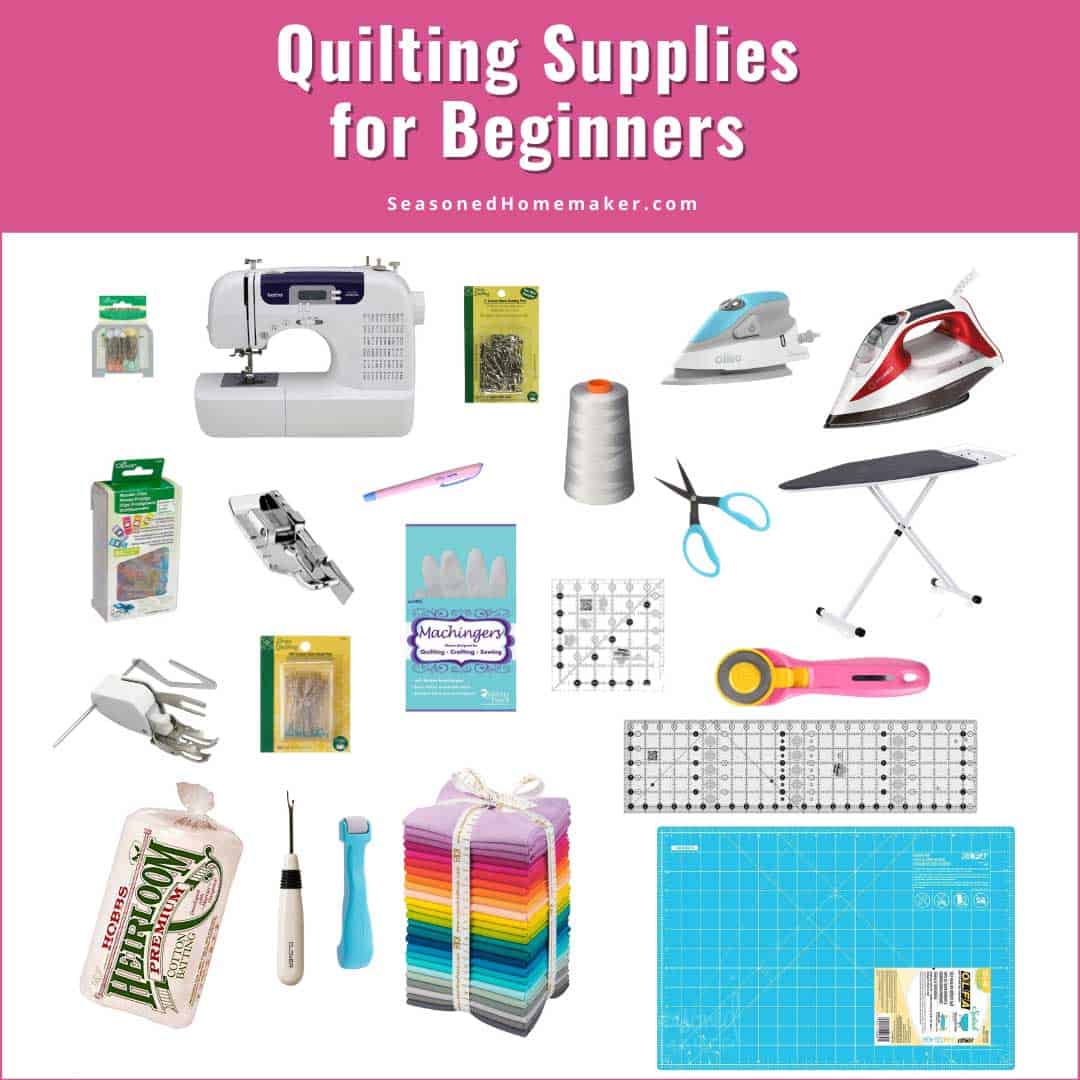
- Fabric – choose three different fabrics to create a quilt with triangles
- Rotary cutter – for clean and precise cuts
- Ruler – for drawing the triangle patterns
- Sewing machine – for stitching the triangles together
- Quilting batting – for extra cushion and warmth
- Thread – to match your fabrics
Making a triangle quilt is an easy and satisfying project for quilting beginners. All you need is the right materials and a few simple steps. With these supplies, you can create a beautiful quilt that will last for years.
Types of Triangle Quilts
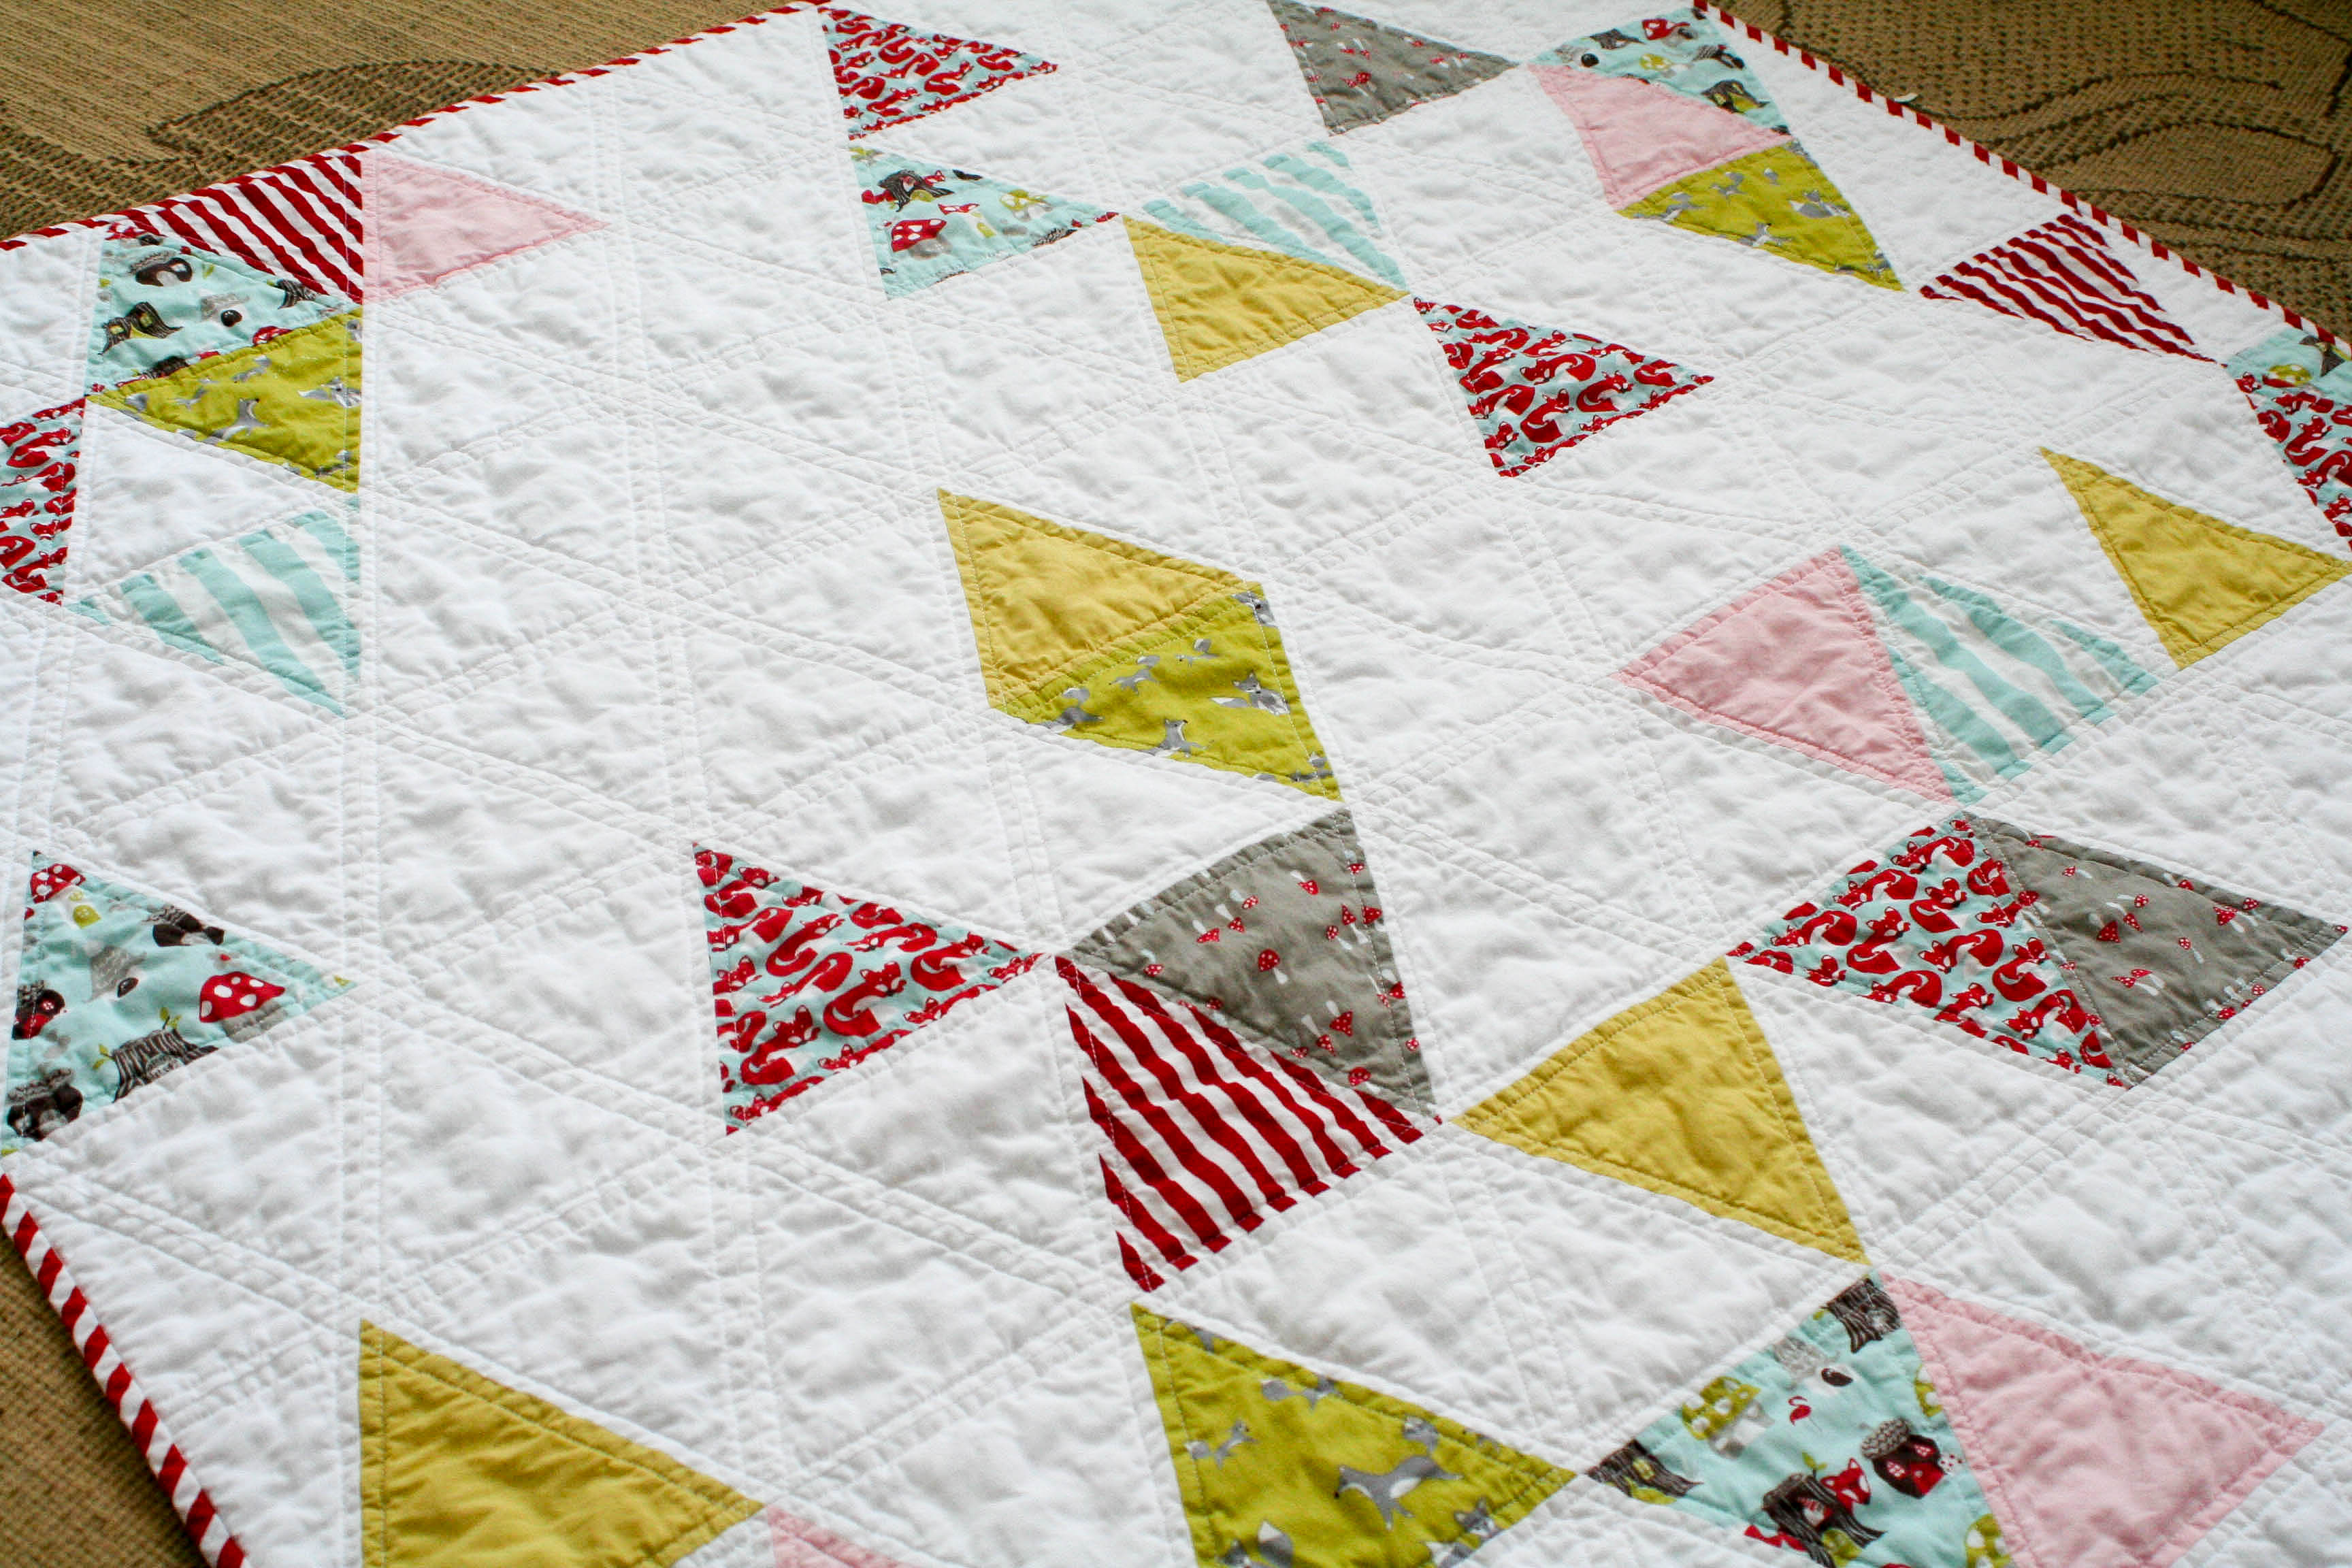
Triangle quilts come in all shapes and sizes, from single triangle blocks to complex quilts made up of multiple triangles. Here are some of the most common types of triangle quilts:
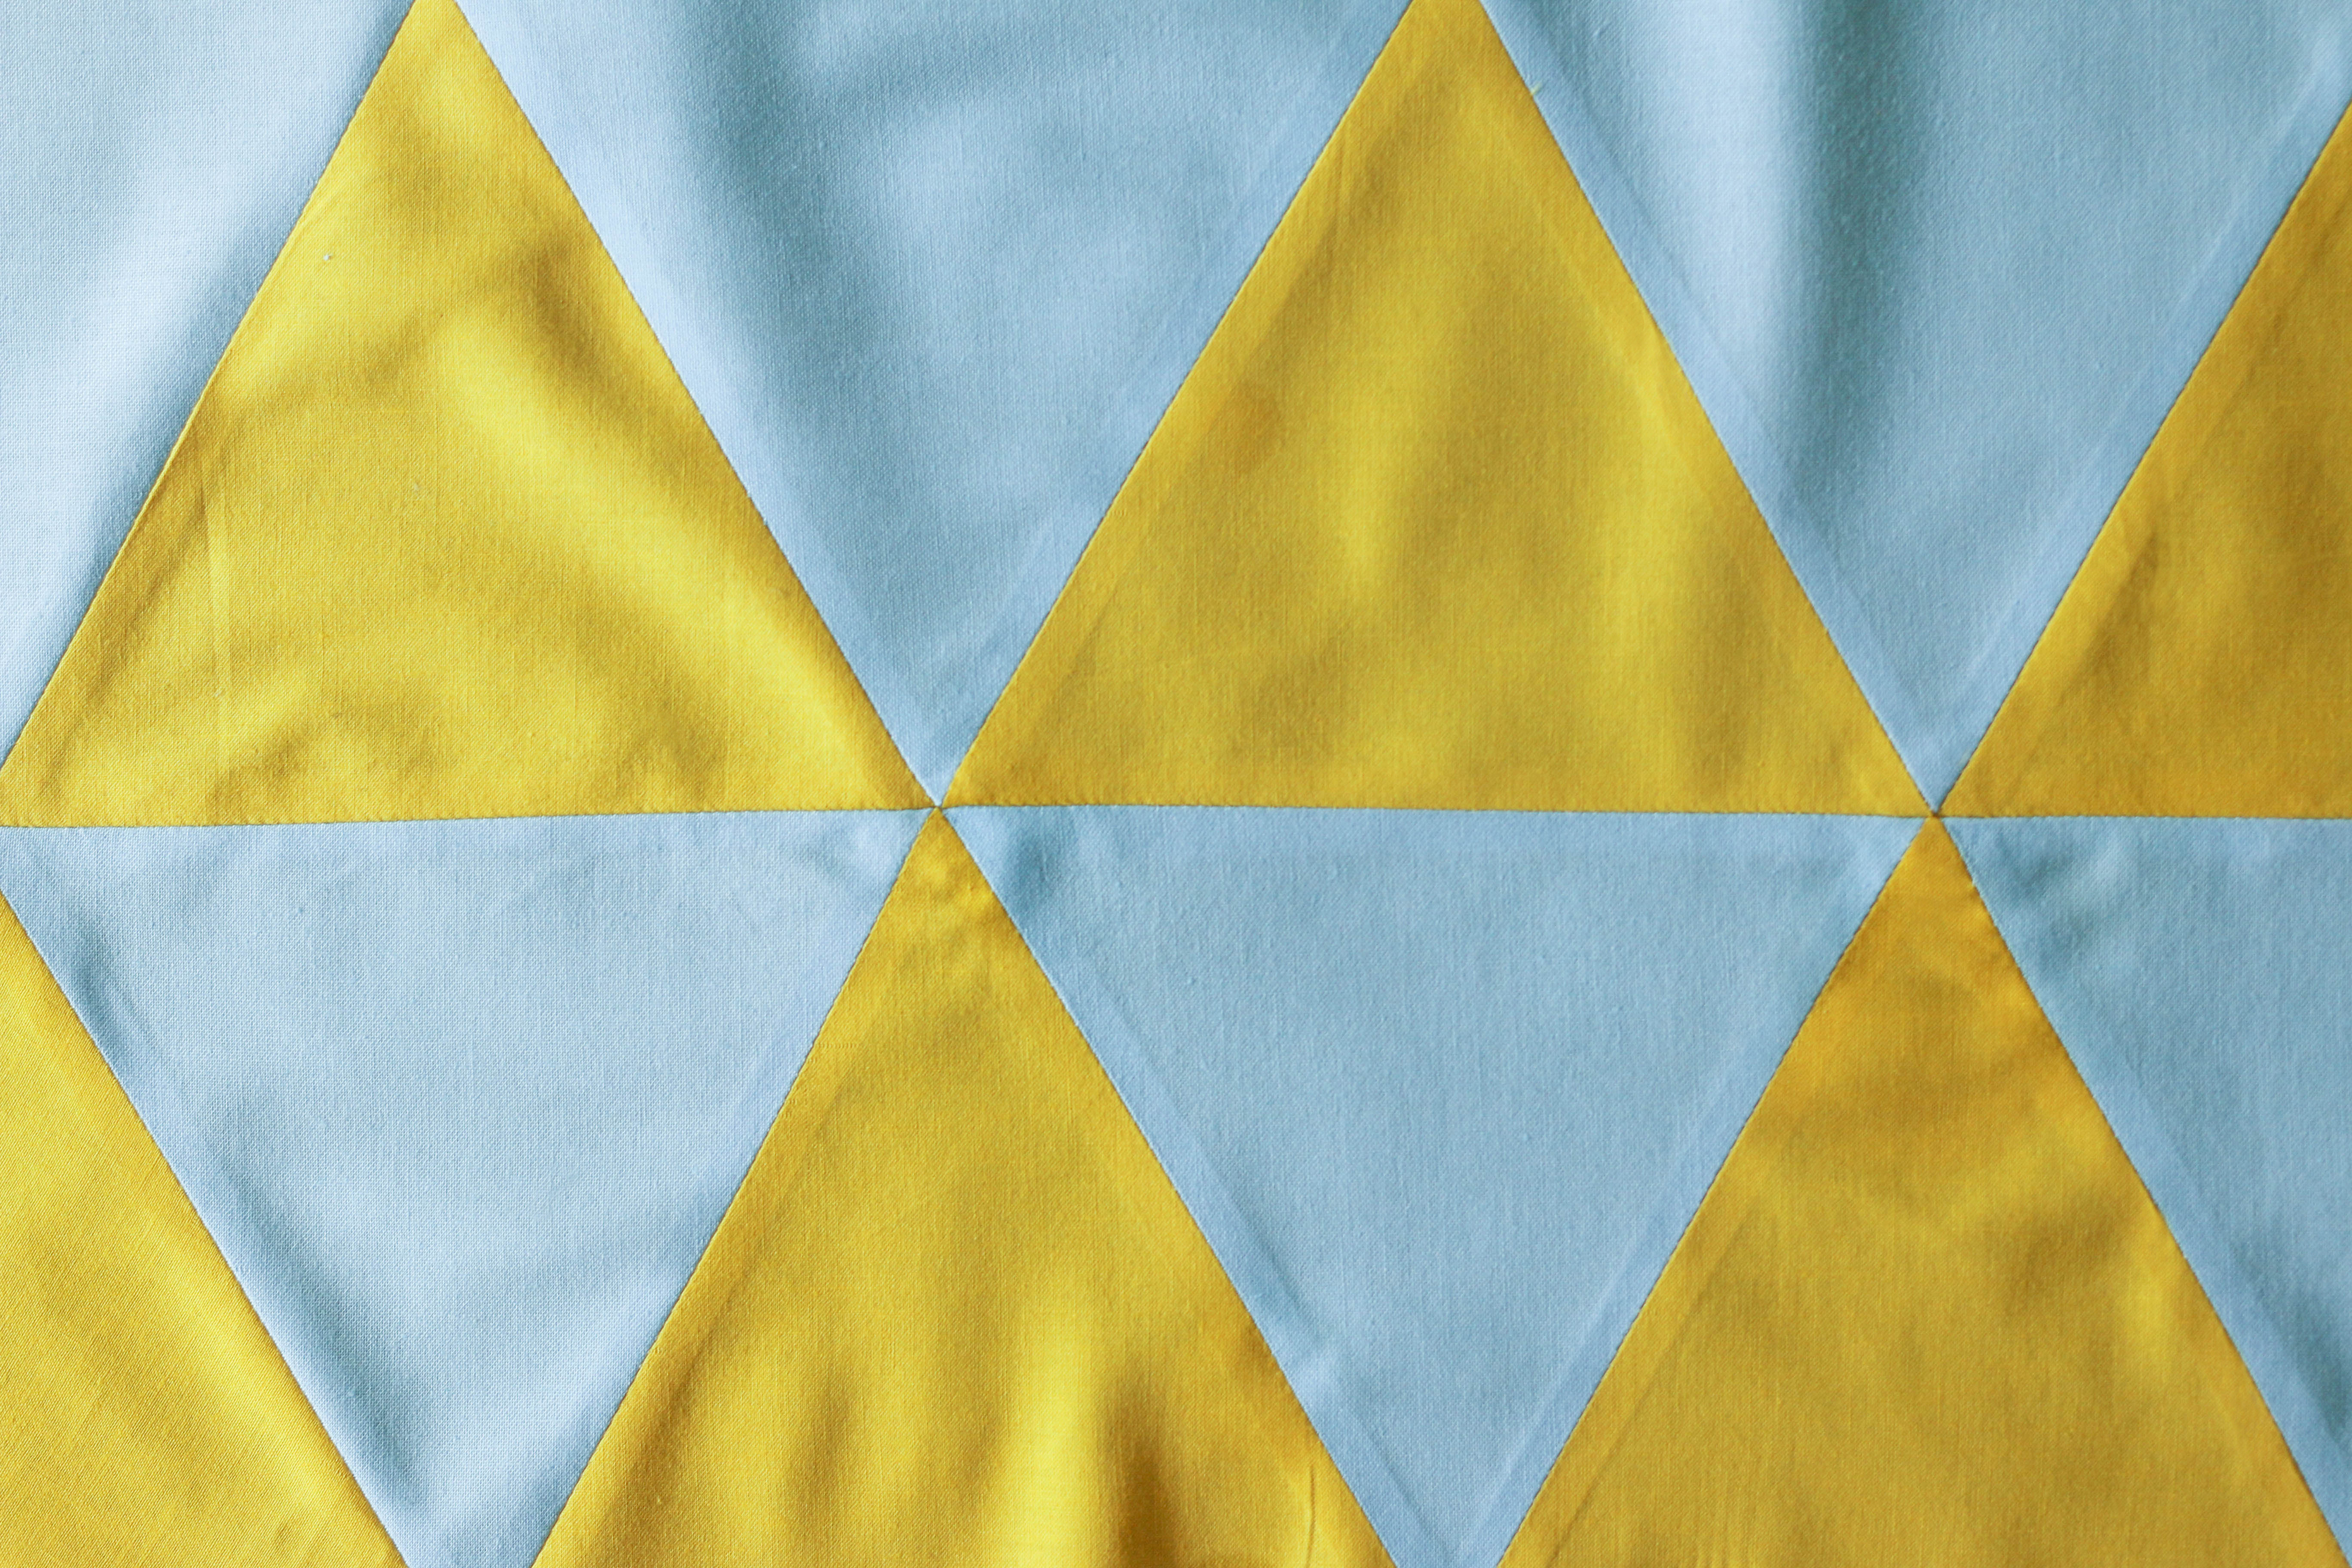
Half-Square Triangle Quilt – This quilt is made up of two squares sewn together and then cut in half diagonally. This creates two triangles, which are then sewn together to form the quilt. To quilt this type of triangle, you would need to sew the two squares together and then cut it into two separate triangles.
Flying Geese Quilt – The flying geese quilt is made up of two triangles and a square. The triangles are sewn to one side of the square, creating the look of flying geese. To quilt this type of triangle, you would need to sew the two triangles together and then attach them to the square.
Hourglass Quilt – The hourglass quilt is made up of four triangles, which are sewn together to form an hourglass-like shape. To quilt this type of triangle, you would need to sew the four triangles together and then shape the piece into an hourglass.
Tumbling Blocks Quilt – The tumbling blocks quilt is made up of multiple triangles that are sewn together to form an eye-catching pattern. To quilt this type of triangle, you would need to sew the triangles together and then arrange them into the desired pattern.
Diamond Quilt – The diamond quilt is made up of four triangles that are sewn together to form a diamond shape. To quilt this type of triangle, you would need to sew the four triangles together and then shape the piece into a diamond.
No matter what type of triangle quilt you decide to make, the process of how to quilt a triangle is the same for each type. You will need to sew the triangles together and then shape the piece into the desired pattern.
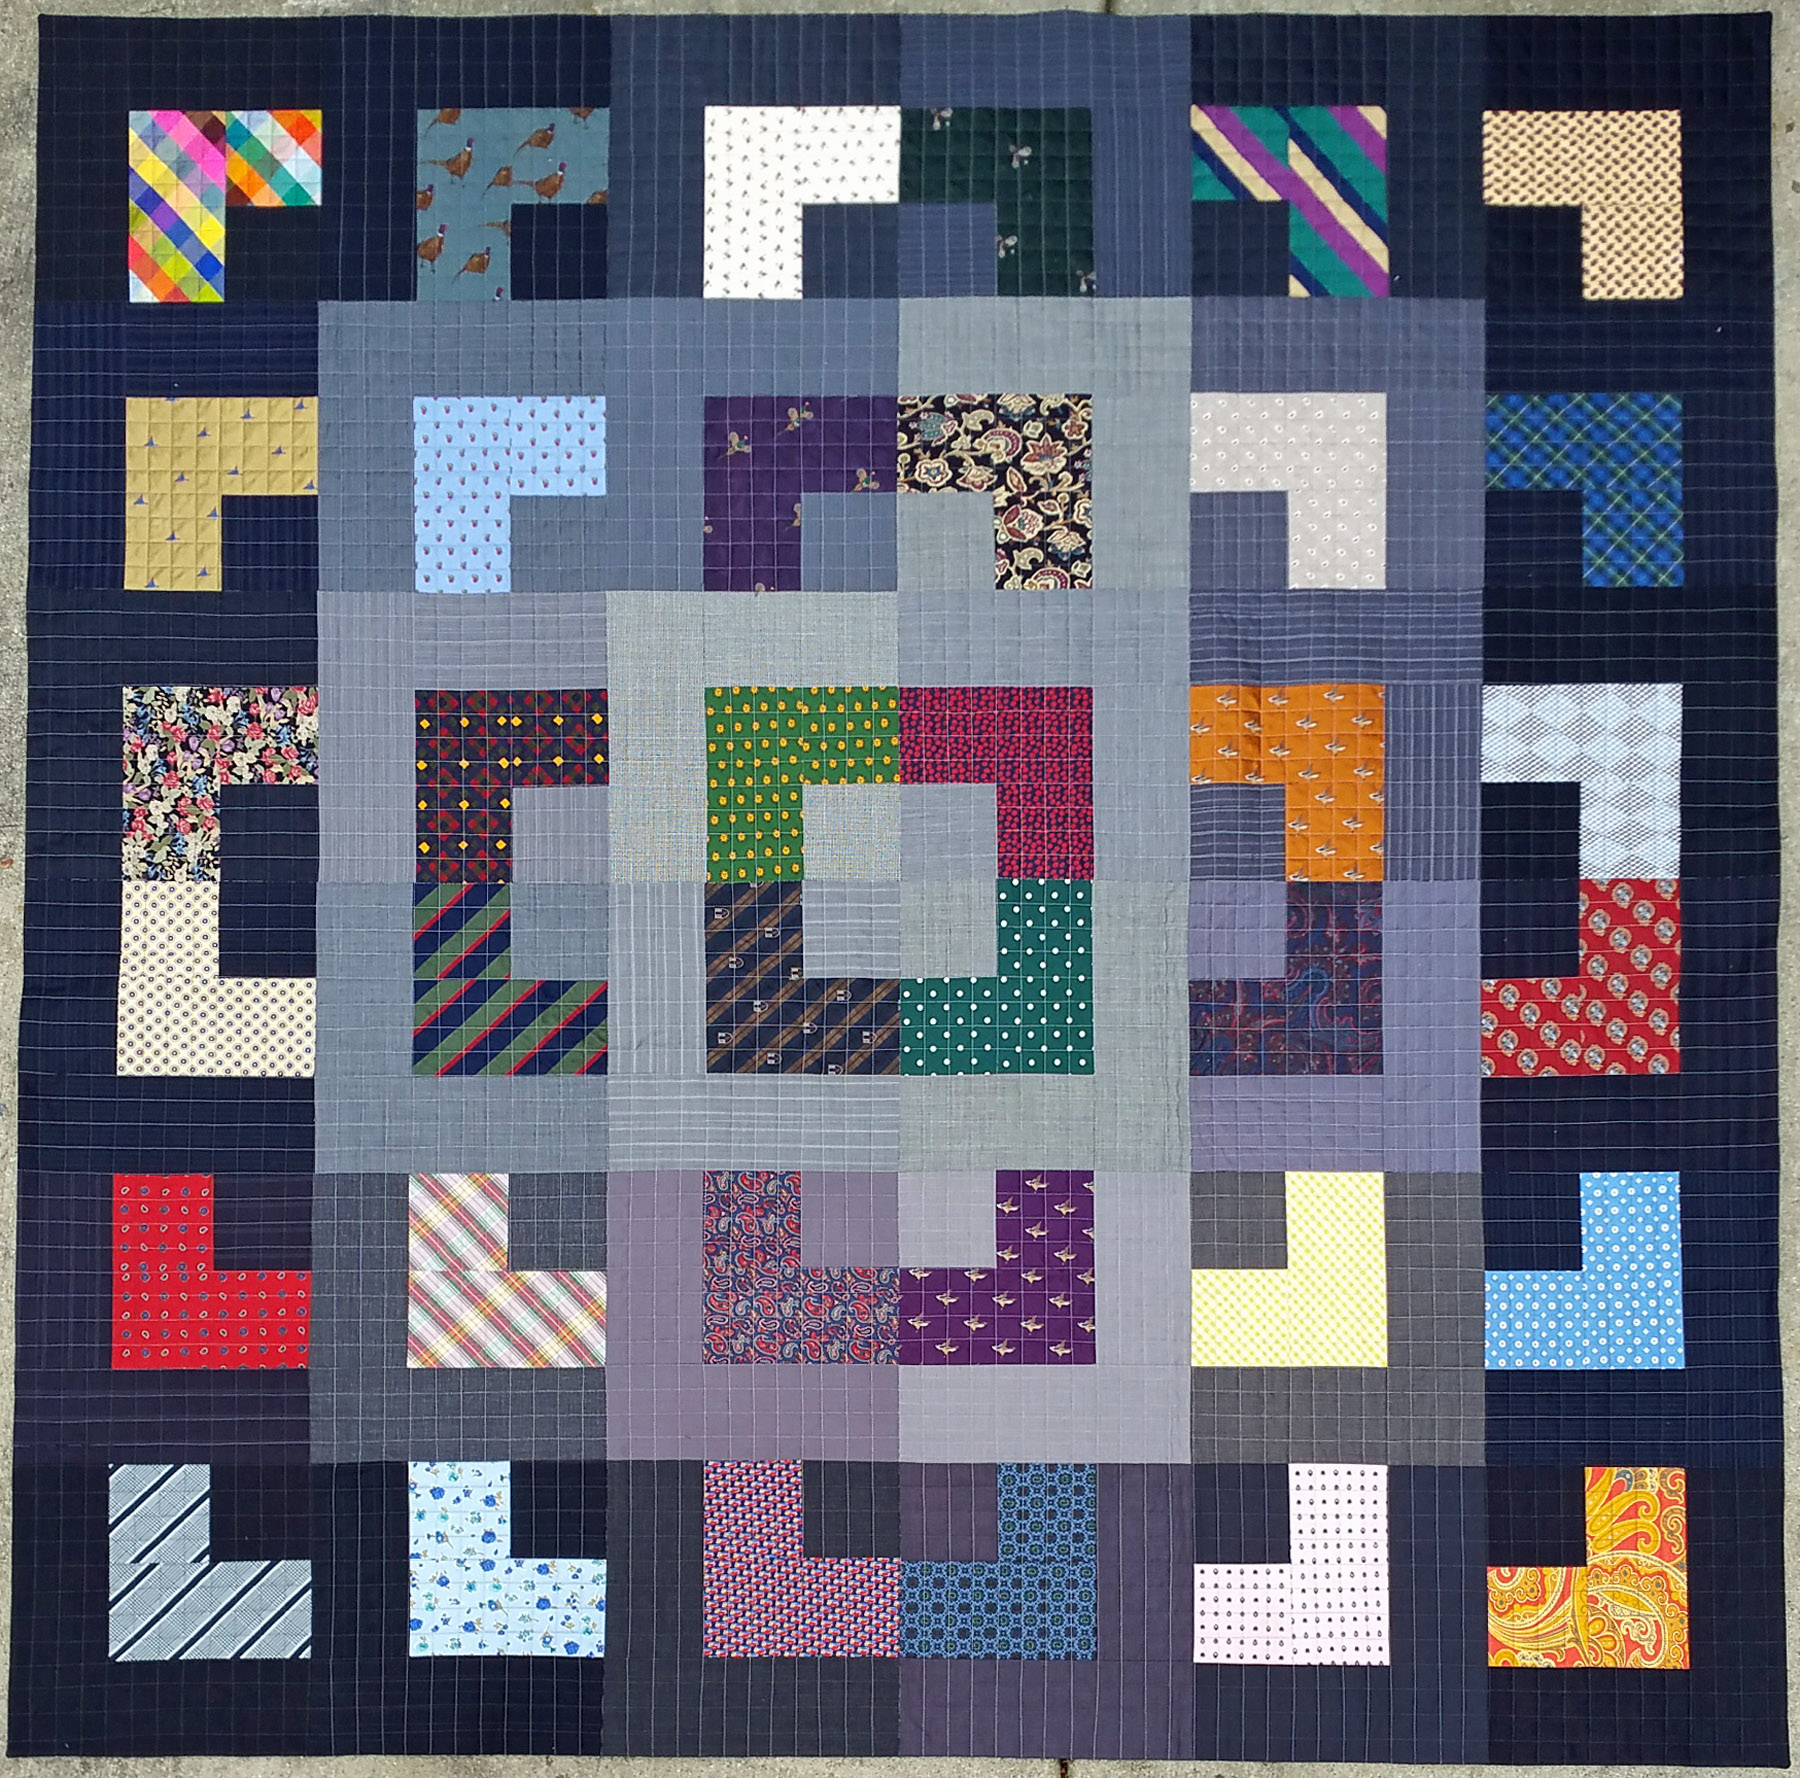
Log Cabin Quilt
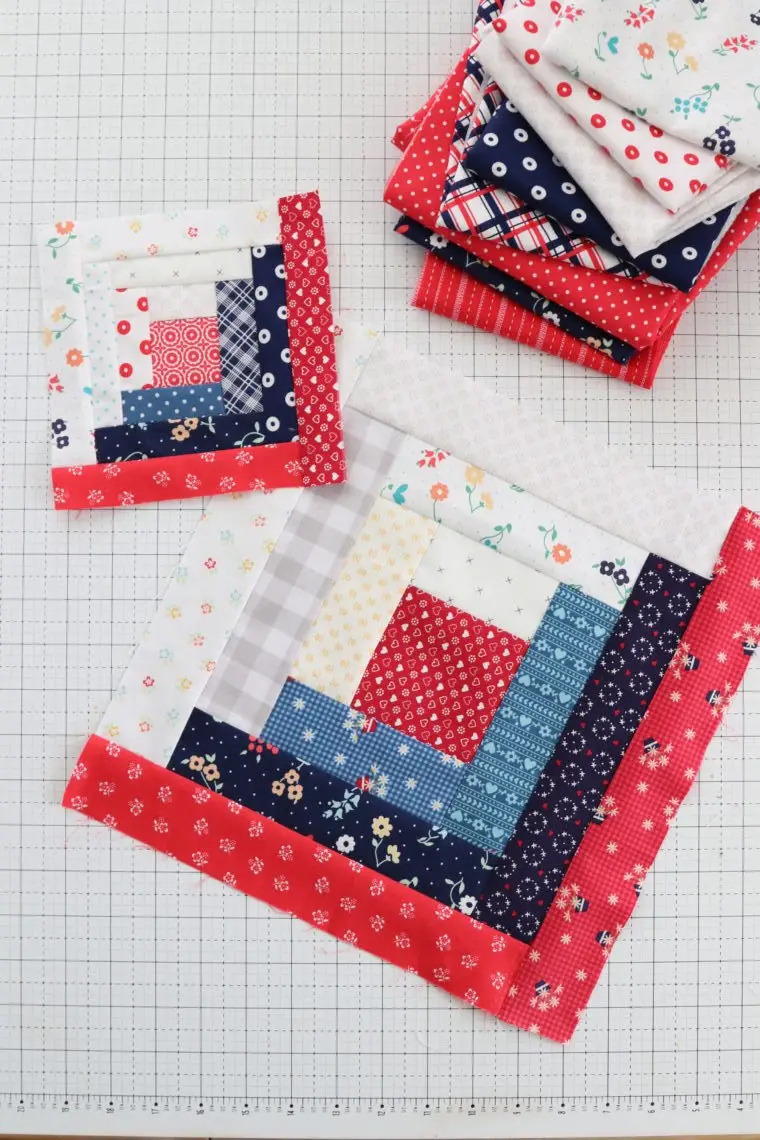
The Log Cabin quilt pattern is a classic that uses triangle shapes to create a beautiful quilt. This pattern is made up of several strips of fabric sewn together in a circular pattern. It’s a great way to use up scraps of fabric and make a stunning quilt.
Step 1: Gather your fabric scraps and decide how big you want your quilt to be. You’ll need a light and a dark fabric for each triangle. Cut the light fabric into strips and the dark fabric into triangles.
Step 2: Sew the light fabric strips together in a circle. Start with the longest strip and sew the shorter strips around it in a circular pattern.
Step 3: Sew the dark fabric triangles to the light fabric strips. Make sure the points of the triangles are facing outward and the triangles are evenly spaced around the circle.
Step 4: Repeat the process for the next layer of the quilt. Alternate the light and dark fabric to create a checkerboard pattern.
Step 5: Continue adding layers until you reach the desired size of your quilt.
Step 6: Once your quilt is finished, it’s time to quilt it. You can quilt it by hand or use a machine. To quilt it by hand, use a running stitch to stitch through all the layers of the quilt. If you’re using a machine, you can quilt the quilt in a variety of ways.
Step 7: Finally, bind the edges of the quilt and add a label with your name and the date.
The Log Cabin quilt is a classic quilt pattern made up of triangles that can create a beautiful quilt. Once you get the hang of it, triangle quilt patterns can be fun and rewarding to make. With a little bit of patience and creativity, you can create a stunning quilt that will last for years to come.
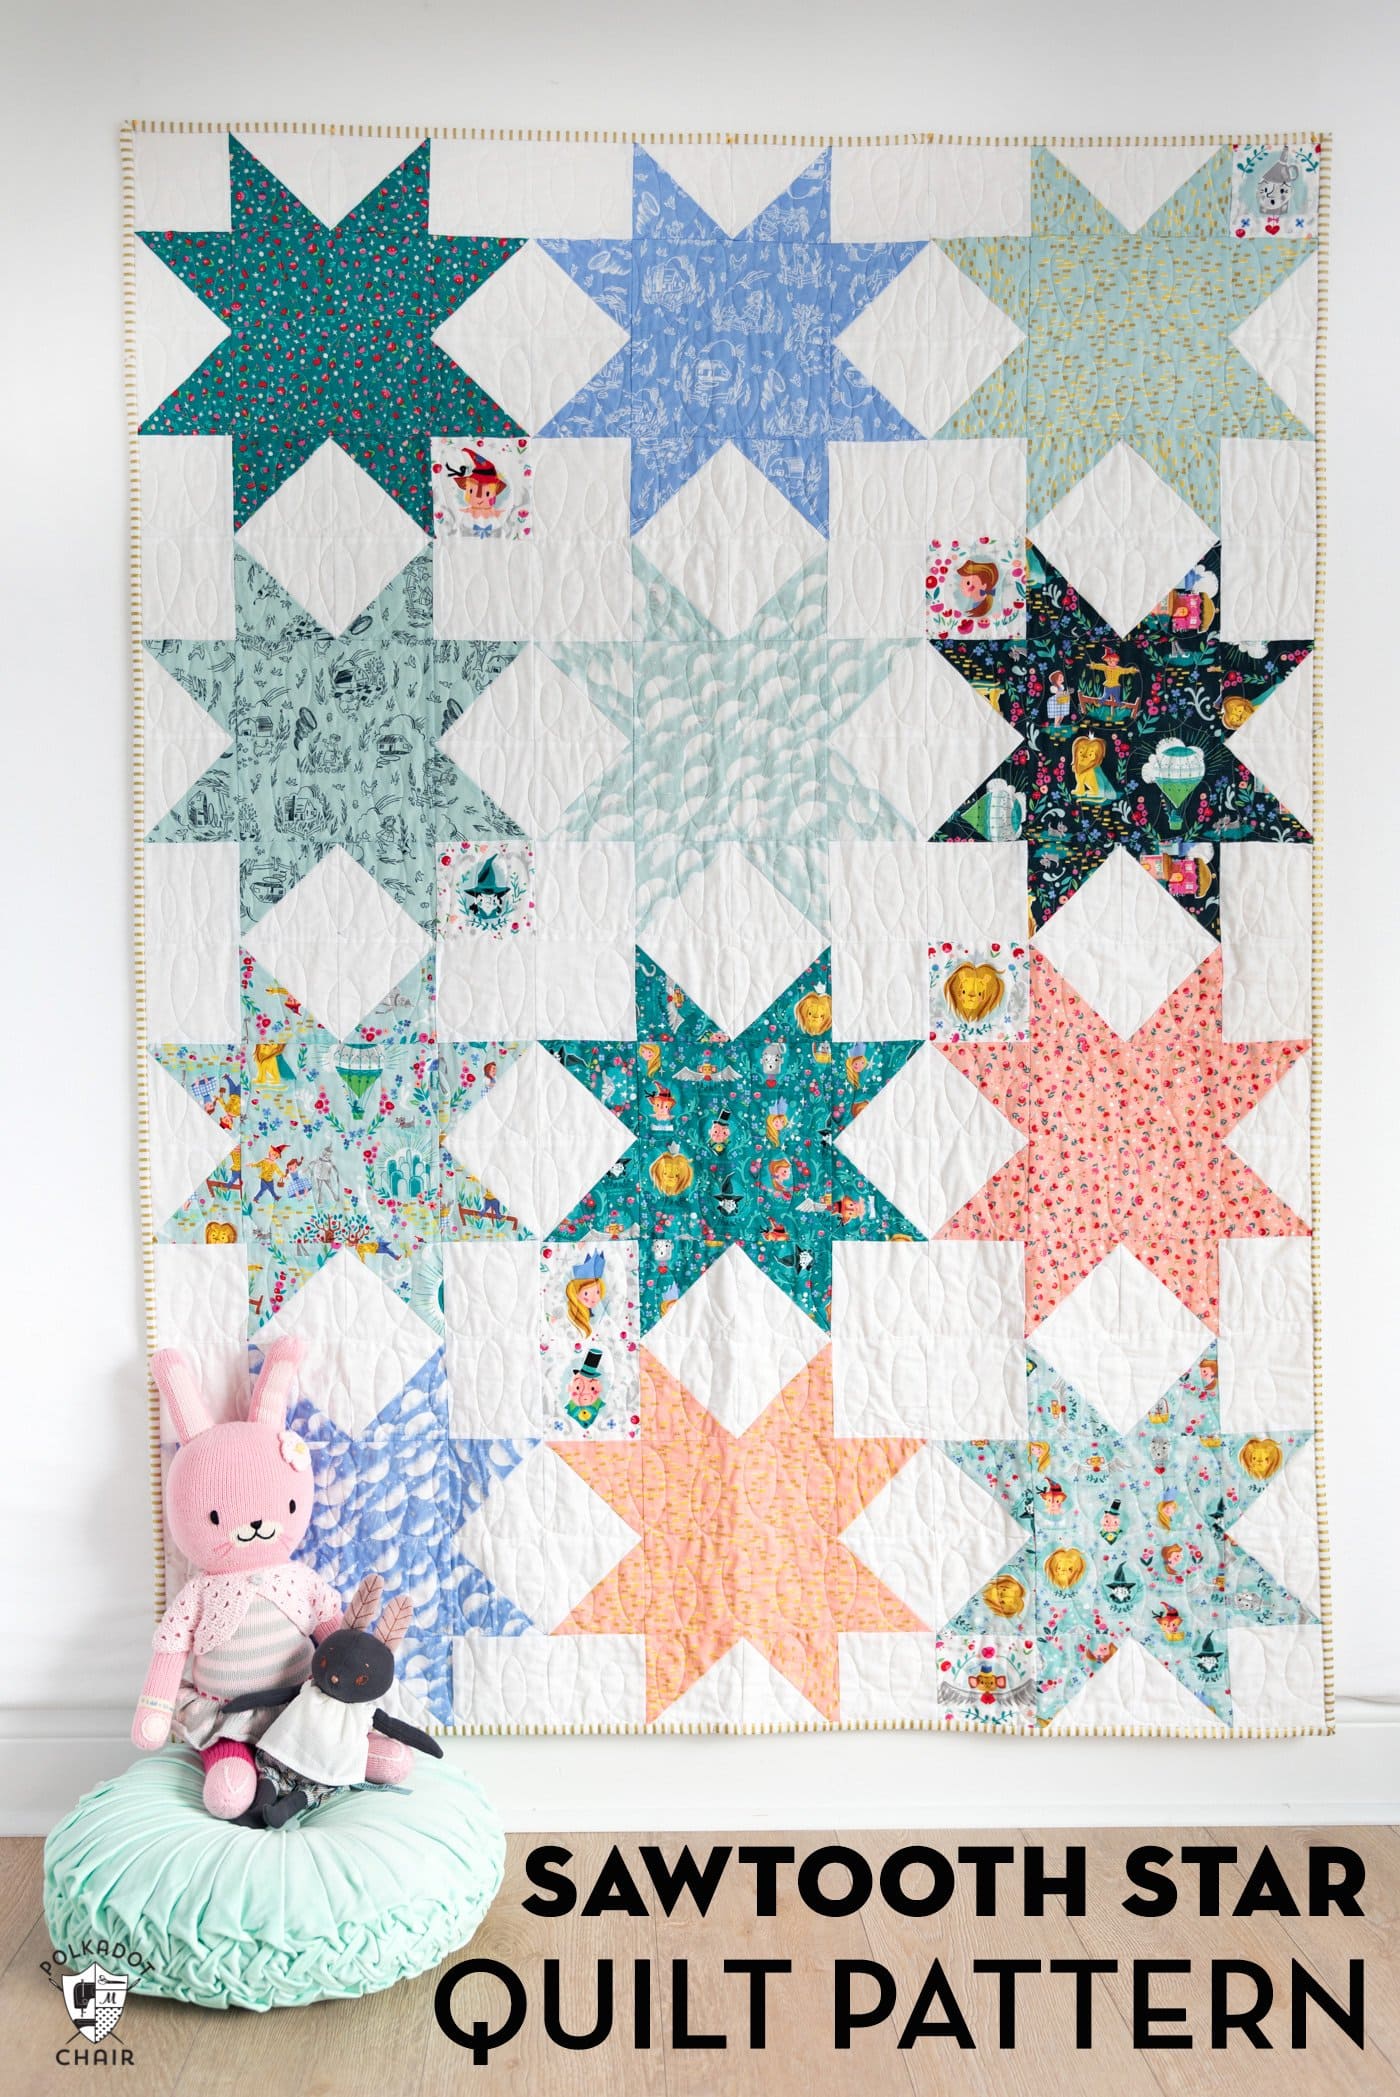
Sawtooth Star Quilt
Materials Needed:
- Fabric for the quilt top
- Batting
- Thread
- Sewing machine
- Rotary cutter and ruler
- Iron
Instructions:
- Cut two rectangles of fabric. The first should be slightly larger than the other.
- Cut the smaller rectangle into four equilateral triangles.
- Fold the larger rectangle into four equal sections and mark with a fabric marker.
- Place a triangle in each section so the peaks of the triangles meet the markings.
- Iron the triangles in place and sew along the edges.
- Press the seams open.
- Cut a piece of batting the same size as the quilt top.
- Layer the backing, batting and quilt top.
- Pin in place.
- Quilt as desired.
- Bind the edges.
The sawtooth star quilt is a simple quilt made with triangles. The quilt top is made from two rectangles of fabric, one slightly larger than the other. The smaller rectangle is cut into four equilateral triangles and the larger rectangle is folded into four equal sections. The triangles are then placed in the sections so the peaks of the triangles meet the markings. The triangles are then ironed in place and sewn along the edges. The seams are then pressed open. The quilt is quilted as desired and the edges are bound.
Half Square Triangle Quilt
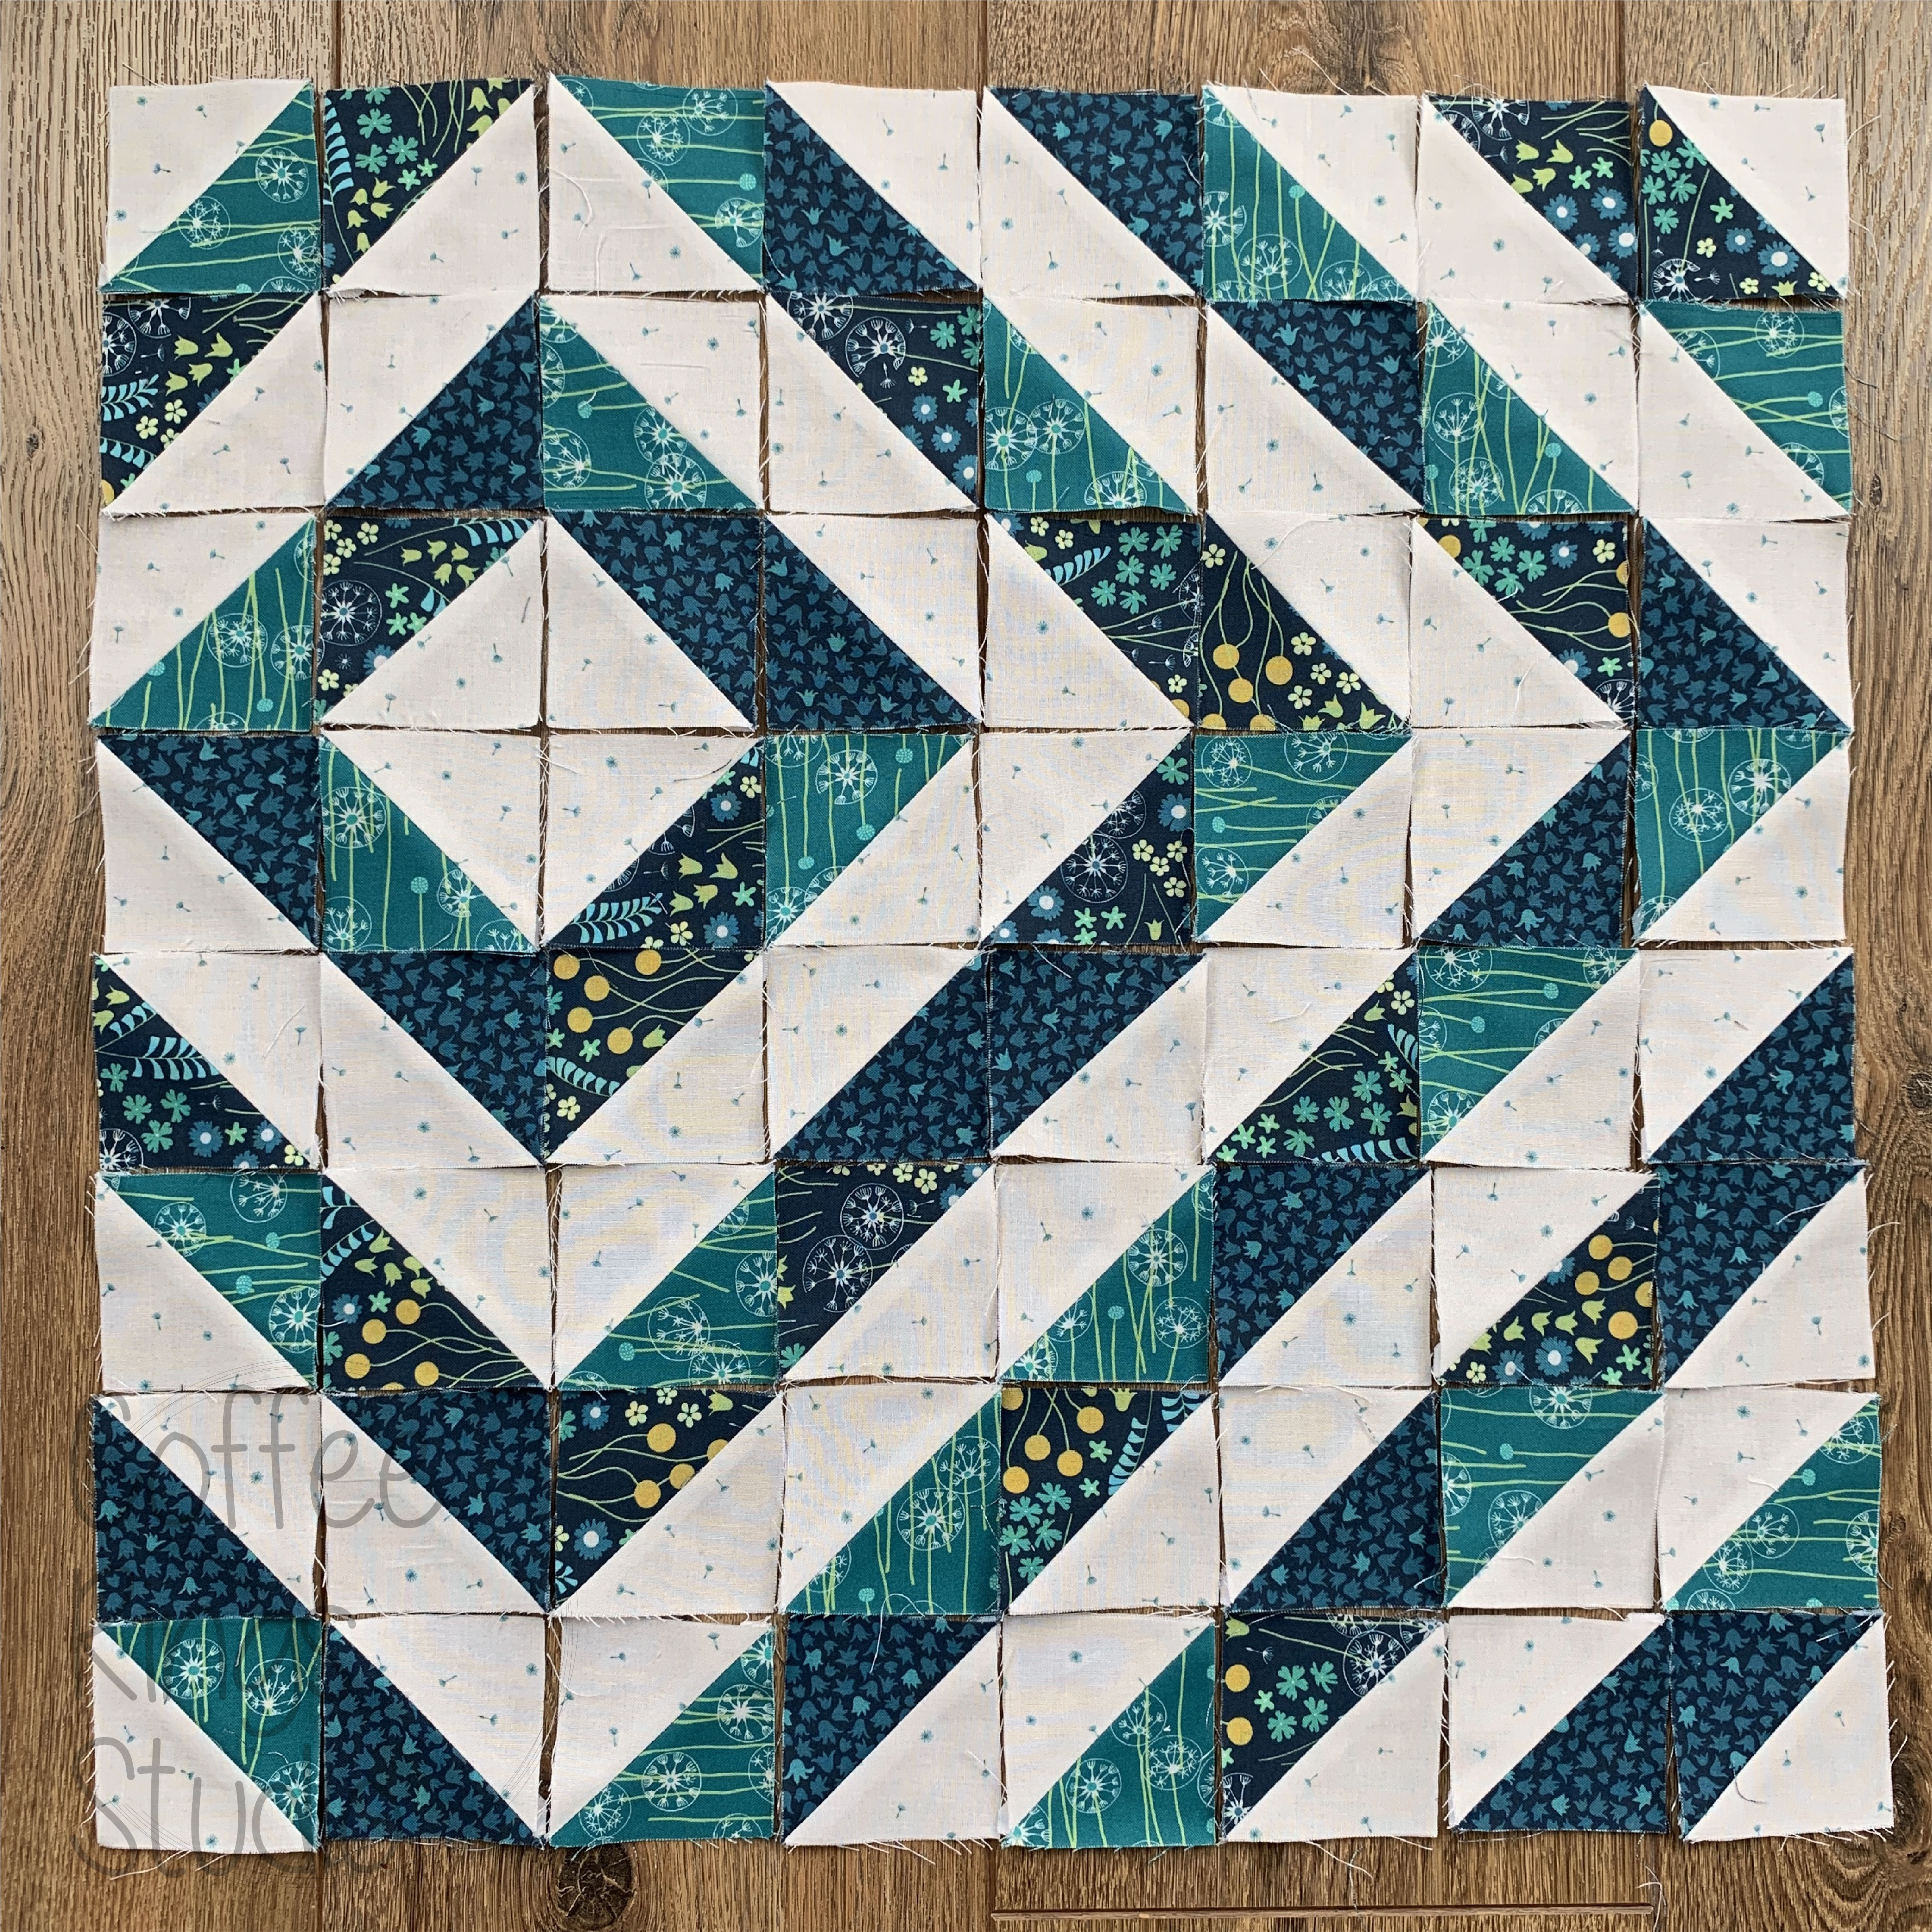
- Cutting: Cut two pieces of fabric in the desired size. For a 9-inch block, cut two 9.5-inch squares.
- Marking: Draw a line diagonally from corner to corner on the wrong side of one of the fabric squares. Pin the two squares right sides together.
- Sewing: Sew 1/4 inch away from the drawn line on both sides of the line.
- Cutting: Cut along the marked line. You now have two half-square triangle units.
- Pressing: Press the seam allowances open.
- Piecing: Piece the blocks together in the desired pattern.
- Quilting: Quilt as desired.
Other Triangle Quilt Patterns

Half-Square Triangle Quilt
This type of quilt pattern is made up of two triangles sewn together to create a square. It is one of the most popular quilt patterns as it can be used to create a variety of designs.
Flying Geese Quilt
This quilt pattern is made up of two triangles sewn together with a rectangle. The pattern is a great way to create a unique quilt design with a lot of movement.
Triangle In A Square Quilt
This quilt pattern is made up of a triangle sewn onto a square. It is a great way to create a quilt with a lot of texture and interest.
Diamond In A Square Quilt
This quilt pattern is made up of a diamond sewn onto a square. It is a great way to create a quilt with a lot of texture and contrast.
Brick Wall Quilt
This quilt pattern is made up of two triangles sewn together to create a brick wall design. It is a great way to create a quilt that is bold and graphic.
Triangle Star Quilt
This quilt pattern is made up of several triangles sewn together to create a star design. It is a great way to create a quilt that is bright and cheerful.
Preparing the Fabric
- Pre-wash the fabric to remove the sizing and prevent shrinkage when the quilt is washed after it is finished.
- Iron the fabric to remove wrinkles and make it easier to cut accurately.
- Measure and cut the fabric into triangles, using a template and fabric scissors.
Cutting the Fabric
To make a triangle quilt, you will need to cut your fabric into triangular-shaped pieces. To do this, you will need to measure and cut the fabric according to the pattern you have chosen. The size of the triangle will depend on the pattern, so make sure to measure accurately.
Tools:
- Fabric
- Ruler
- Markers
- Scissors
Instructions:
- Measure the fabric according to the pattern you have chosen.
- Using the ruler and marker, mark the measurements on the fabric.
- Cut the fabric along the markings with the scissors.
- Repeat the process until all the triangles have been cut.
Once the fabric has been cut into triangles, you are ready to start piecing the quilt together. Keep in mind that the size and shape of the triangles will determine the finished look of the quilt, so make sure to measure and cut accurately.
Piecing Together the Triangle Quilt Blocks
1. Gather Your Supplies
- Fabric scraps
- Scissors
- Pins
- Thread
- Sewing machine
2. Cut the Triangle Pieces
Cut the fabric scraps into triangle shapes of the same size. Use a template to make sure all pieces are the same size.
3. Pin the Pieces Together
Lay out the triangle pieces into the desired pattern. Pin the pieces together in pairs.
4. Sew the Pieces Together
Sew the pieces together, starting from the center and working outward. Leave the edges of the triangles unpinned so that they can be curved and manipulated.
5. Curve and Manipulate the Edges
Once all the pieces have been sewn together, curve and manipulate the edges to create a quilted look.
6. Stitch the Quilt Blocks Together
Stitch the triangle quilt blocks together using a sewing machine. Make sure to backstitch at the beginning and end of each seam.
Assembling the Quilt Top

To assemble the quilt top, first lay all the triangle pieces out on a flat surface. Make sure the colors are arranged in the desired pattern. To join the triangles together, use a ¼ inch seam allowance. Start with two triangles right sides together, and sew along the short sides. Repeat the process until all the triangles are attached. For a more complex pattern, use more colors and join the triangles in an alternating pattern.
If desired, you can press the seams open or to one side. Again, it is important to use a ¼ inch seam allowance when sewing the triangles together. To finish the quilt top, sew the border strips to the sides, attaching them to the quilt top with a ¼ inch seam allowance. When attaching the border strips, make sure the colors are arranged in the desired pattern.
| Steps | Description |
|---|---|
| Step 1 | Lay all the triangle pieces out on a flat surface. |
| Step 2 | Sew the triangles together using a ¼ inch seam allowance. |
| Step 3 | Press the seams open or to one side. |
| Step 4 | Attach the border strips to the sides, using a ¼ inch seam allowance. |
Finishing the Quilt
Once the triangles have been sewn together, the next step is to finish the quilt. This involves attaching the backing fabric, quilting the layers together and adding binding.
Backing Fabric
The backing fabric is attached to the quilt using the same basting stitches used to sew the triangles. Place the backing fabric on a flat surface, with the wrong side facing up. Lay the quilt top on top of it, ensuring that the edges are lined up. Pin the layers together at the edges and sew them together using a ¼ inch seam allowance.
Quilting
Quilting is used to hold the layers of the quilt together. It can be done by hand or machine and there are many different quilting patterns that can be used.
Binding
Binding is used to enclose the edges of the quilt. Start by cutting strips of fabric 2½ inches wide. Join the strips together at right angles, making sure to press the seams open. Fold the strip in half lengthways and press. Position the folded binding along the edge of the quilt and pin in place. Sew the binding to the quilt, using a ¼ inch seam allowance and mitering the corners.
| Step | Description |
|---|---|
| Backing Fabric | Attach backing fabric using basting stitches. |
| Quilting | Hold the layers of the quilt together using quilting. |
| Binding | Enclose the edges of the quilt using binding. |
Once the binding is attached, the quilt is finished. With some practice, you can learn how to quilt triangles and create a beautiful quilt.
Common Questions
How to Quilt Triangles? To quilt triangles, start by measuring and cutting out a triangle shape from batting and fabric. Using a walking foot, sew around the edges of the triangle. Start quilting from the center, using a straight stitch, and work your way out towards the edges. When finished, trim the excess batting and fabric from the sides.
How to Make a Triangle Quilt? To make a triangle quilt, begin by gathering fabric and batting. Cut the fabric into triangle shapes of the same size and lay out the triangles in the desired pattern. Sew the triangles together, following the pattern, and add a layer of batting and backing fabric on top. Quilt the design, following the same pattern as the triangles. Add a binding, if desired, and finish with a label.
How Would You Quilt a Triangle? To quilt a triangle, start by measuring and cutting out the triangle shape from batting and fabric. Use a walking foot and sew around the edges of the triangle. Start from the center and use a straight stitch to quilt the design, working your way out towards the edges. When finished, trim the excess batting and fabric from the sides.
Triangle Quilt How To? To make a triangle quilt, begin by gathering fabric and batting. Cut the fabric into triangle shapes of the same size and lay out the triangles in the desired pattern. Sew the triangles together, following the pattern, and add a layer of batting and backing fabric on top. Quilt the design, following the same pattern as the triangles. Add a binding, if desired, and finish with a label.
How do I choose the Fabric for my Triangle Quilt?
When it comes to making a triangle quilt, choosing the right fabric is crucial for the end result. There are a few things to consider when selecting fabric for a triangle quilt.
Composition: Cotton and linen are the two most popular fabrics to use for a triangle quilt. Cotton is lightweight and easy to work with, while linen is more durable. Other fabrics such as flannel, wool, and silk can be used, but they are more difficult to work with.
Color: Choosing the right color palette for a triangle quilt will help make the quilt unique. Consider the theme of the quilt when picking out colors. If the quilt is intended to be a gift, choosing colors that reflect the recipient’s favorite color or that represent an important event can also be a thoughtful touch.
Pattern: Prints, solids, and stripes are all great options for a triangle quilt. Look for fabrics that have a small to medium scale pattern that will work with the size of the triangles. Make sure the fabric has enough contrast to make the triangles easier to see.
Texture: Texture can add an interesting dimension to a triangle quilt. For example, using velvet, corduroy, faux fur, or even minky can add a touch of luxury. Make sure the texture of the fabric doesn’t overwhelm the quilt design.
Finding the right fabric for a triangle quilt is the key to making a unique quilt that you’ll love for years to come. With a little bit of planning and creativity, you can create a quilt that will be cherished for a lifetime.
What is the best way to piece together the triangle quilt blocks?
1. Lay out the quilt blocks. Place the triangle blocks on a flat surface and arrange them in the desired pattern. Make sure the points of the triangles fit together and line up correctly.
2. Sew the triangles together. Starting with the first two triangles, line up the edges and sew them together using a ¼ inch seam allowance. Continue sewing the triangles together in the same pattern, until all the triangles are sewn together.
3. Press the seams. After the triangles are sewn together, press the seams open to flatten the quilt block.
4. Sew the quilt blocks together. Place two quilt blocks together, lining up the seams and pin in place. Sew the two blocks together using a ¼ inch seam allowance. Continue to sew the quilt blocks together until all the blocks are sewn together into the desired pattern.
5. Press the seams. After the quilt blocks are sewn together, press the seams open to flatten the quilt top.
6. Add the sashing. If desired, add sashing between the quilt blocks. The sashing strips should be cut wider than the seam allowance, typically around ¼ of an inch wider. Sew the sashing strip to the quilt block using a ¼ inch seam allowance.
7. Quilt as desired. After the quilt top is complete, quilt it as desired. This can be done by hand or with a sewing machine.
By following these steps, you should be able to piece together triangle quilt blocks to create a unique quilt top.
How do I finish my triangle quilt?
Once the quilt top is complete, you will need to layer the quilt with batting, backing fabric, and basting spray. Once the layers are in place, it is time to quilt the top. There are many ways to quilt a triangle quilt. It is possible to quilt straight lines, echo quilting, or add a motif to the quilt.
Once the quilting is finished, it is time to add the binding. Measure the quilt and cut strips of binding fabric 2.5 inches wide. Sew the strips together at a 45-degree angle, creating one long strip. Attach the binding to the edge of the quilt by folding in half and stitching it in place.
Finally, trim the excess batting and backing fabric and finish the quilt edges with a zigzag stitch. The triangle quilt is now ready to be admired and used!
Frequently Asked Questions
What types of supplies do I need to quilt triangles?
- Fabric – You will need fabric for the top, batting, and backing of the quilt.
- Thread – Matching thread for topstitching and quilting will be needed.
- Rotary Cutter – You will need a rotary cutter to cut the triangles.
- Ruler – A ruler for measuring and cutting will be necessary.
- Sewing Machine – You will need a sewing machine to stitch the pieces together.
- Pins – Pins will be needed to hold the pieces in place while sewing.
- Iron – An iron is needed to press the fabric before and after sewing.
Can I quilt triangles using a sewing machine?
- Choose the right fabric type: Choose a fabric that is suitable for quilting. Cotton, linen and muslin are good choices.
- Cut the triangles: Measure and cut the fabric into triangles using a rotary cutter, ruler and cutting mat.
- Set up the sewing machine: Set up the sewing machine with a walking foot attachment, and select a size and color of thread to match your fabric.
- Sew the triangles together: With the right sides of the fabric together, sew the triangles together with a ¼ inch seam allowance. Make sure that the seams line up correctly.
- Press the seams: Press the seams open and then press the quilt top flat.
- Layer the quilt: Layer the quilt top, batting and backing, and pin or baste them together.
- Quilt the triangles: Using a walking foot, quilt the triangles in a pattern of your choice. Stitch in the ditch, or straight line quilting, works well.
- Bind the quilt: Bind the quilt using a binding strip of fabric.
Yes, you can quilt triangles using a sewing machine. Just make sure to follow the steps outlined above to ensure a successful project.
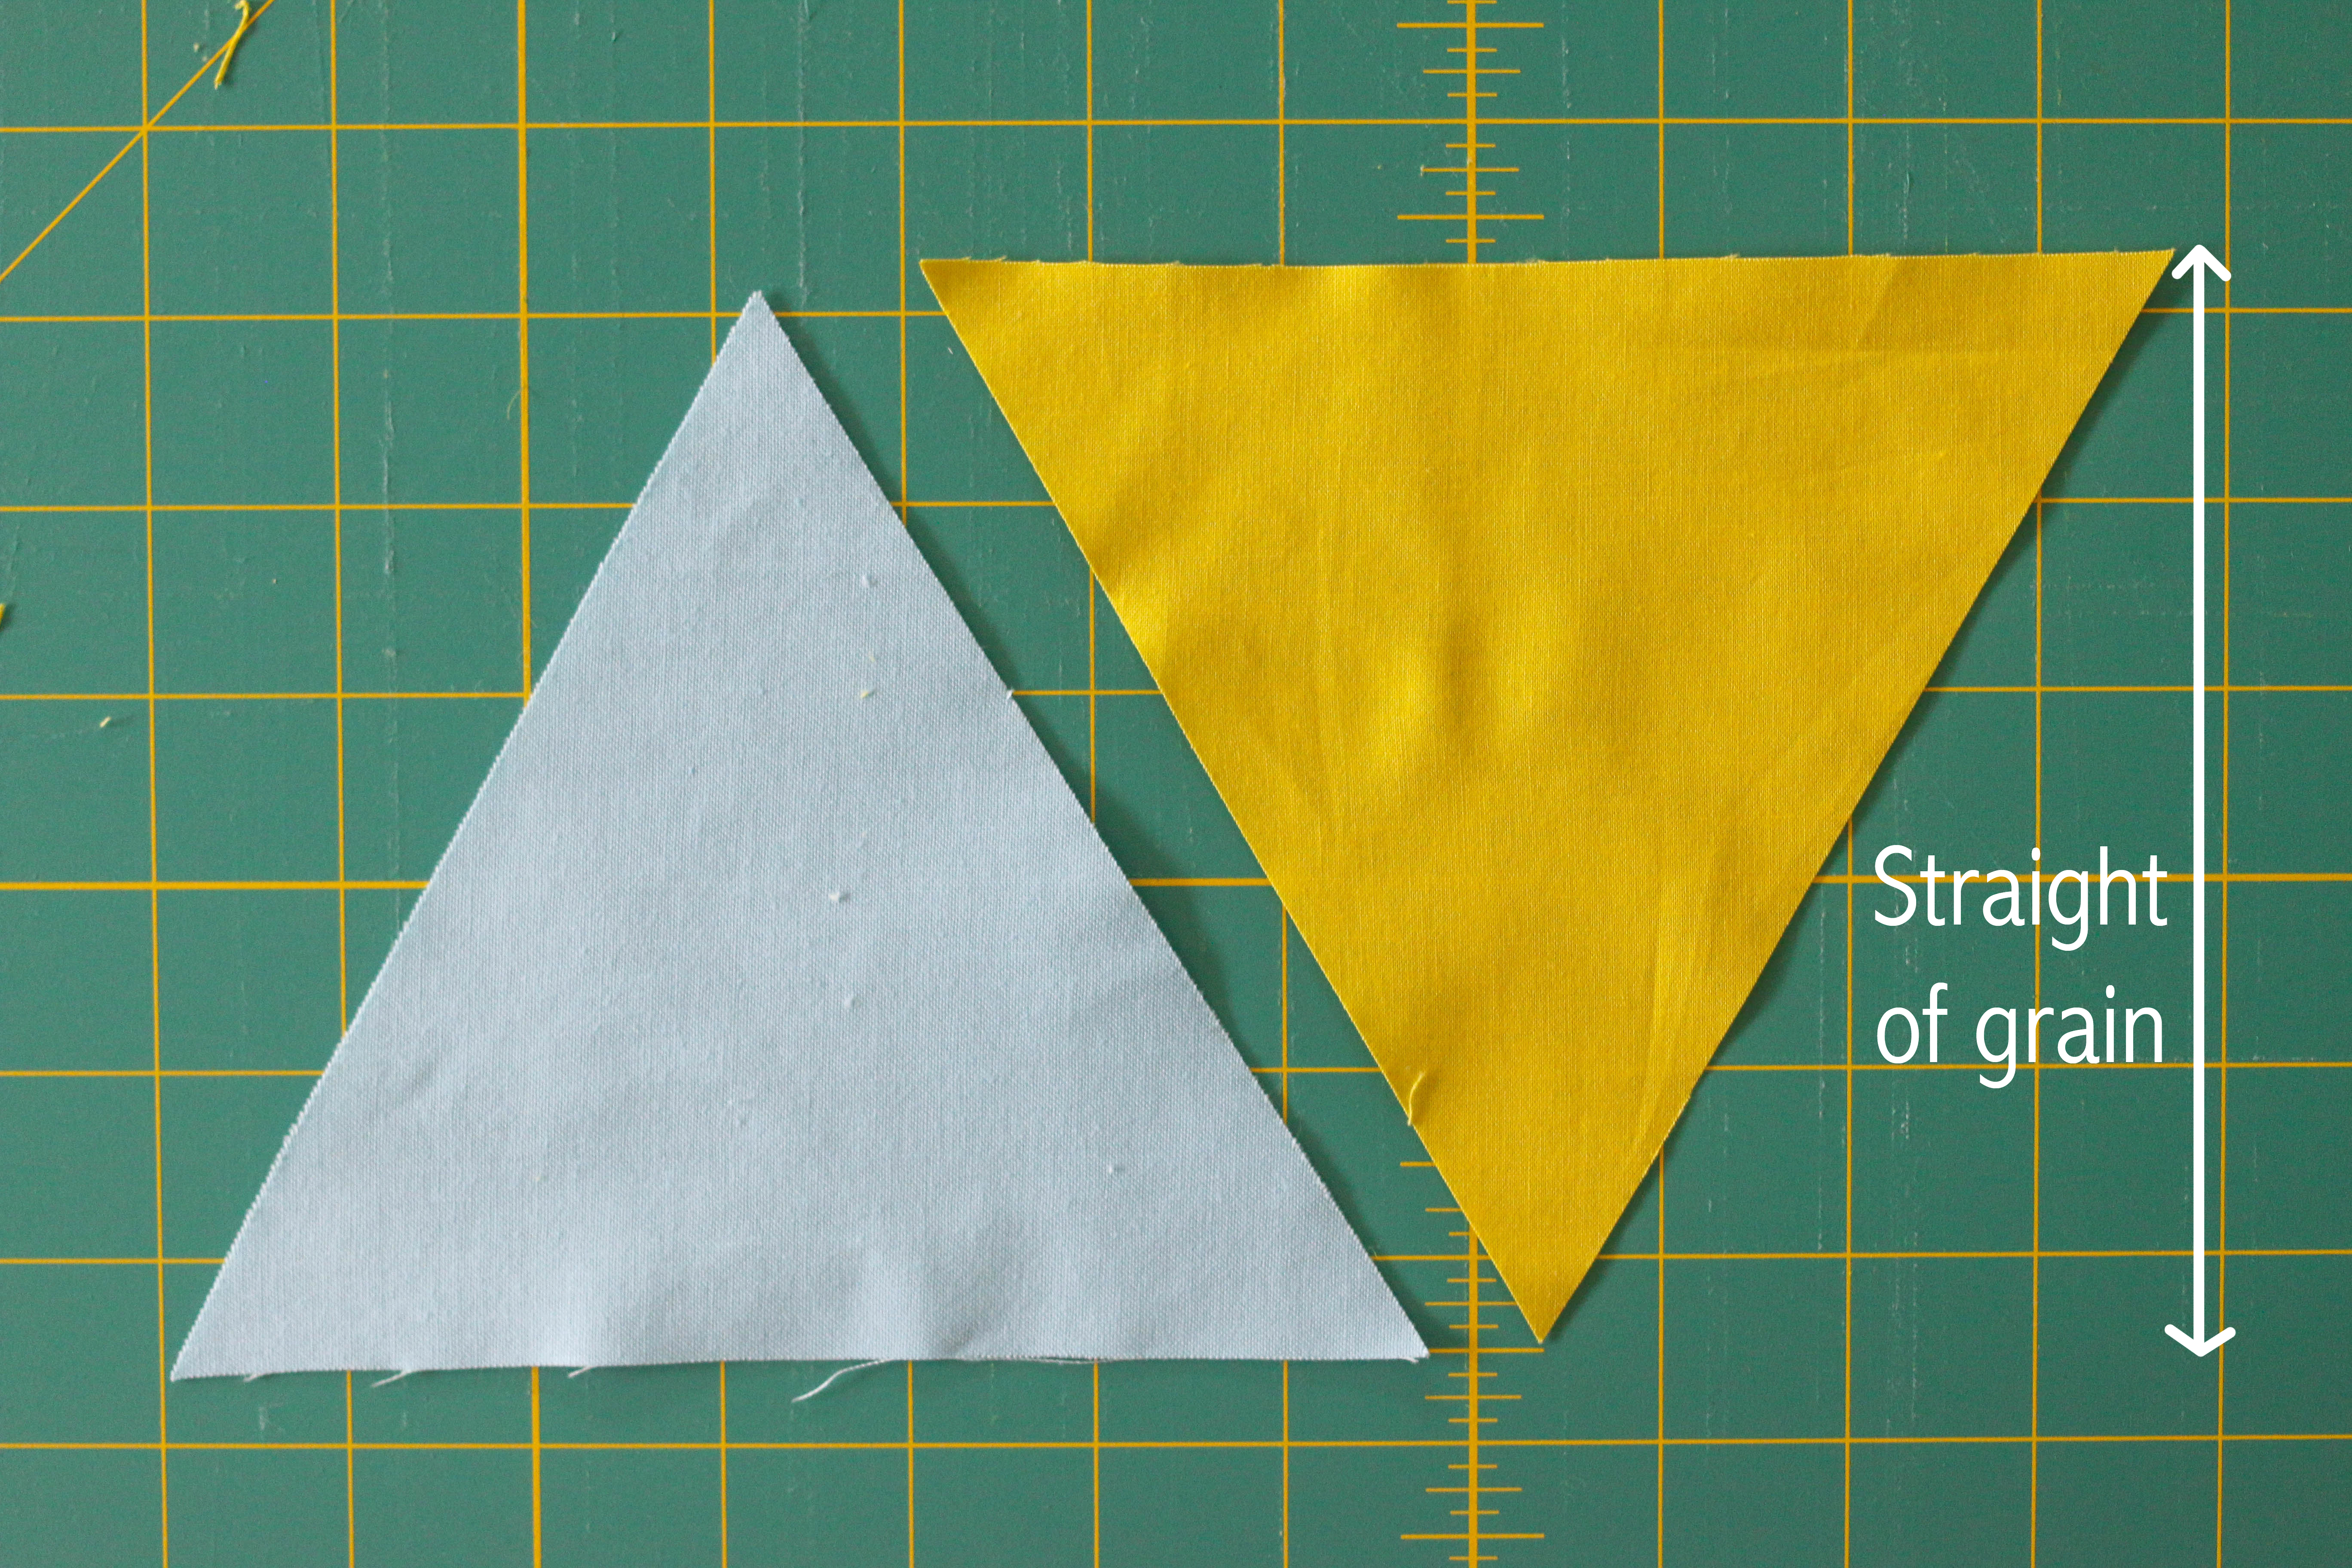
How do I determine the size of the triangles I want to quilt?
Measurement
- Measure the quilt top or project you are quilting to determine the size of the triangles needed.
- If the quilt or project is already finished, measure the size of the finished block.
- Consider the size of your quilting machine, as larger triangles may not fit.
Designs
- Decide if you want to make equilateral, isosceles, or right triangles.
- Choose a size that works with the design of the quilt or project.
- Choose a size that will accommodate the quilting machine.
Fabric
- Select a triangle size that will fit on the fabric.
- Choose the triangle size that will minimize fabric waste.
- Choose a size that will accommodate the quilting machine.
What are some creative ways to quilt triangles?
1. Traditional Triangle Quilt – This classic quilt pattern is made up of right-angled triangles, creating an attractive and timeless quilt.
2. Diamonds in the Sky – Use a combination of equilateral triangles and half-square triangles to create a quilt that has a 3D effect.
3. Drunkard’s Path – Create a quilt that looks like a winding river by sewing together curved triangles.
4. Triangle Stars – Combine equilateral triangles to create star-shaped patterns.
5. Chevron Quilt – This modern quilt pattern is made up of a series of equilateral triangles with alternating colors.
6. Flying Geese – Sew together right-angled triangles to create a quilt with a “flying geese” pattern.
7. Triangles and Squares – Combine triangles and squares to create a quilt with a unique look.
8. Triangle Blocks – Create a quilt with unique shaped blocks by combining triangles and other shapes such as circles and rectangles.
What are some tips for quilting triangles accurately?
- Use a rotary cutter – this is the best way to ensure you get straight cut edges on your triangles.
- Trace and cut – make a template for your triangles and trace them onto your fabric before cutting. This will ensure that all your triangles are the same size and shape.
- Use a seam guide – using a seam guide when piecing triangles together will ensure the seam allowance is even.
- Press seams open – when piecing triangles together, press the seams open rather than to one side. This will help your triangles lay flat.
- Test fit – once you have sewn your triangles together, test fit them before quilting to make sure they fit correctly.
- Use a spray adhesive – use a spray adhesive to secure your fabric to the batting and backing to keep it in place while you quilt.
- Mark your quilting lines – use a washable marker to mark your quilting lines on your triangles. This will help ensure that you stay on track and keep your quilting lines consistent.
- Go slow – quilting triangles can be tricky so take your time and go slow. This will help ensure that you don’t make any mistakes.
Conclusion
Quilting triangles is a fun and creative way to add flair to your quilt projects. When piecing triangles for quilts, it is important to use the correct techniques and tools for the best results. With the right materials and a little practice, you can easily make beautiful quilts that will last for years.
References
- “How to Sew a Triangle Quilt Block.” Craftsy
- “How to Sew Triangles Together.” The Spruce Crafts
- “How to Make a Triangle Quilt Block.” Quilting Daily


