
Are you looking to learn how to sandwich a quilt for a professional finish? Quilting is a great way to show off your creativity and create something unique. With the right knowledge and some patience, anyone can learn how to sandwich a quilt. This guide will provide the steps you need to take from start to finish to create a quilt with a professional finish. Follow these steps to ensure a perfect quilt sandwich every time.
Materials Needed
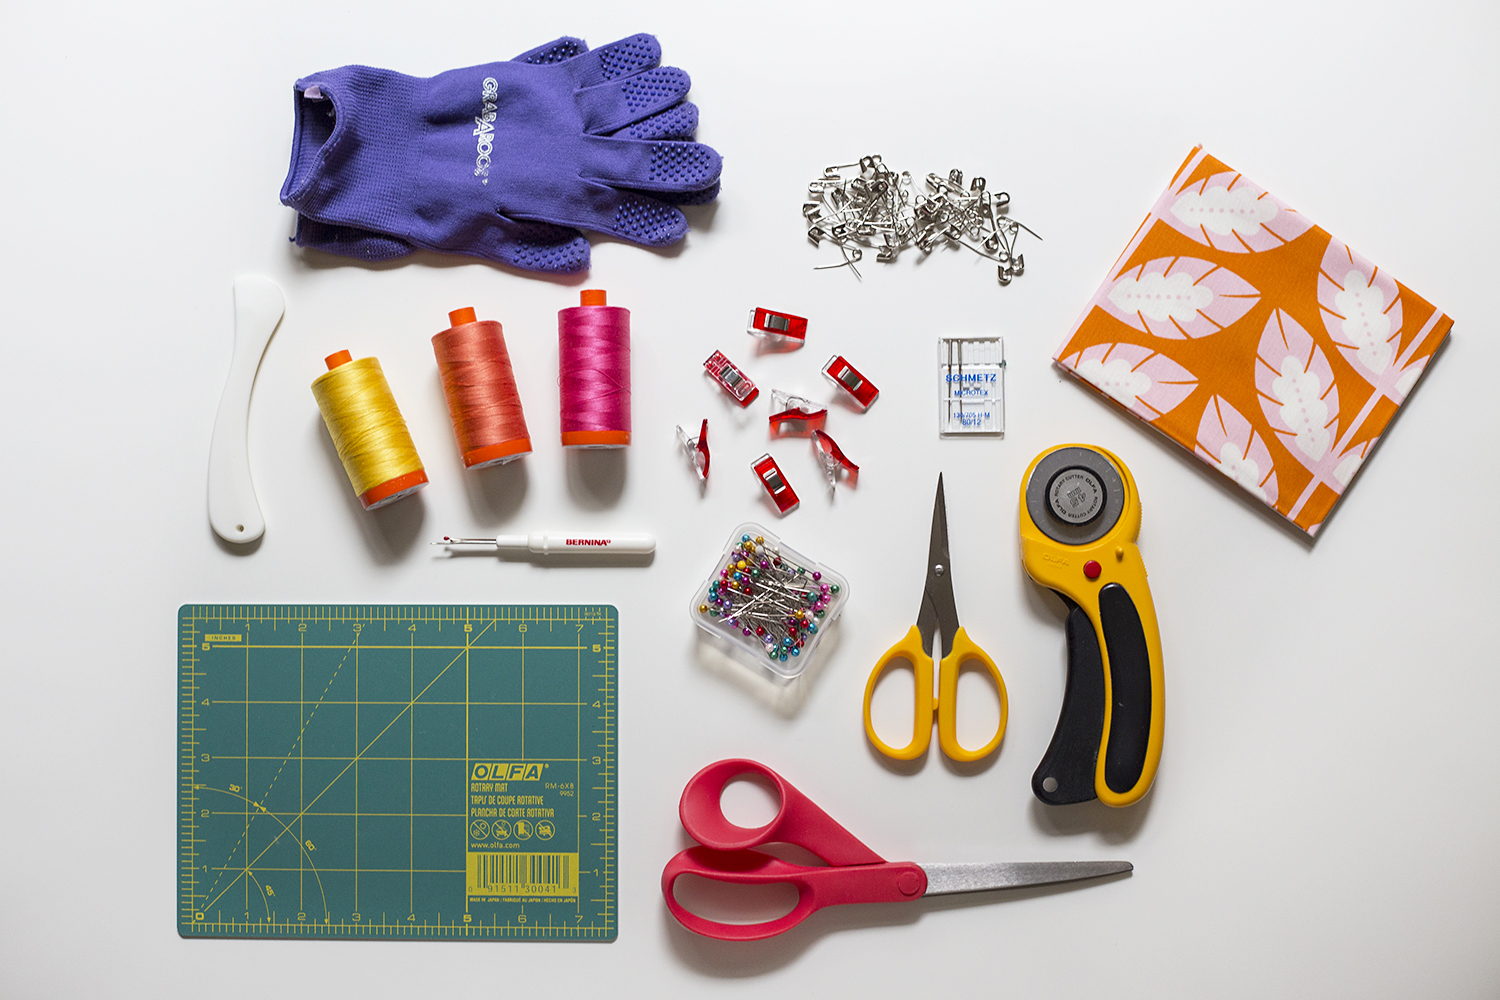
- 3 Yards of Cotton Fabric – for the top, middle, and bottom of the quilt.
- Cotton Batting – to fill the quilt with warmth.
- Thread – to piece the quilt together.
- Scissors – to cut the fabric into the desired shapes.
- Pins – to hold pieces together while sewing.
- Sewing Machine – to stitch the quilt sandwich together.
These are all the material needed to make a quilt sandwich.
Preparation
Gather the necessary materials: You will need a quilt top, batting, backing fabric, quilting thread, and a large flat surface. Make sure your quilt top and backing fabrics are larger than the batting by at least 6-8 inches on each side.
Lay out the backing fabric: Place the backing fabric face down on the flat surface and smooth it out. The backing fabric should be slightly larger than the batting.
Layer the batting: Center the batting on top of the backing fabric, and smooth out any wrinkles. Make sure the batting is flat and the edges are even with the backing fabric.
Lay out the quilt top: Place the quilt top on top of the batting, face up. Smooth out any wrinkles and make sure the edges are even with the batting.
Check for accuracy: Once you have your quilt layers in place, double-check that the quilt top, batting, and backing fabric are all aligned. This is an important step for a successful quilt sandwich, so take your time and get it right.
Now that you have all of your layers in place, you’re ready to begin sandwiching your quilt. This how to sandwich quilt tutorial for beginners will guide you through the process.
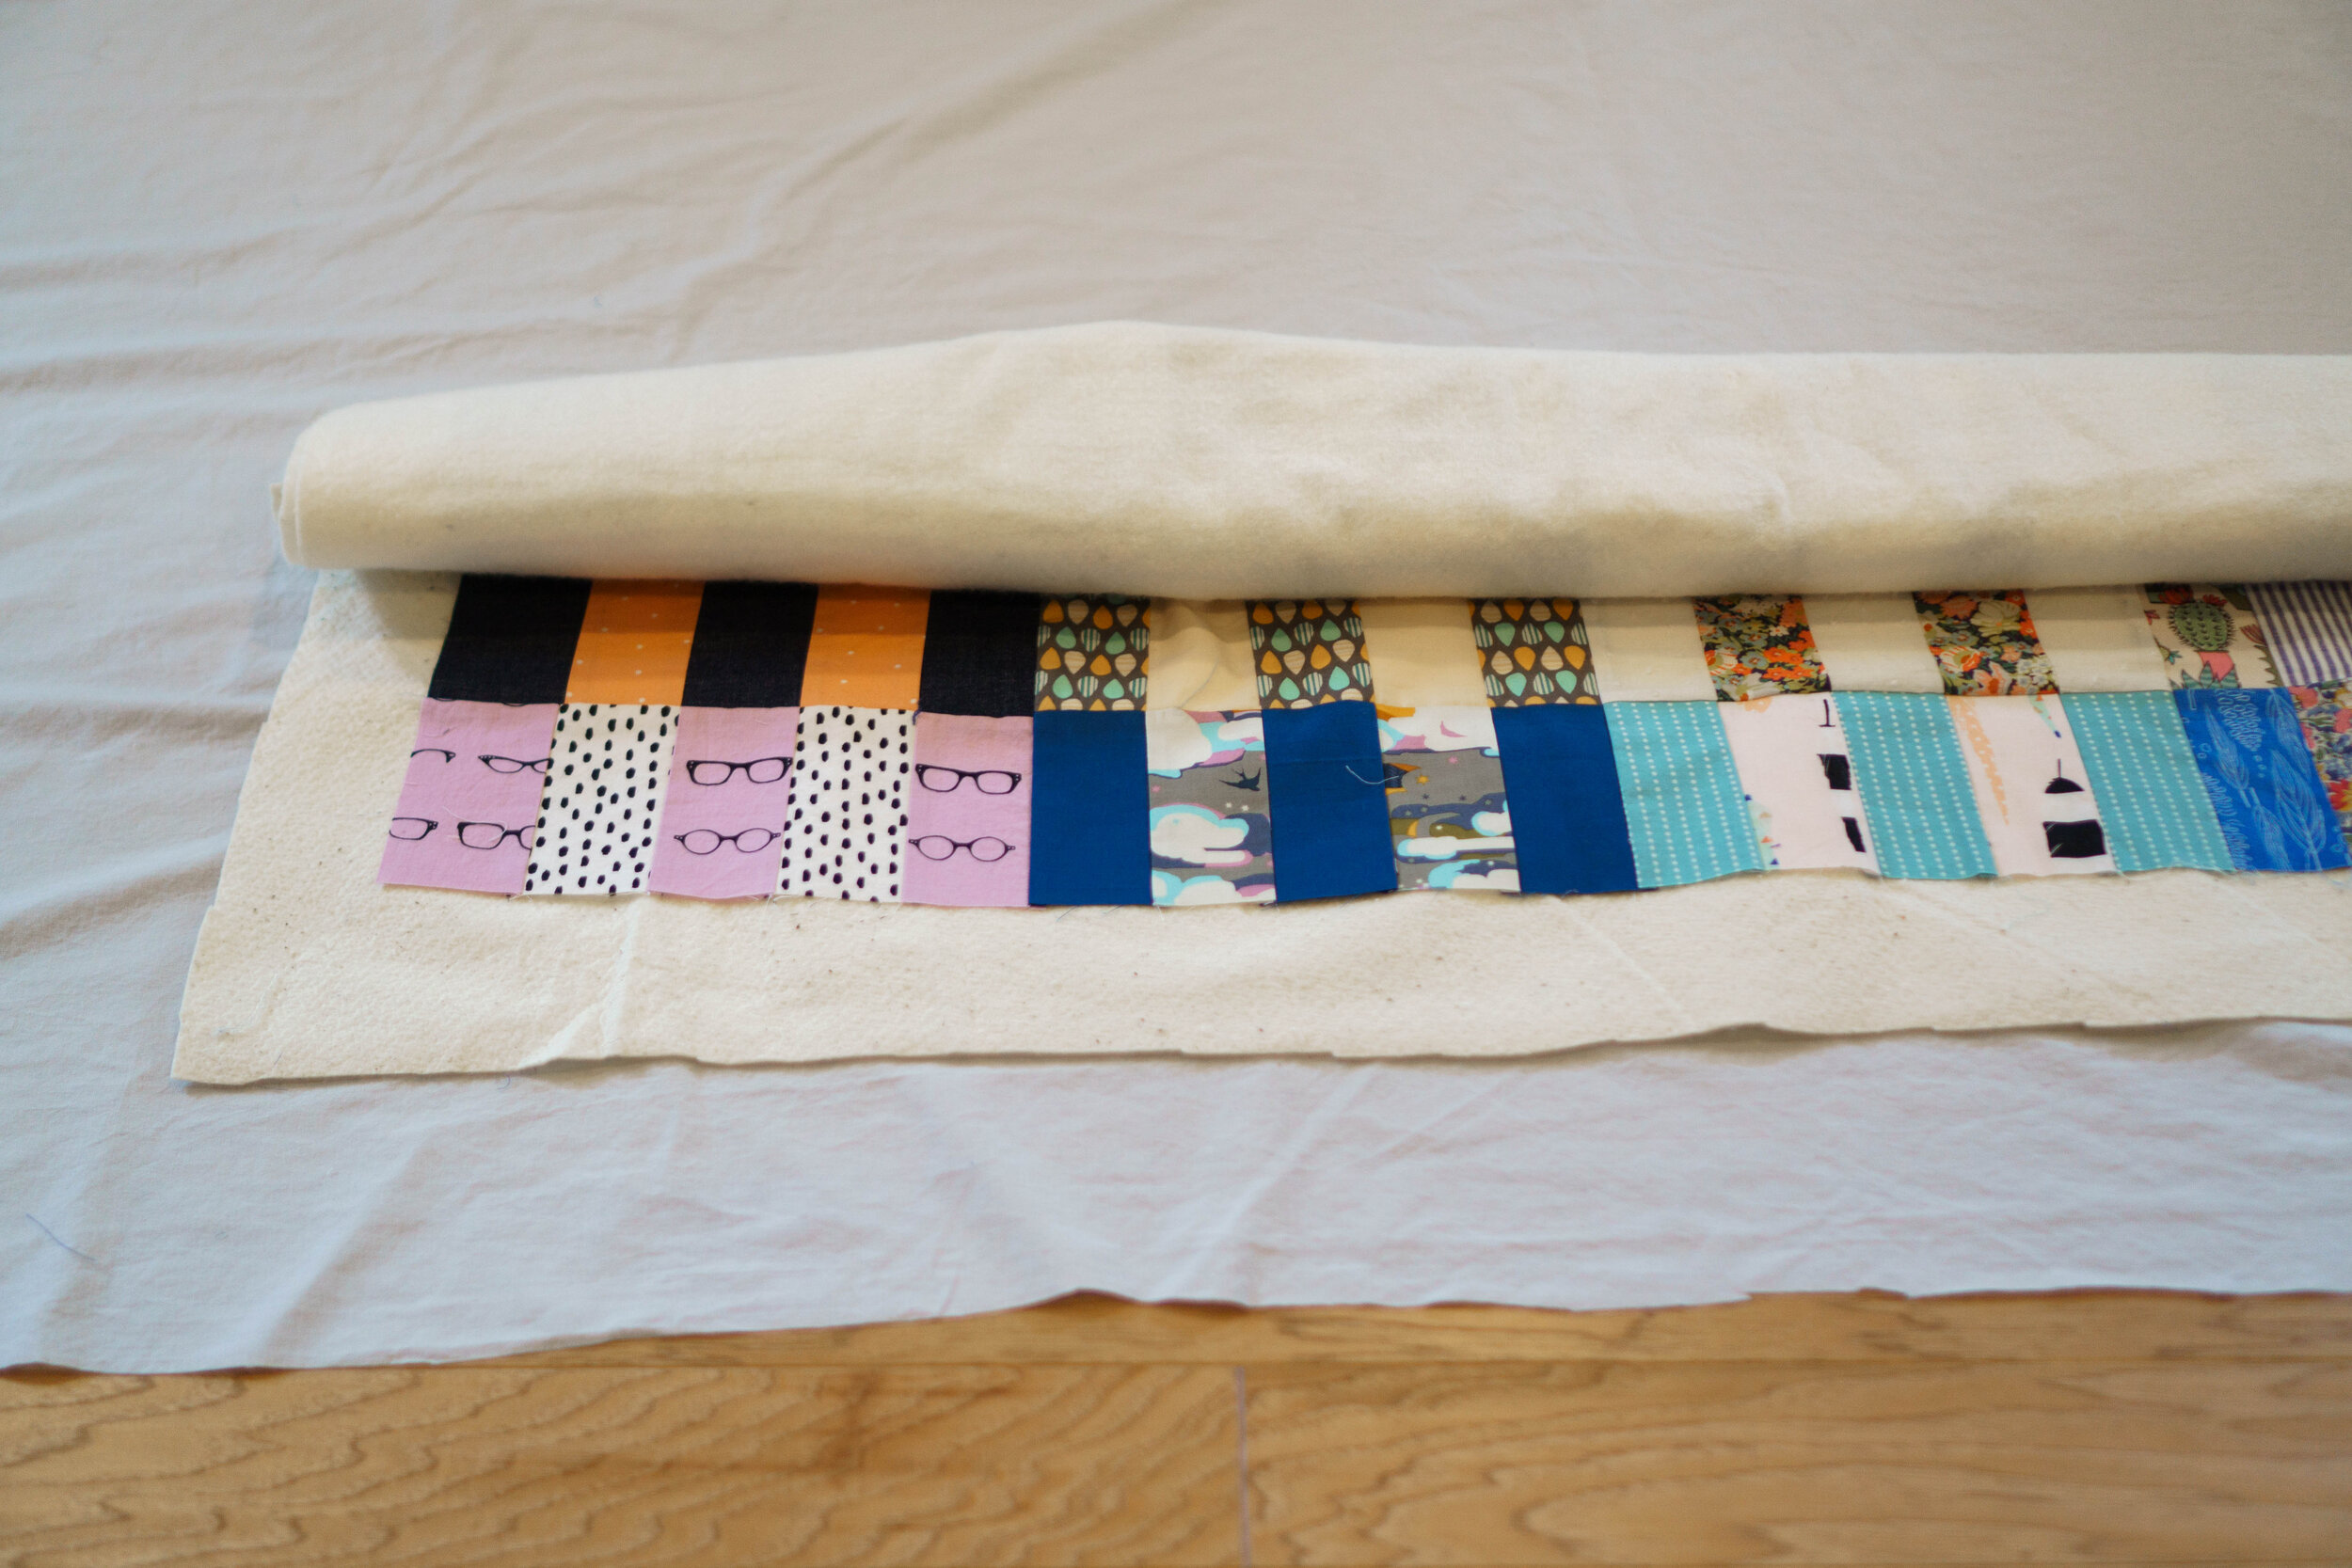
Step 1: Layering the Quilt
- Prepare the quilt backing, batting and top fabric.
- Cut the backing and batting slightly larger than the top fabric.
- Lay the backing fabric on a flat surface with the wrong side up.
- Smooth out the backing fabric.
- Place the batting on top of the backing fabric.
- Smooth out the batting.
- Place the top fabric on top of the batting with the right side up.
- Smooth out the top fabric.
The first step to making a quilt sandwich is layering the quilt. Begin by preparing the quilt backing, batting and top fabric. Cut the backing and batting slightly larger than the top fabric. Once the materials are ready, lay the backing fabric on a flat surface with the wrong side up. Smooth out the backing fabric. Place the batting on top of the backing fabric and smooth it out. Place the top fabric on top of the batting with the right side up and smooth it out.
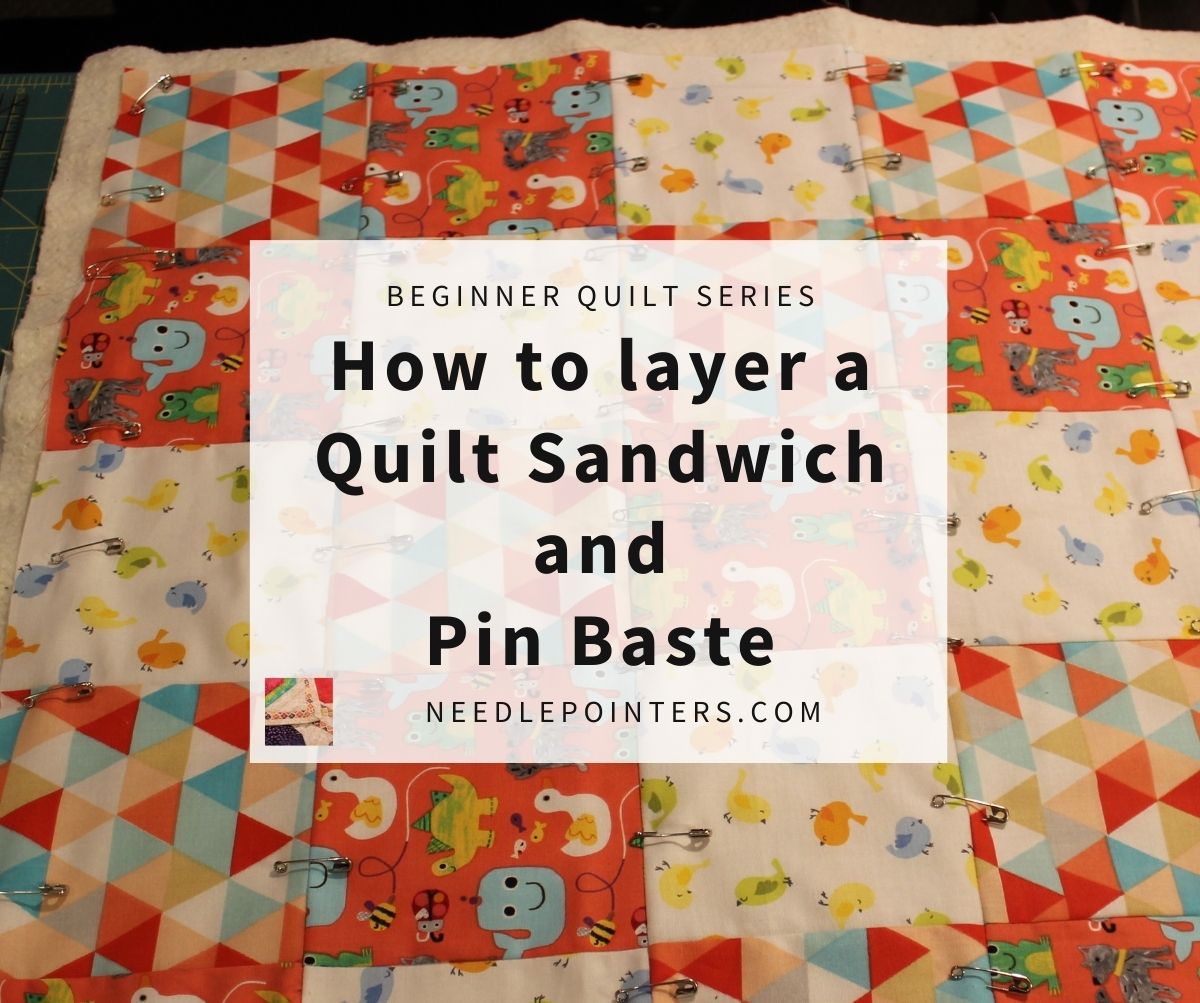
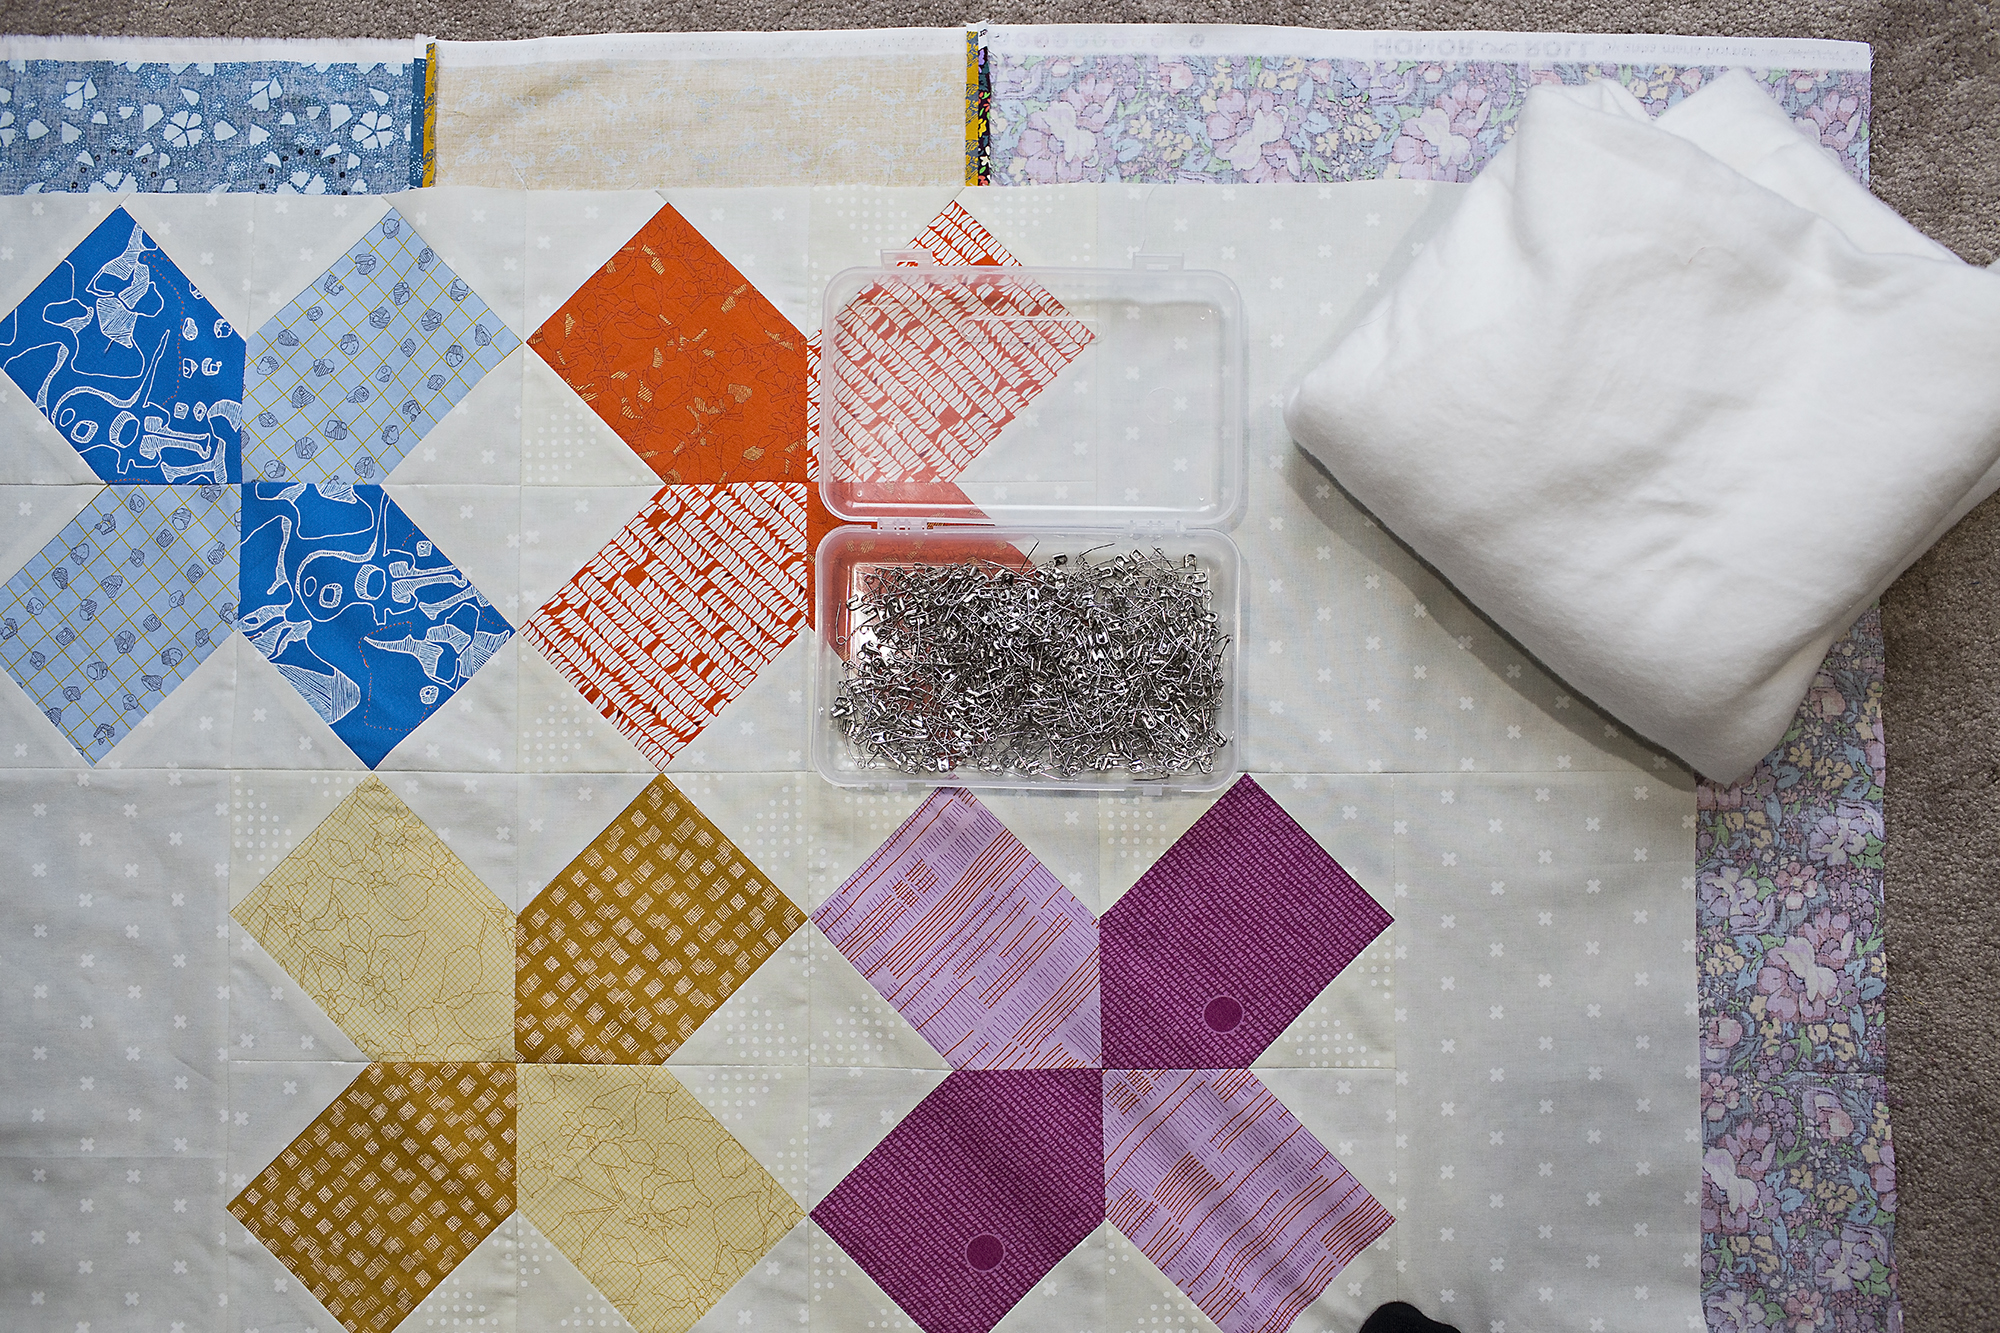
Step 2: Securing the Layers
The second step in making a quilt sandwich is to secure the layers. This is done by basting the layers together. Basting is a temporary stitching that holds the quilt layers in place. It is important to baste the quilt layers together to prevent shifting when quilting.
Begin by laying out the backing fabric on a flat surface. Place the batting on top of the backing fabric. Finally, place the quilt top on the batting. Pin the layers together in several places to keep them from slipping.
Now it is time to baste the layers together. You can use either safety pins or basting thread to baste the quilt. If you use safety pins, insert them into the layers every few inches. If you use thread, hand stitch the quilt layers together with large running stitches.
Once you have basted the layers together, you are ready to move on to Step 3 of how to sandwich a quilt.
Step 3: Adding the Batting
- Put the backing fabric wrong-side-up on the floor.
- Lay the batting on top of the backing fabric.
- Smooth the batting out, making sure that it is not wrinkled or bunched.
- Trim the batting if it is too large for the backing.
- Pin the batting to the backing fabric at regular intervals, about every 8 to 10 inches.
Once the batting has been added, your quilt sandwich is complete. If you are quilting on the floor, you can now begin to quilt. If you are quilting on a machine, you will need to baste the quilt sandwich together before quilting.
Step 4: Securing the Batting
- Lay the batting on the quilt’s backing fabric, making sure the backing fabric is slightly bigger than the batting.
- Pin the batting to the backing fabric, using safety pins and spacing them every 6-8 inches.
- Trim the batting if necessary. If the batting is made of polyester, use a rotary cutter to trim it to size.
Once you’ve laid, pinned, and trimmed the batting, you have successfully sandwiched your quilt!
Step 5: Adding the Backing
- Cut the backing fabric – measure the quilt top and add 3” all the way around for seam allowance. Cut the backing fabric accordingly.
- Assemble the backing – if the backing fabric is too small, you can piece the fabric together. Join the seams using 1/4” seam allowance.
- Press the seams – press the seams open to prevent bulk in the backing.
- Layer the backing – place the backing fabric on a flat surface, right side facing down. Center the batting on top of the backing, followed by the quilt top.
- Baste the quilt – use safety pins or quilting clips to secure the layers in place. Make sure to baste each layer evenly.
- Quilt the layers – stitch in the ditch, quilt by hand or machine, or use a walking foot to add texture.
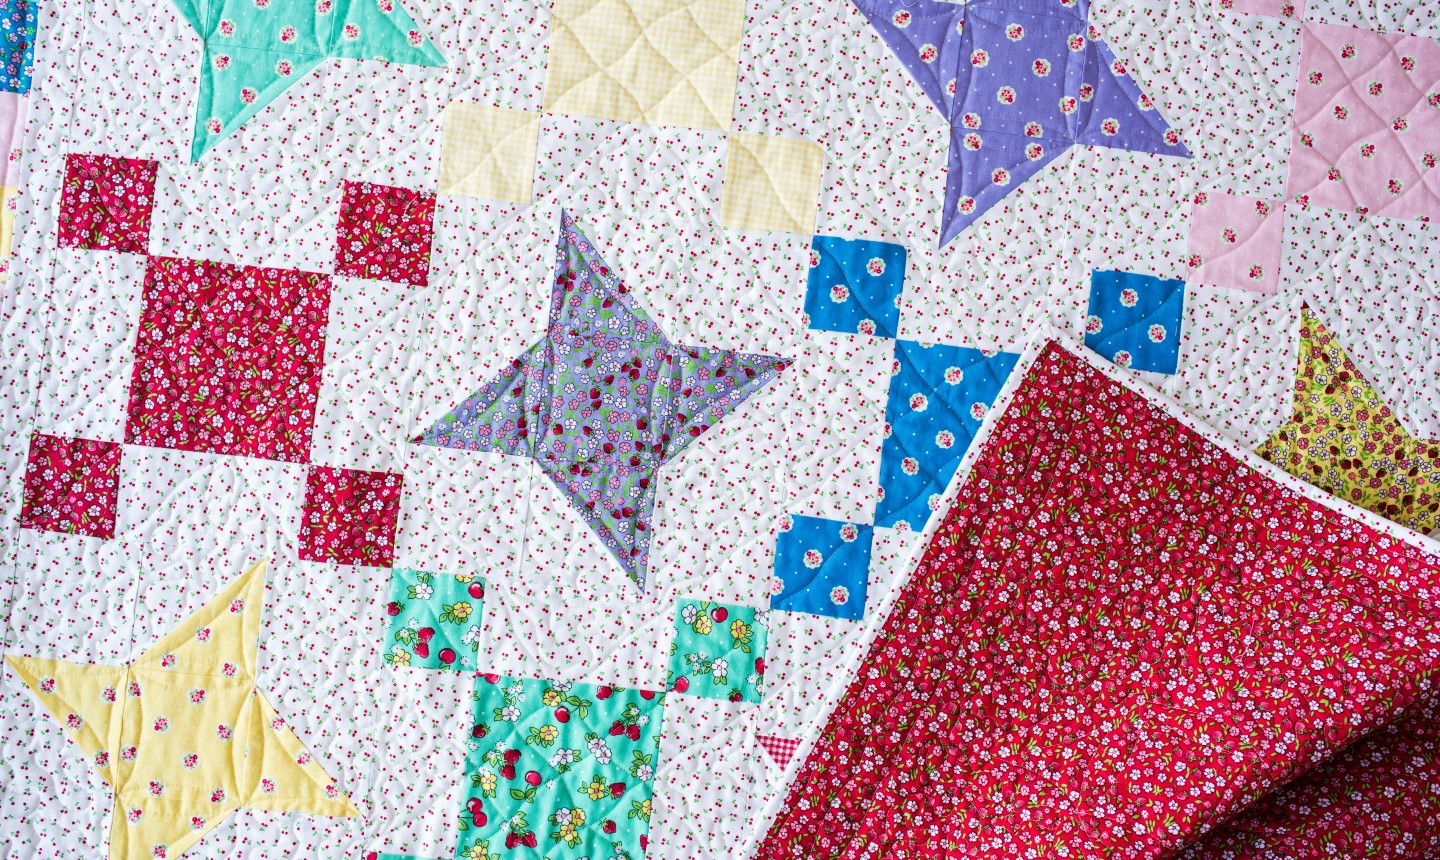
Step 6: Finishing the Quilt
Next, trim the batting and backing fabric so that it is the same size as the quilt top. Be sure to use sharp scissors for this step.
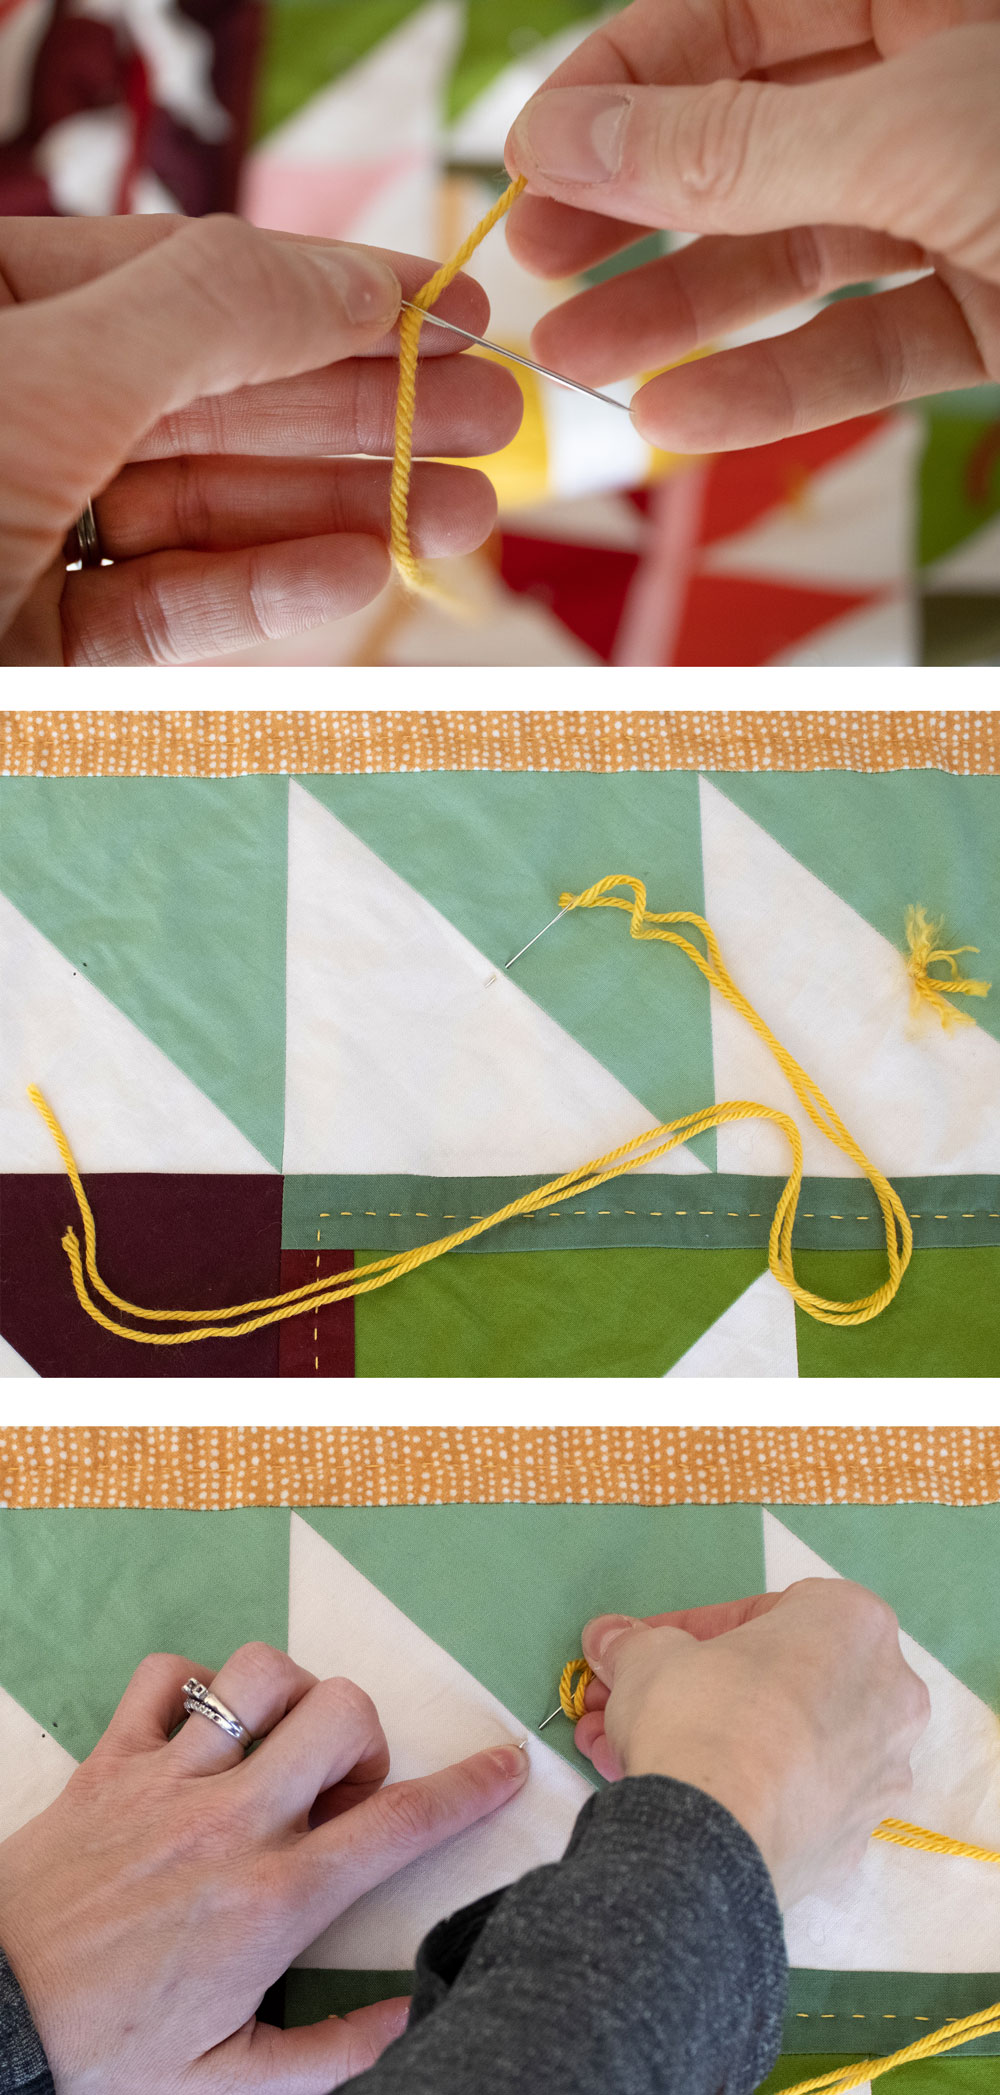
Secure the three layers of the quilt sandwich together by quilting it. This can be done by hand or machine. Hand quilting is done by sewing a running stitch in a pattern or design of your choice. Machine quilting is done by stitching in the ditch, free motion quilting, or edge to edge quilting.
Once the quilting is finished, trim the excess batting and backing fabric to the same size as the quilt top.
Finally, bind the quilt. Binding is the finishing touch that will secure all the layers of the quilt together. You can make your own binding or purchase pre-made binding. To attach the binding, fold one end of the binding strip in half and place it at one corner of the quilt. Sew the binding to the quilt, starting at the corner and working your way around the quilt. When you reach the end, overlap the binding and secure it.
Your quilt sandwich is now finished and ready to be used. Enjoy!
Frequently Asked Questions
What type of batting should be used for quilt sandwiching?
The batting used in quilt sandwiching should be synthetic or natural. Synthetic batting is usually made of polyester or cotton and is lightweight. Natural batting is usually made of wool, cotton, or bamboo, and is heavier and more expensive. Low-loft batting is recommended for quilt sandwiching as it is easier to quilt and looks better in the finished product.
Is there a specific size of quilt that should be used for sandwiching?
No, there is no specific size of quilt that needs to be used for sandwiching. However, it is important to use a quilt that is large enough to accommodate the batting and backing layers. The quilt should also be large enough to allow for a 2-3 inch border to be added around the edges.
Do I need to use a specific type of thread for quilt sandwiching?
- Cotton thread is the most recommended and commonly used thread for quilt sandwiching. It is strong and durable, and produces a quality stitch.
- Polyester thread is another option for quilt sandwiching. It is strong and can withstand higher temperatures when pressing. It also doesn’t shrink when washed.
- Nylon thread is a good choice for quilting projects because it is strong and lightweight. It is also less likely to break or become tangled.
- Fusible thread is a special type of thread that is used to create a temporary bond between two pieces of fabric. It is not recommended for use in quilt sandwiching.
In conclusion, cotton thread is the best choice for quilt sandwiching. It is strong, durable, and produces a quality stitch. Polyester and nylon threads are also good choices, but they may not be as strong as cotton thread. Fusible thread should be avoided as it is not designed for quilt sandwiching.
How often should I use a Walking Foot while Sandwiching a Quilt?
Always. A walking foot will help to evenly distribute the layers of your quilt sandwich and prevent shifting, puckering, and other unevenness.
- When basting the quilt layers together, use a walking foot to ensure the layers stay in place.
- When quilting, use a walking foot to prevent the quilt layers from shifting.
- When attaching the binding, use a walking foot to help keep the binding straight and even.
In summary, a walking foot should be used whenever sandwiching and quilting the quilt to ensure even layers and a professional finish.
What type of fabric should I use for the backing of a quilt sandwich?
The backing of a quilt sandwich should be a fabric that is at least 4-5 inches larger than the top and batting combined. It should also be a durable, tightly woven fabric that is able to withstand wear and tear. Cotton or flannel are common choices, but other fabrics such as polyester, canvas, or muslin can also be used. Consider the size and weight of the quilt when selecting a fabric; heavier quilts require a sturdier fabric that won’t stretch or tear.
Conclusion
Sandwiching is a crucial part of quiltmaking that can be done in a few easy steps. Layering your three pieces of fabric and batting correctly, pinning, and quilting can all be done with minimal effort for a professional-looking finish. With the right tools and techniques, anyone can make a beautiful quilt.


