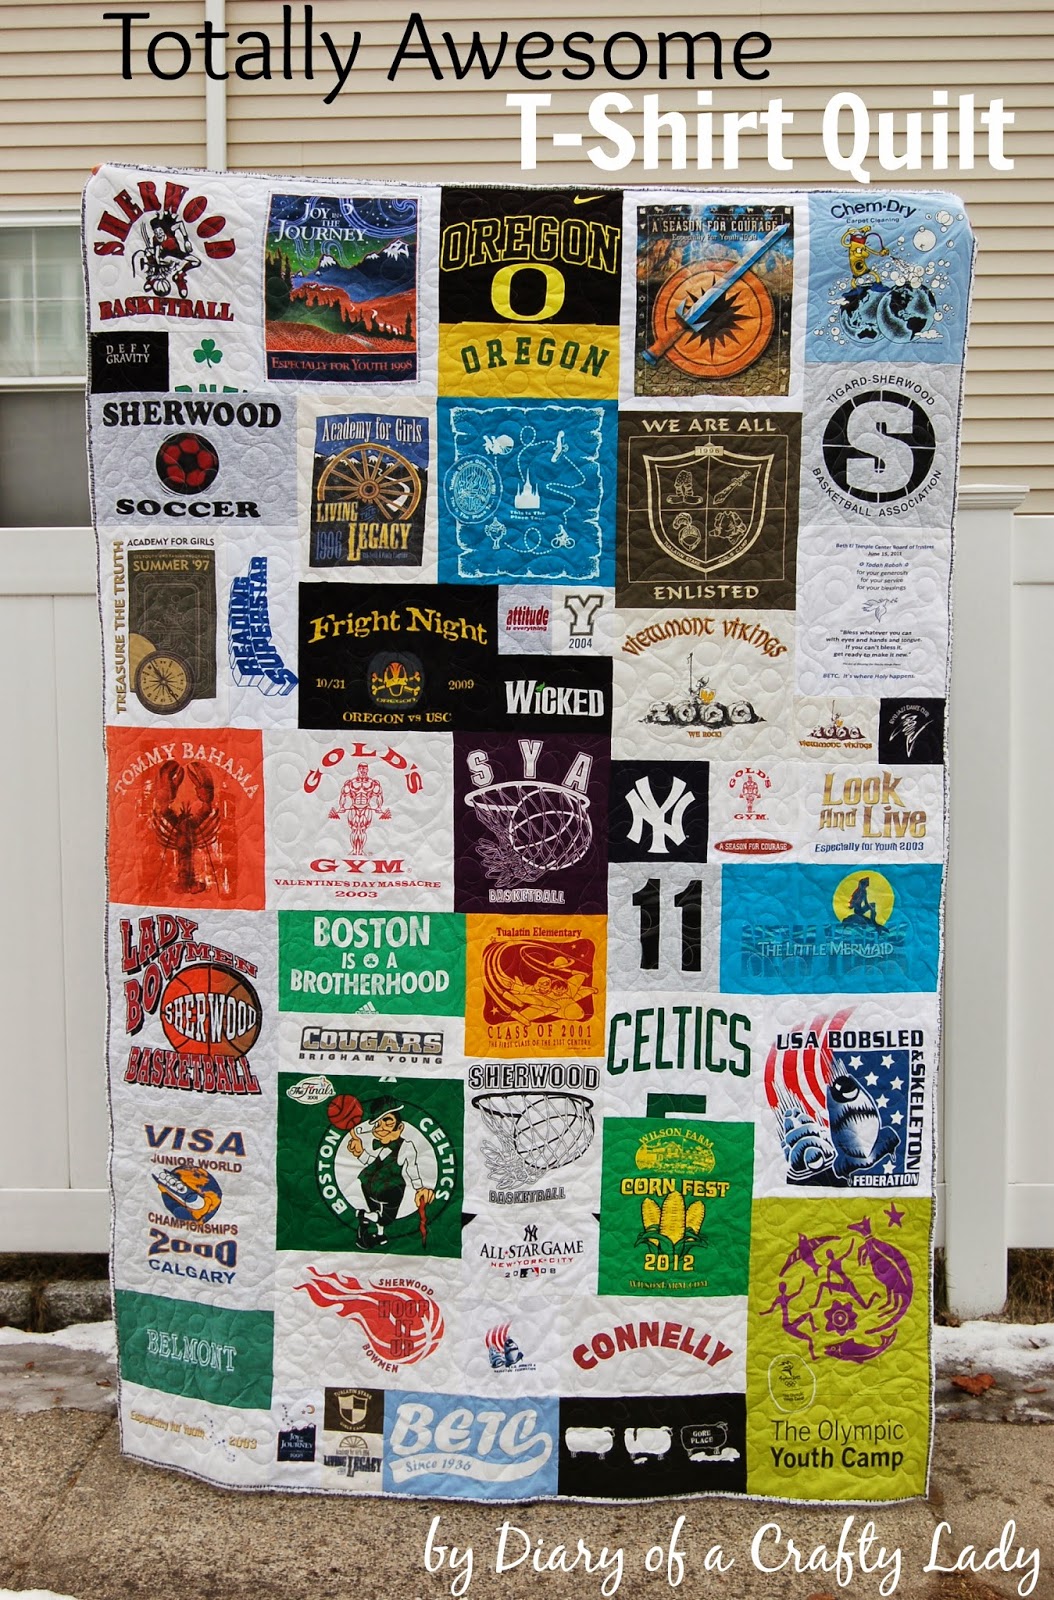
Are you looking for an easy guide on how to finish a t-shirt quilt? If yes, then you’ve come to the right place! This article will provide you with a step-by-step guide on how to finish your t-shirt quilt, so you can proudly display your creation. We’ll cover everything from selecting your t-shirts, laying out the blocks, and quilting the quilt, to binding the edges and adding labels. So, let’s get started and learn how to finish a t-shirt quilt!
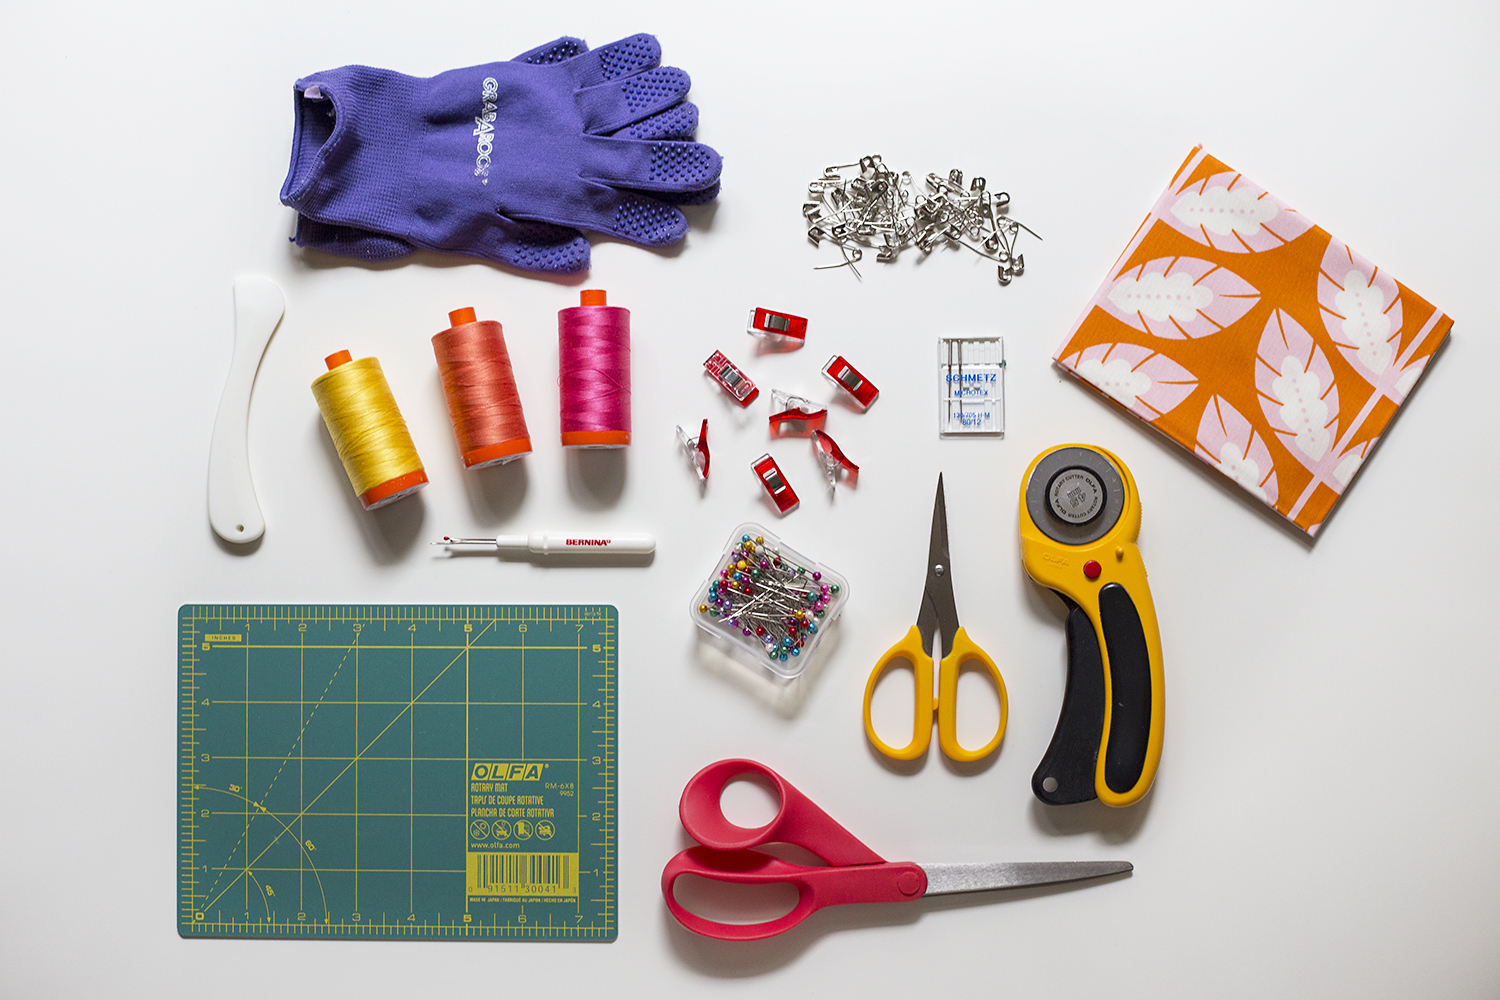
Materials Needed
T-shirts: You’ll need at least 12 t-shirts for a twin-sized quilt.
Fabric for border and backing: Choose a fabric to use as a border and/or backing for your quilt.
Batting: You’ll need batting to fill the center of your quilt.
Thread: Choose polyester or cotton thread for piecing and quilting your quilt.
Iron and ironing board: You’ll need an iron and ironing board to press seams and fabric.
Rotary cutter, quilting ruler and cutting mat: To cut your fabrics accurately, you’ll need a rotary cutter, ruler, and cutting mat.
Sewing machine: A sewing machine is necessary to piece and quilt the t-shirt quilt.
Safety pins: You’ll need safety pins to baste the quilt layers together.
Pressing cloth: A pressing cloth will help you press your seams accurately.
Scissors: A pair of good scissors will help you trim threads and fabric.
Preparing the Fabrics

Gather the t-shirts that you want to use in your quilt. You may use up to 12 t-shirts for a queen-size quilt.
Wash and dry the t-shirts in the washing machine and dryer, respectively. This will help pre-shrink the t-shirts, which will reduce the chances of shrinkage after the quilt is finished.
Iron the t-shirts if necessary and trim off any worn areas or stains.
Cut the t-shirts into squares, rectangles, or strips that are all the same size. Make sure to leave a 1/4-inch seam allowance on all four sides of each piece.
Iron fusible interfacing onto the wrong side of each piece of fabric to stabilize them and make them easier to sew.
Layer the fabrics onto the batting and backing. The batting and backing should be slightly larger than the t-shirt pieces, to allow for seam allowances. Start with the batting and backing, then add the t-shirt pieces on top.
Pin all the layers together. Use safety pins to secure the layers in place. This will make it easier to sew the quilt together without the layers shifting.
Now you have all the fabrics prepared for your how to make a jersey quilt project.
Quilting the T-Shirt Quilt
Piecing the Top
Start by cutting the T-shirts into squares of the desired size. Arrange the squares in the desired quilt pattern and sew them together into rows. Sew the rows together to complete the top.
Creating the Quilt Sandwich
Lay the backing fabric on a flat surface, right side down. Place the batting on top of the backing. Place the quilt top on top of the batting, right side up.
Quilting
Pin the quilt sandwich together and quilt as desired. This step will hold the layers of the quilt together. For a weighted T-shirt quilt, use an all-over quilting pattern.
Binding
Trim away the excess batting and backing fabric. Attach the binding all around the edges of the quilt, either by machine or hand stitching.
Finish the quilt by washing and drying it to give it a crinkled texture.
Adding Weight to the Quilt
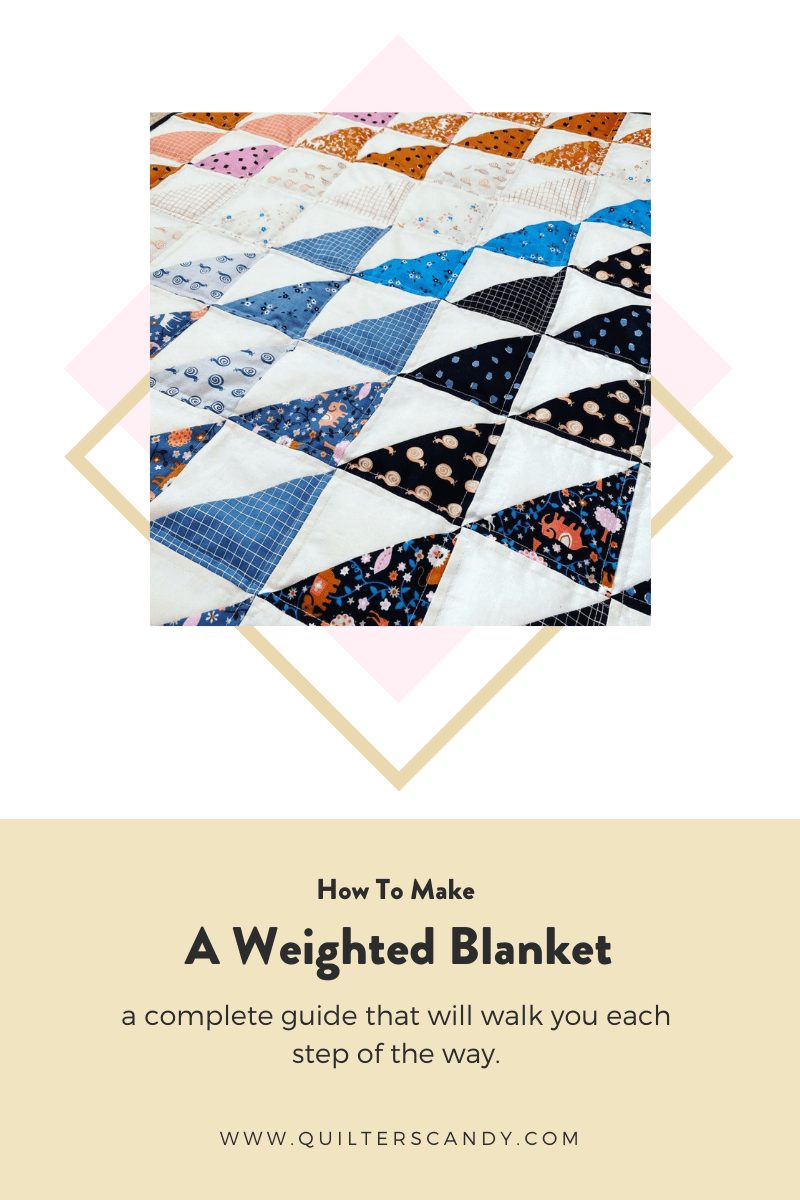
Sewing the Weight
To ensure that your quilt keeps its shape, you need to add weight to the quilt. You can do this by attaching a piece of batting to the back side of the quilt. Start by marking the center of the quilt and then laying the batting over it. Pin the batting to the quilt, making sure that it is centered. Sew the batting to the quilt using a simple running stitch.
Adding the Weight
Once the batting is attached, you can start adding the weight to the quilt. Start by laying the quilt on the floor with the batting side facing up. Place the weights on the batting, making sure that the weights are evenly distributed. Secure the weights in place with a few hand stitches. Once the weights are in place, flip the quilt over and your T-shirt quilt is finished!
Finishing Touches
- Iron the entire quilt on a low heat setting. Make sure to iron the back side as well.
- Bind the edges of the quilt with a binding strip of fabric. Sew the binding strip to the quilt with a sewing machine to finish the edges.
- Add a label to the back side of the quilt. Include the date, your name, and a short message.
- Quilt the entire quilt with a quilting machine and batting.
- Add a backing fabric to the quilt to give it a finished look.
- Finish with a spray of fabric protector to help keep the quilt clean and protected.
Frequently Asked Questions
What kind of Fabric Should I Use for My Quilt?
- Cotton is the most popular fabric to use for quilts, due to its durability and breathability. Cotton quilt fabric is available in a variety of designs, colors, and patterns.
- Linen is another popular choice for quilt fabric. Linen is strong, durable, and wrinkle-resistant, making it a great option for quilt projects.
- Fleece is a great option for quilts that will be used in cold weather. Fleece is warm, lightweight, and soft, making it a great choice for quilt projects.
- Flannel is a lightweight fabric that is perfect for quilts that will be used in cooler climates. Flannel is soft, durable, and easy to care for.
- Silk is a luxurious fabric that is perfect for quilts. Silk is lightweight, soft, and has a beautiful sheen that will make any quilt project look stunning.
How do I choose the layout for my quilt?
- Identify the size of your quilt. Measure the t-shirts and decide how many can fit and what shape you want the quilt to be.
- Choose a pattern. Popular patterns include a grid, alternating blocks, a log cabin, and a pinwheel.
- Visualize your quilt. Sketch out a design on paper or use software to create a computer-generated version of your quilt.
- Add sashing. Use fabric to separate t-shirts.
- Consider borders. Borders can be used to complete the look of your quilt and make it easier to sew.
- Choose batting. Select a batting that is appropriate for the size and shape of your quilt.
- Plan the quilting. This can be done manually or by using a longarm quilting machine.
What size batting should I use?
- Select a batting material that suits your needs – whether it’s natural or synthetic, lightweight or heavy.
-
Choose the correct size for the quilt. There are several standard sizes to choose from:
- Twin: 72″ x 90″
- Full/Double: 81″ x 96″
- Queen: 90″ x 108″
- King: 108″ x 108″
- Allow for shrinkage. Batting can shrink up to 10% when washed, so it is important to buy a size slightly larger than the finished quilt.
How do I sew the shirts together?
- Trace the quilt pattern onto the back of the fabric. Draw the quilt pattern onto the back of the fabric with a fabric pen, or use a quilt pattern template and trace it onto the fabric.
- Cut the fabric accordingly. Use a rotary cutter, ruler, and mat to cut out the pieces of the quilt.
- Lay out the pieces of the quilt, with the right sides facing up. Arrange the pieces according to the quilt pattern.
- Pin the pieces together. Pinning the pieces together helps them stay in place while you sew.
- Sew the pieces together using a straight stitch. Sew the pieces together, starting at one corner and working your way around.
- Trim the excess fabric. Trim the fabric around the seams, leaving about ⅜ inch of fabric.
- Press the seams open. Use an iron to press the seams open, making sure the fabric lays flat.
- Stitch the seams together. Use a zigzag stitch to finish the seams and give the quilt a more professional look.
How do I bind the edges of the quilt?
To bind the edges of a tshirt quilt, use a fabric binding strip cut to 2” wide. Lay the binding strip on the right side of the quilt, lining up the raw edges, and sew it in place with a ¼” seam allowance. Fold the binding strip over to the quilt’s wrong side, encasing the raw edges, and pin it in place. Stitch the binding in place using a ¼” seam allowance. Finish the quilt’s edges by hand-stitching the binding to the back of the quilt.
Conclusion
T-shirt quilts make a great gift for loved ones and a great reminder of the memories embedded in each shirt. By following the easy step-by-step guide, you can easily create a t-shirt quilt that is sure to be treasured for years to come.


