If you’re a quilter who doesn’t have access to a long arm quilting machine, you may be wondering how you can still create beautiful quilts without one. Luckily, there are plenty of tips and tricks to help you quilt without a long arm and still achieve stunning results. In this article, we’ll provide you with everything you need to know about how to quilt without a long arm and get the perfect quilt every time.
Supplies Needed
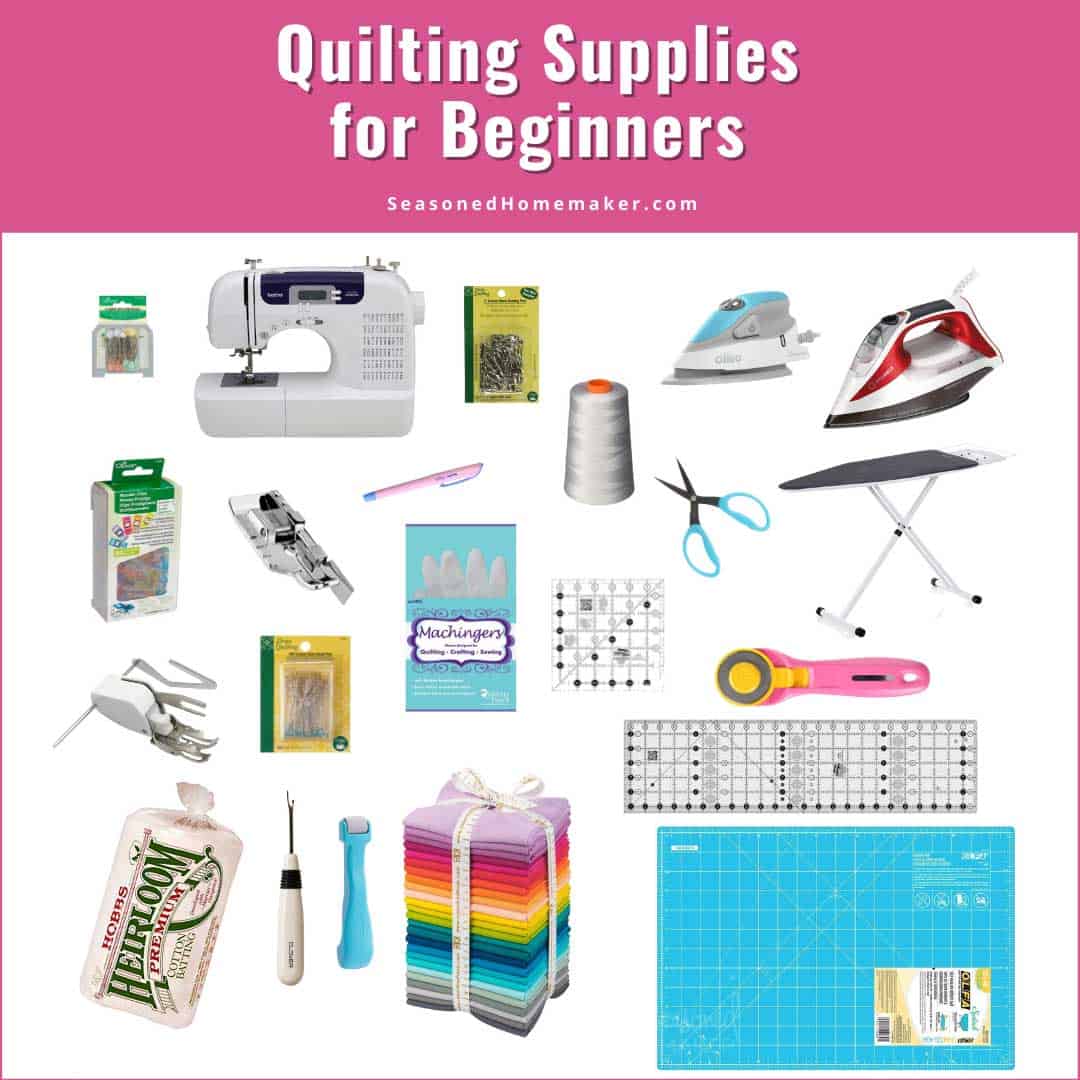
- Fabric: Depending on the size of the quilt, you will need to purchase enough fabric for the top, back, and batting of the quilt.
- Rotary Cutter and Mat: A rotary cutter and mat are essential for cutting your fabric pieces to size.
- Iron: To press your seams and fabric.
- Pins: To hold your fabric pieces together while sewing.
- Thread: To sew your pieces together.
- Sewing Machine: To stitch your pieces together.
- Quilting Needles: For hand-quilting without a longarm.
- Quilting Thread: To hand-quilt without a longarm.
- Quilting Ruler: To measure and cut your pieces.
Quilting without a longarm requires the same basic supplies as quilting with a longarm. However, you will need to purchase a few additional items, such as quilting needles and thread, in order to hand-quilt the quilt. All of these supplies are essential for creating a beautiful, hand-quilted quilt.
Preparing Your Quilt Top
Before you can start quilting without a long arm, it is essential to ensure that your quilt top is properly prepared. Layering and basting your quilt is the first step in this process. Begin by laying out a flat surface, such as a table or the floor. Place a layer of batting followed by a layer of backing fabric. Smooth these out, then place your quilt top on top. Pin the layers together, starting at the center and moving outward, to ensure that the layers stay in place.
For those looking to quilt without a long arm machine, an alternative to pinning is to use a spray basting adhesive. This allows you to easily stick the layers together without having to use pins. Once the quilt layers are basted together, you are ready to start quilting!
Preparing Your Batting
- Choose batting: Select batting that is suitable for the type of quilt you plan to make. Generally, cotton and polyester batting work best for quilting without a long arm.
- Check size: Unroll your batting and measure it to ensure it is the correct size for your quilt. If it is too small, you may need to purchase additional batting.
- Check for wrinkles: Before adding the batting to your quilt, smooth out any wrinkles or creases.
- Secure batting: Secure the batting to your quilt with safety pins. Pin the batting to the quilt top in a grid-like pattern, spacing the pins about 6-8 inches apart.
Preparing Your Backing Fabric

| Fabric | Preparation |
|---|---|
| Cotton | Wash, dry, and press the fabric. |
| Fleece | Do not wash before quilting. |
| Flannel | Wash, dry, and press the fabric. |
| Batting | Layer batting and backing fabric and baste. |
Tip: It is important to prepare the backing fabric according to the type of fabric. Cotton, flannel and other woven fabrics need to be washed, dried, and pressed before quilting. Fleece and other non-woven fabrics do not need to be washed before quilting. Batting should be layered with the backing fabric and basted together.
Quilting Basics
Fabric: Choose 100% cotton fabric, pre-washed and ironed, with a tight weave and no visible flaws. Measure the fabric to cut the quilt top accurately.
Batting: Select batting that suits the quilt size and the quilting style. Polyester or wool batting is best suited for hand quilting.
Needles: Regular sewing needles with sharp points are recommended for hand quilting.
Thread: Choose high quality, 100% cotton thread. Use neutral colors for light fabrics and darker colors for darker fabrics.
Marking: Mark the quilt top with tailor’s chalk or water soluble marker.
Pinning: Pin the quilt layers together to keep them from shifting.
Basting: Baste the quilt layers together with basting stitches or a basting spray.
Quilting Stitches: Use a basic running stitch or a back stitch to quilt the quilt layers.
Binding: Hand stitch the binding to the edge of the quilt.
Finishing: Steam press the quilt to add texture and sheen.
Quilting Techniques
Hand Quilting is the most traditional method of quilting. It is done by hand, using a needle and thread, and involves stitching through all three layers of the quilt. Quilters begin in the center and work outward, making small stitches in a pattern that can be either printed or freehand.
Machine Quilting is done by machine, usually on a regular sewing machine. The quilter will use a walking foot attachment to help the quilt sandwich move through the machine more easily. The quilting pattern is usually free motion, which means that the quilter will be able to manipulate the fabric as they stitch.
Quilt-As-You-Go is a technique that allows the quilter to make each quilt block individually and then assemble them into a finished quilt. The individual blocks can be quilted by either hand or machine, and then connected using sashing strips or a simple quilt binding.
Free Motion Quilting is a technique that involves using a machine with a darning foot or free motion foot to stitch directly onto the quilt top. The quilter will be able to move the fabric freely beneath the needle, creating intricate and unique designs.
Trapunto Quilting is a technique that involves stitching extra layers of batting or fabric onto the quilt top to create added dimension. This technique is usually done by hand and requires the quilter to use a needle to stitch through all of the layers. The result is a quilt that has a raised, padded texture.
Reverse Applique is a technique that involves cutting away fabric to create an image or design. The quilter will use a separate piece of fabric that is usually a different color or pattern to create the design. The fabric is then stitched onto the quilt top and the edges of the fabric are turned under and stitched down to create the design.
Finishing the Quilt
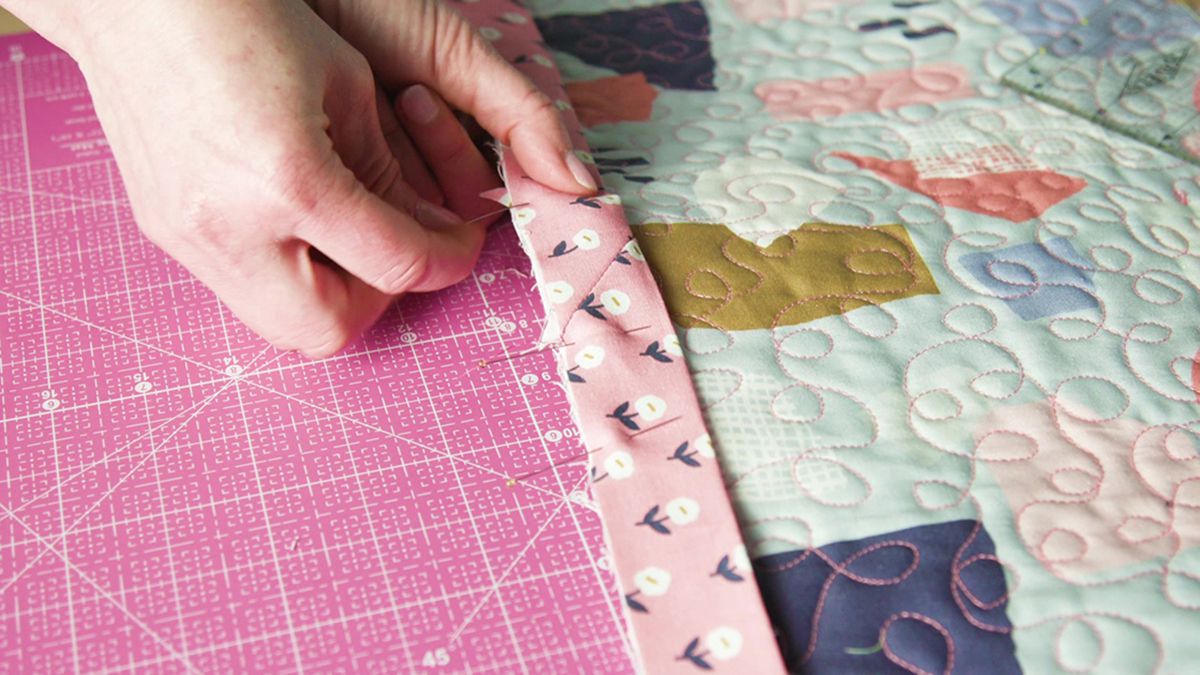
- Sew binding strips together at a 45-degree angle to make one long strip. Press the seams open.
- Fold the binding strip in half lengthwise and press. Pin the binding onto the quilt, matching up the raw edges and starting at the middle of one side. Sew the binding to the quilt using a ¼” seam allowance.
- Stop sewing when you reach the corner. Leave a tail of binding and fold the binding up at a 45-degree angle. Secure the corner with a few stitches.
- Start sewing the binding to the quilt again, matching up the raw edges, and continue sewing around the quilt.
- Secure the last tail of binding to the quilt by overlapping the other end of the binding strip by at least 1/2” and pin in place.
- Hand stitch the binding to the back of the quilt, making sure to catch both layers of the binding.
- Trim away excess batting and backing fabric from the quilt edges.
- Quilt is now finished!
Frequently Asked Questions
What Tools Do I Need to Quilt Without a Long Arm?
- Quilting Frame – A quilting frame is the most important tool when quilting without a long arm. It helps to keep your quilt taut and even as you stitch.
- Rotary Cutter – A rotary cutter is essential for cutting fabric into uniform pieces. It is also great for trimming threads or for cleaning up edges.
- Quilting Ruler – A quilting ruler is used to measure and mark the fabric for cutting and piecing. It is also great for creating perfect binding strips.
- Quilting Pins – Quilting pins are used to secure the layers of fabric together before sewing. They help to ensure that the fabric does not shift or bunch up when quilting.
- Pressing Cloth – A pressing cloth is a thin fabric that is placed between the fabric layers and the iron. It prevents the fabric from scorching or sticking to the iron.
- Thread – Thread is used to stitch the quilt together. Choose a thread that matches the fabric or a contrasting color for a more decorative look.
- Quilting Needles – Quilting needles are specifically designed for sewing quilts. They are longer and stronger than regular hand sewing needles, allowing them to penetrate multiple layers of fabric.
- Thimble – A thimble is worn on the finger to protect it from the needle when hand-quilting. It has a raised surface that allows the needle to be pushed through the fabric with ease.
How do I determine the best quilting pattern for my quilt?
- Choose a Pattern That Compliments the Quilt Top: Consider the color, texture, and design of the quilt top and pick a quilting pattern that will enhance it.
- Consider the Quilt Block Pattern: Look for a quilting pattern that will draw attention to the quilt block pattern.
- Think About the Weight of the Quilt: Choose a quilting pattern that has a good amount of space between the quilting lines if the quilt is heavy. This will make the quilt lighter and more comfortable.
- Choose a Pattern That’s Not Too Complicated: Make sure you choose a quilting pattern that is easy to stitch and doesn’t require too much skill.
What Tips and Tricks Can I Use to Make Sure My Quilt Turns Out Perfectly?
Use a Quality Fabric: Choose a high-quality quilting fabric that won’t pill, fray, or shrink.
Choose the Right Needles: Use a fine, sharp needle that is appropriate for the fabric you’re using.
Use a Walking Foot: Invest in a walking foot for your sewing machine that will help keep layers of fabric from shifting.
Cut Precisely: Use a rotary cutter and mat to cut precise and straight lines.
Press as You Go: Press seams open as you go, as this will help ensure your quilt blocks line up nicely.
Take Time with Layering: Layer your quilt sandwich carefully and use plenty of pins to keep everything in place.
Test Your Thread: Test your thread on a scrap of fabric for tension, stitch length, and color.
Secure Threads: Secure all threads on the back of the quilt before moving onto the next section.
Be Patient: Take your time and be patient with yourself. Quilting is a labor of love and the result is worth it!
Is it possible to quilt large projects without a long arm?
- Yes, it is possible to quilt large projects without a long arm.
- The most important factor is the size of the quilt and the size of the space you have to work with.
- For a large quilt, it is best to use a frame or hoop to help keep the quilt layers in place.
- Using a walking foot on the sewing machine is essential for quilting large projects.
- This type of foot helps keep the fabric layers from shifting or bunching up.
- For quilting designs that are more intricate or larger, it is best to use a free motion quilting foot.
- It is also important to use a larger needle, such as a 90/14, to reduce the risk of skipped stitches.
- Using a quilting guide is also helpful for keeping the quilting even and consistent.
- If the quilt is too large for the space available, it may be necessary to quilt the quilt in sections.
What are the Benefits of Quilting Without a Long Arm?
- Cost Savings – Quilting without a long arm can save quilters a great deal of money. Quilting machines can be quite expensive and require a great deal of space. By opting to quilt without a long arm, quilters are able to save on both the cost of the machine and the space required.
- Portability – Quilting without a long arm is much more portable. Quilters are able to take their projects to classes or to quilt with friends without having to worry about transporting a large machine. This makes it easier to quilt with others or to take part in larger quilting events.
- Variety of Techniques – Quilting without a long arm allows quilters to use a variety of techniques. Quilters are able to use hand-quilting, free-motion quilting, and machine quilting. This gives quilters more options when it comes to creating their quilts.
- Personal Touch – Quilting without a long arm allows quilters to add their own personal touch to their quilts. By hand-quilting or free-motion quilting, quilters are able to create unique quilts that reflect their own individual style.
Conclusion
Quilting without a long arm is possible, but requires dedication and practice. By utilizing the right tools, techniques, and tips, you can get the perfect quilt every time. With patience and practice, you can become a skilled quilter and make beautiful quilts without ever having to purchase a long arm.


