Quilting as you go is a fun and creative technique that allows you to make a quilt in sections. If you’re looking to learn how to quilt as you go, this step-by-step guide will walk you through the process and help you perfect this technique. From how to prepare your fabric and batting, to how to assemble and finish your quilt, you’ll find all the information you need to make a beautiful quilt as you go. So, if you’re ready to get started, let’s dive into learning how to quilt as you go!
What is Quilt-As-You-Go (QAYG)?
- QAYG is a quilting technique that allows you to piece, quilt and bind your quilt all at the same time.
- QAYG involves sewing each quilt block to a batting-and-backing panel before joining them together.
- The end result is a quilted quilt that is ready for binding and finishing.
- QAYG is a great way to quilt a large quilt without having to do a lot of hand quilting or having to use a longarm quilting machine.
- QAYG is also a great way to personalize your quilting by allowing you to quilt each block as you go.
- QAYG is a time-saving technique that can be used for any size quilt and is ideal for those with limited space.
Benefits of Quilting As You Go
- No assembling – Once you finish quilting each block, you don’t need to assemble the quilt. This saves you time and keeps the project more organized.
- Minimal basting – Quilting as you go eliminates the need for basting, which is a tedious step in the quilting process.
- More control – Quilting as you go allows you to control the pattern of the quilting, while in traditional quilting, the quilting pattern is determined after the quilt is assembled.
- Portability – The individual quilted blocks are smaller and thus, easier to transport. This makes quilting as you go a great option for quilters who want to work on their projects on the go.
- Less bulk – Quilting as you go creates less bulk than traditional quilting, making it easier to quilt intricate patterns.
Quilting as you go, also known as ‘QAYG’, is a great way to quilt any quilt. It has many benefits that make it a preferred method for many quilters.
Materials Needed for Quilting As You Go
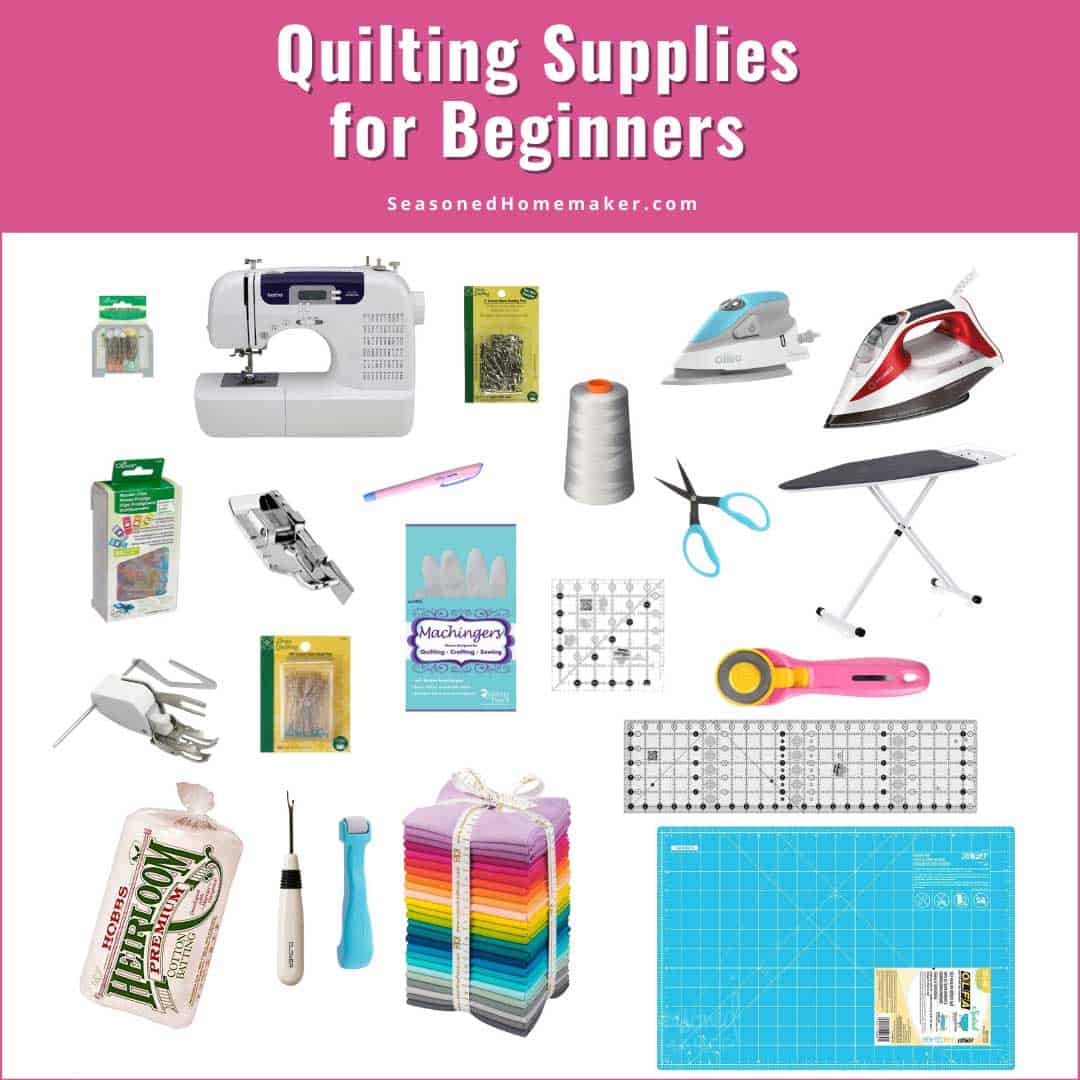
Fabric: Quilting fabric for the top, batting, and backing.
Thread: Quilting thread or all-purpose thread.
Iron: Iron and pressing surface.
Sewing Machine: Sewing machine and walking foot attachment.
Rotary Cutter: Rotary cutter, mat, and ruler.
Quilting Clips: Quilting clips or safety pins.
Batting: Batting of your choice.
Backing: Quilting backing fabric.
Quilting As You Go (QAYG) is a method of quilting that allows you to add the backing at the end, therefore eliminating the need to baste the quilt top, batting, and backing together. With this method, you sew your quilt blocks together as you normally would, and then quilt each block. The quilted blocks are then joined together using a sewing machine and quilting clips or safety pins. Once all the blocks are joined, the backing is added and quilted in place. This method is especially useful for larger quilts, and makes quilting easier and faster.
Step-by-Step Guide to Quilting As You Go
Quilting As You Go is a technique that allows you to quilt your quilt top as you construct it. This process eliminates the need to baste and quilt your quilt after it is completed. With this method, you can quilt each block separately, and then join the blocks together with sashing or borders. Here is a step-by-step guide to quilting as you go:
| Step | Description |
|---|---|
| 1 | Choose your quilting pattern. This could be an all-over design, or a specific pattern for each block. |
| 2 | Draw the quilting pattern onto your fabric. Use a washable fabric marker or a quilting pencil. |
| 3 | Lay your fabric piece on top of the batting and layer it with a backing fabric. Pin the three layers together. |
| 4 | Quilt the fabric block as desired. Use a walking foot or free motion quilting foot on your sewing machine. |
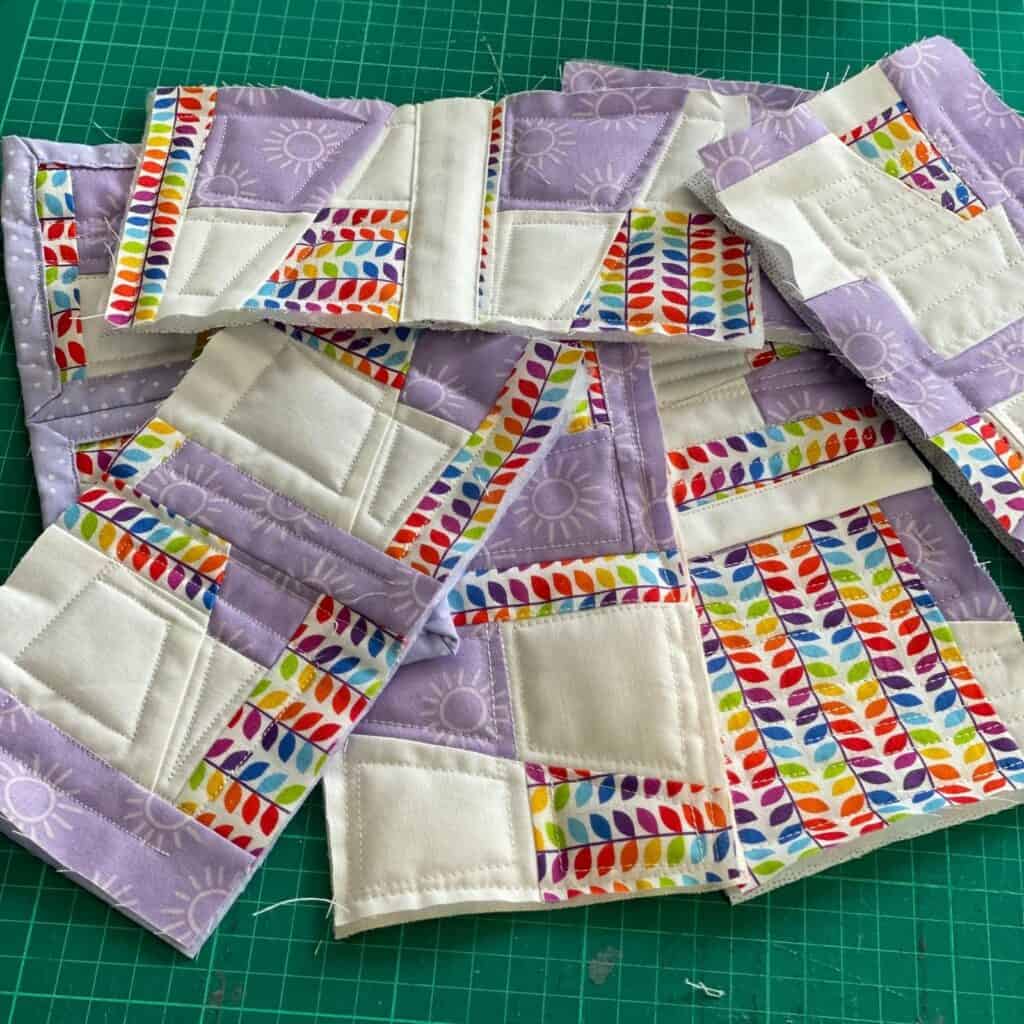
| 5 | Trim the batting and backing fabric away from the finished quilted block. |
| 6 | Repeat steps 1-5 for each block in the quilt. |
| 7 | Join the quilted blocks together using sashing or borders, if desired. |
Using this quilting as you go technique is an efficient way to quilt your quilt top, and is the easiest way to get the job done quickly.
Prepping the Quilt Top
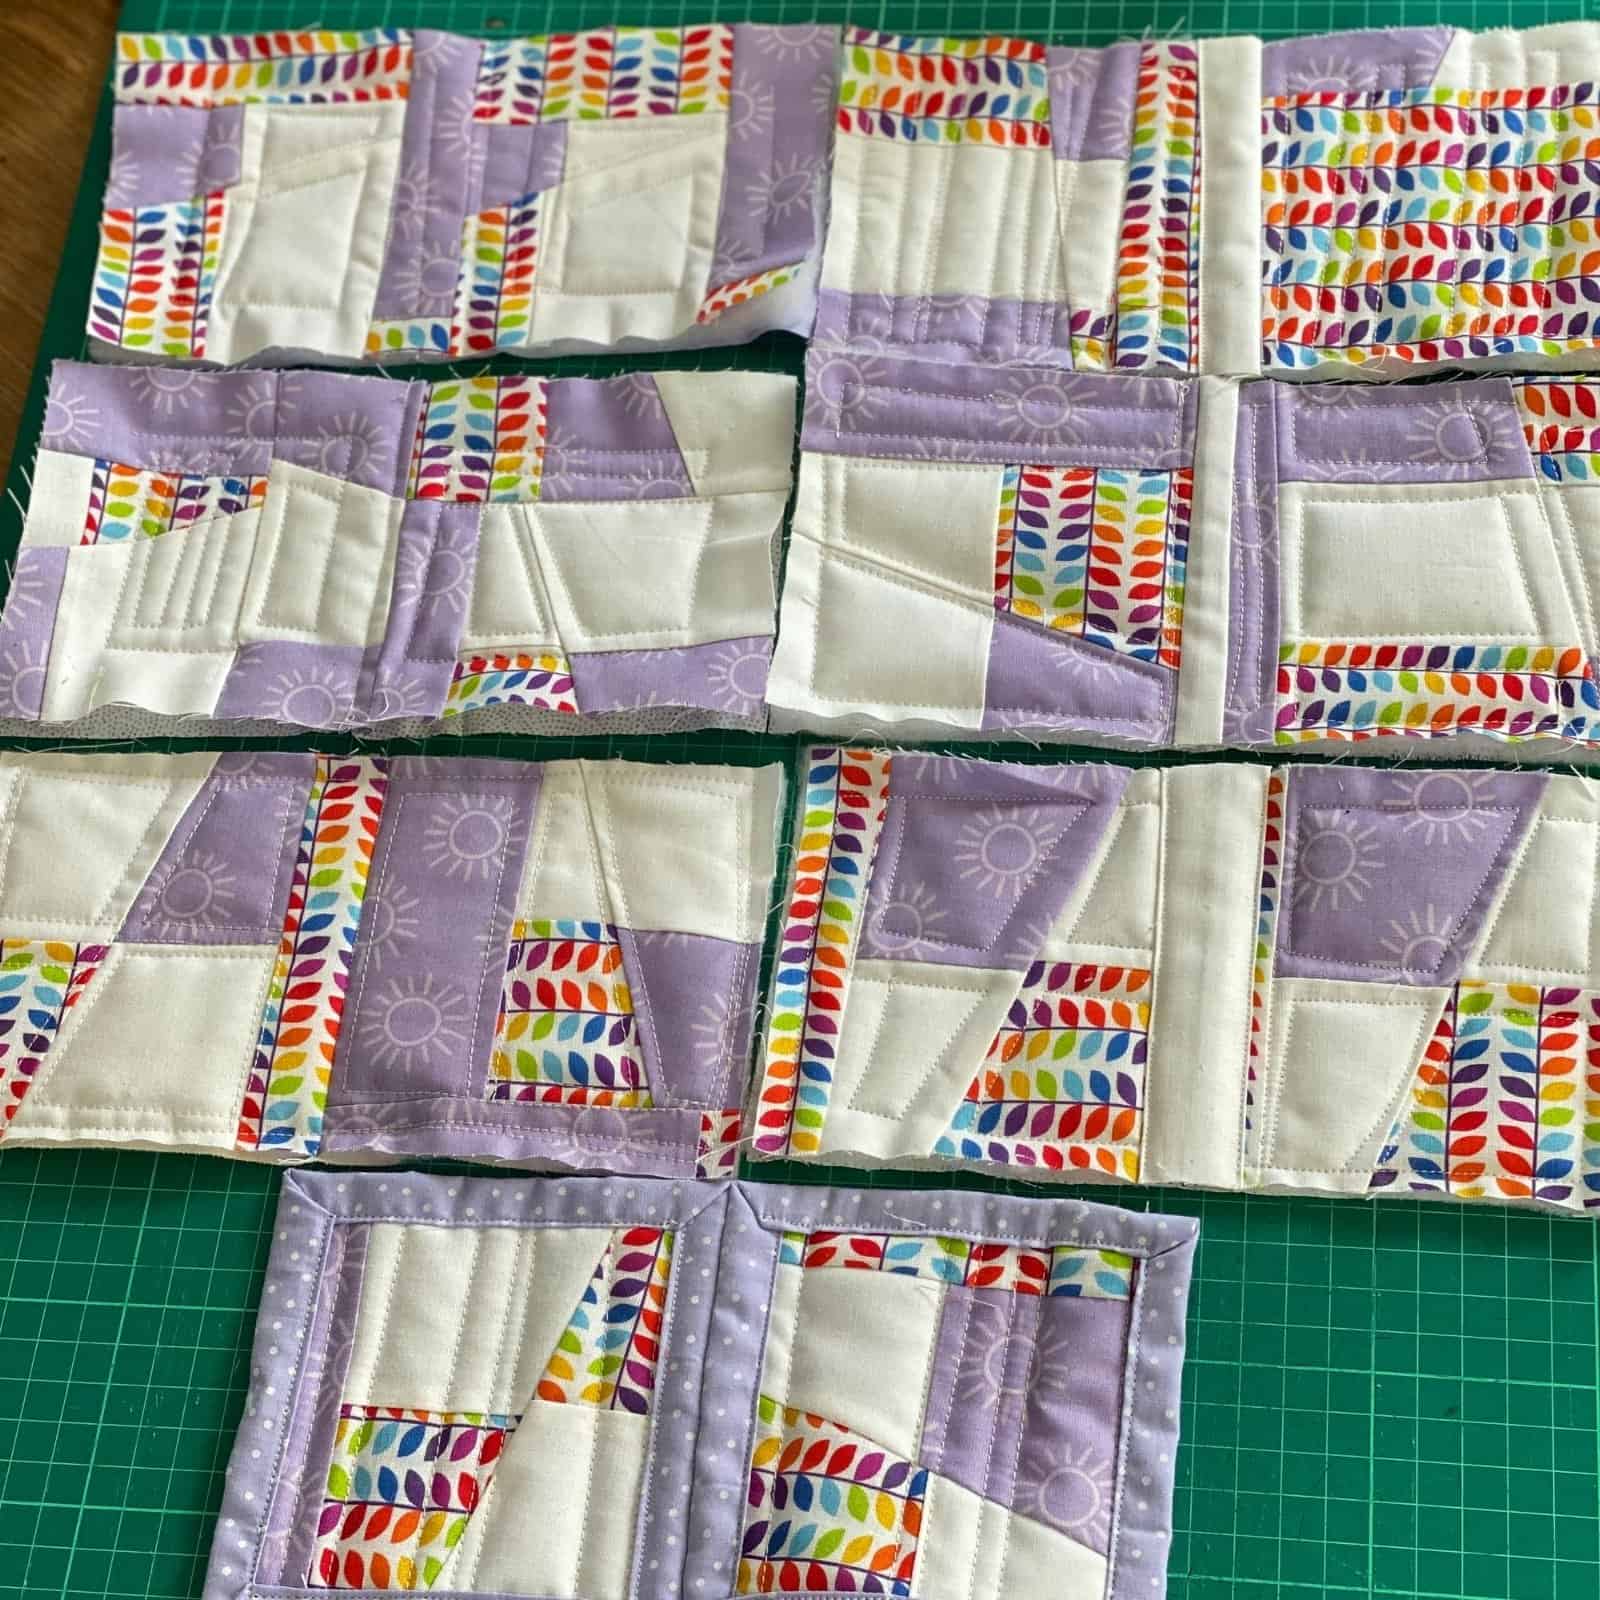
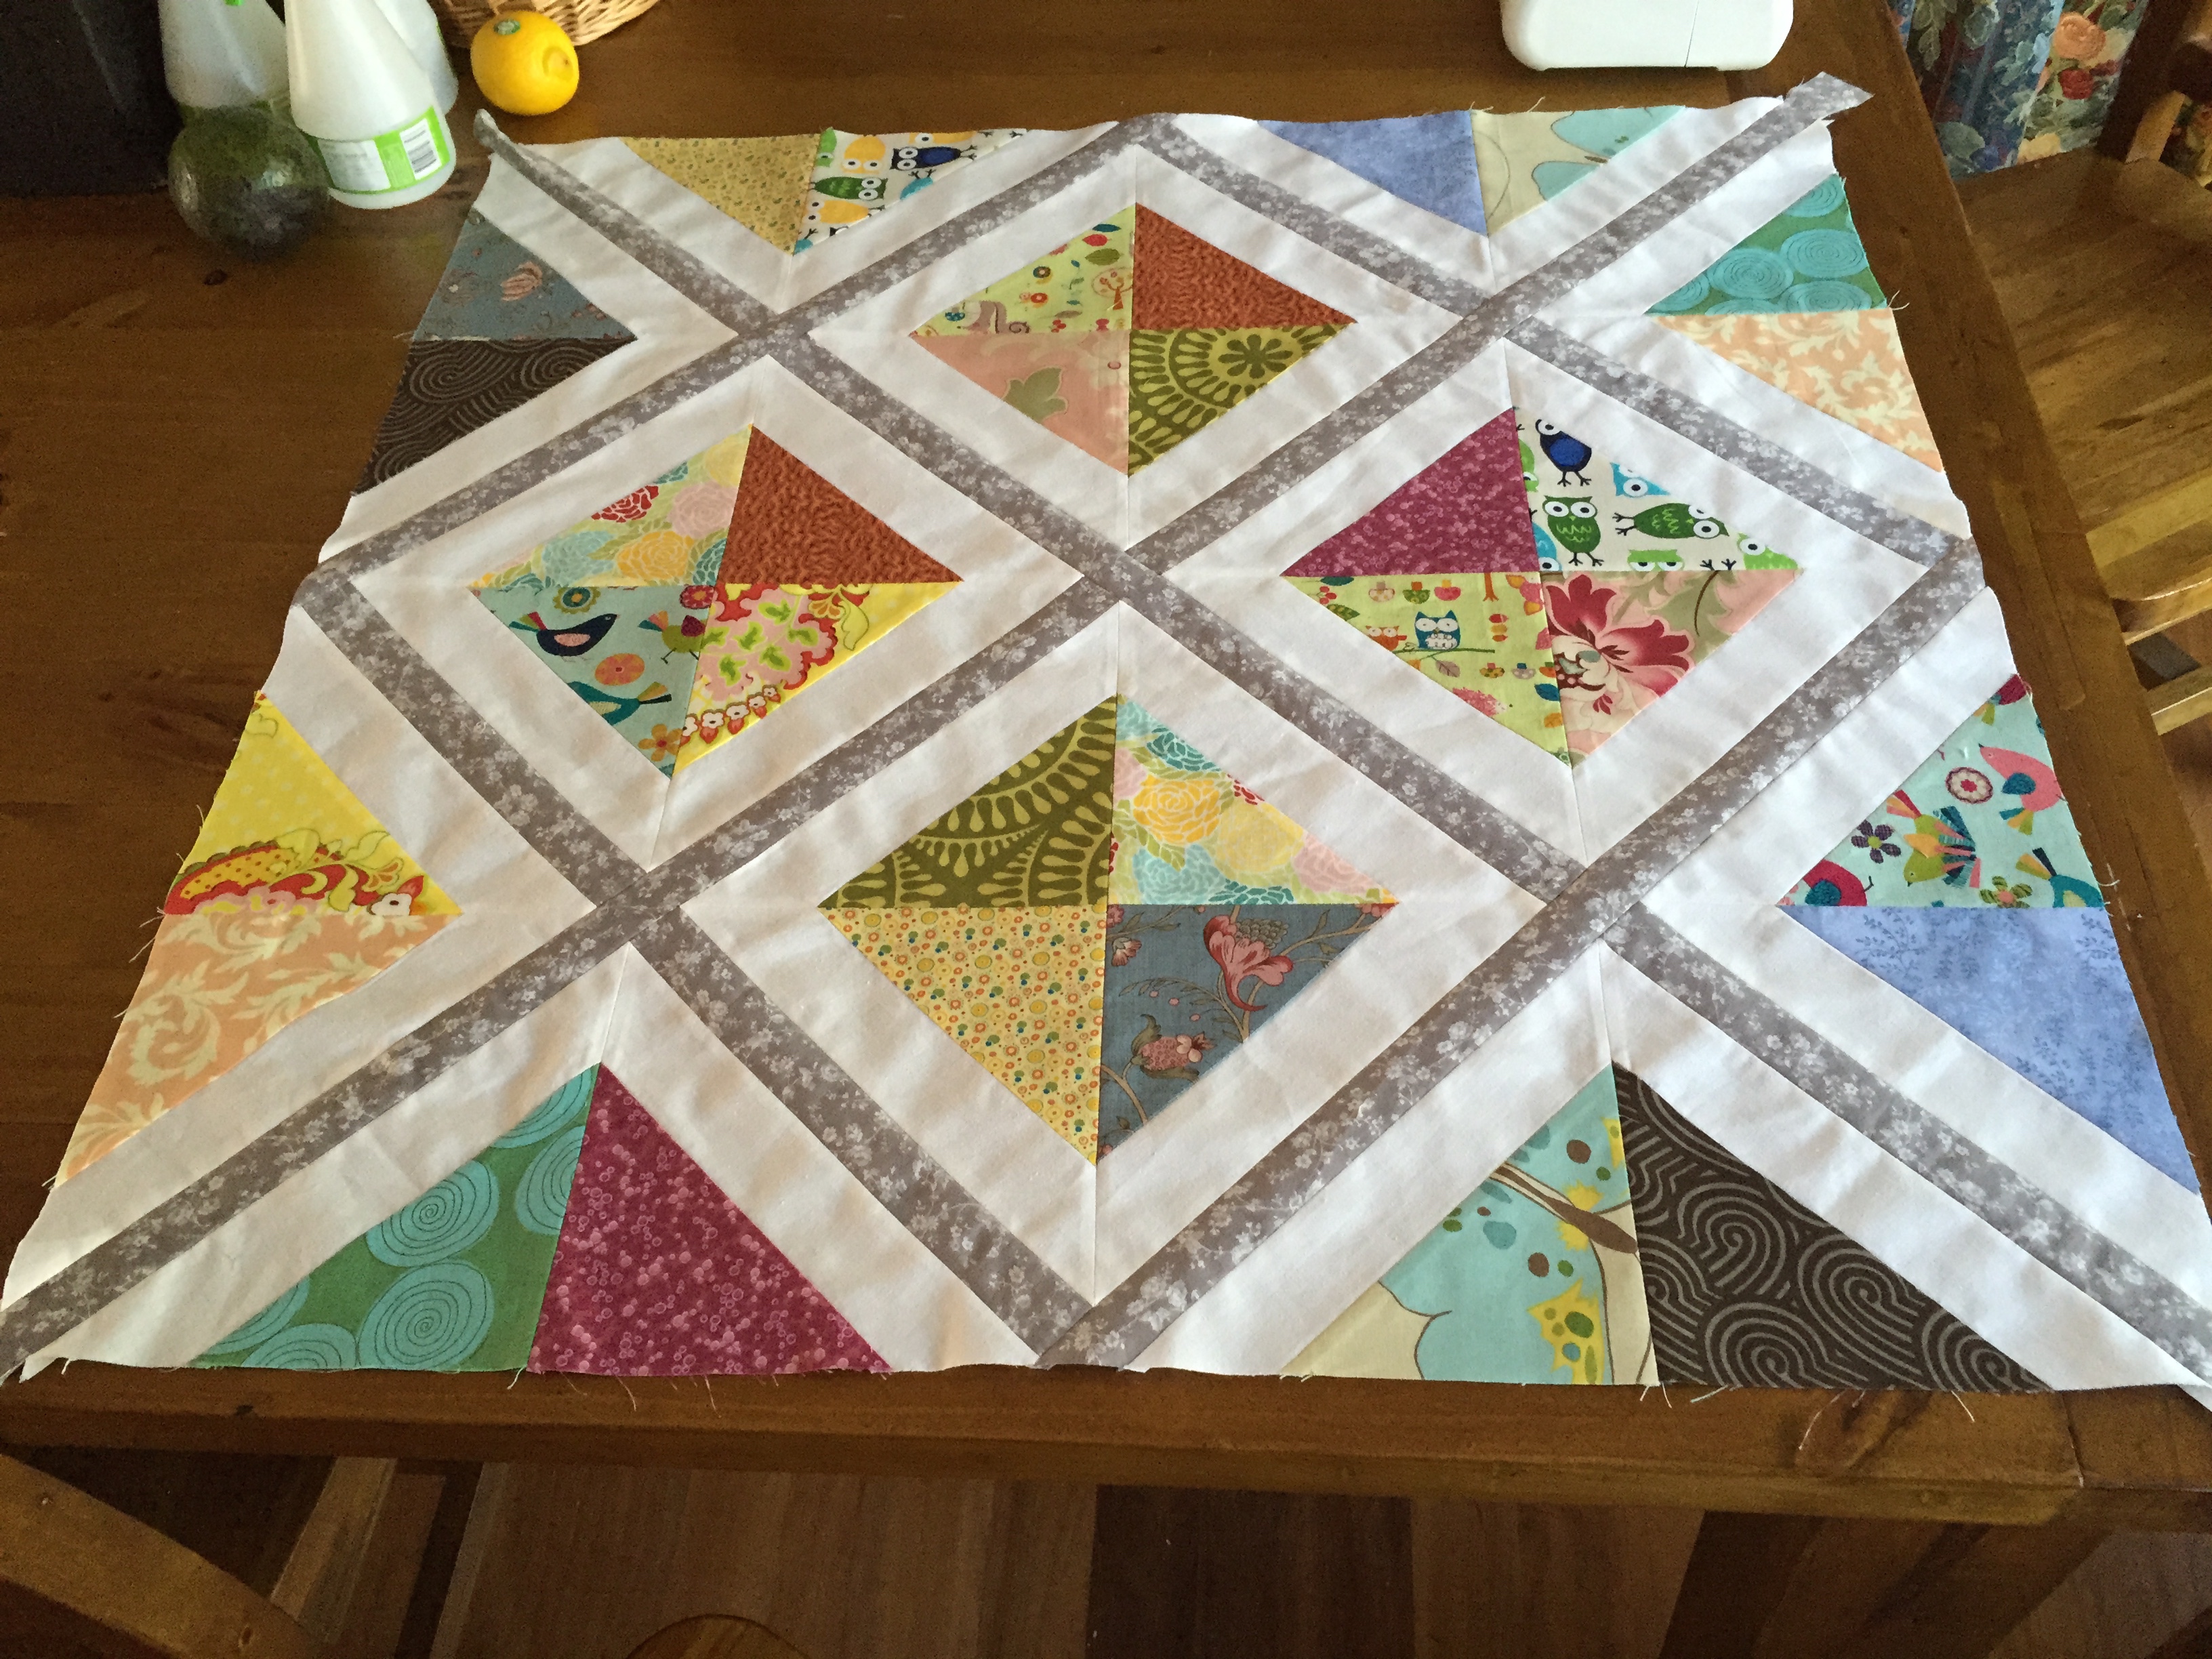
- Layout the quilt blocks: Begin by laying out the quilt blocks on the floor or table. This will give you a visual of how the quilt will look once finished.
- Press the quilt blocks: Press the quilt blocks using an iron to remove any wrinkles or creases. This will ensure that the blocks lay flat and look neat.
- Pin the quilt blocks together: Once all the quilt blocks have been pressed, pin them together. This will help keep the blocks in place and make it easier to sew them together.
- Sew the quilt blocks together: Use a sewing machine or needle and thread to sew the quilt blocks together. This will ensure that the quilt top is secure and will not come apart.
- Trim excess fabric: After sewing the quilt blocks together, trim any excess fabric. This will help keep the quilt top neat and free of bulk.
Once the quilt top is prepped, you can begin quilting as you sew.
Adding Batting and Backing
- Batting is the middle layer of the quilt, which provides warmth and padding. It is usually made from polyester, cotton, wool or a blend of these fibers.
- Backing is the layer of fabric on the back of the quilt and is usually made from a single piece of fabric.
- When adding batting and backing to the quilt, it is important to make sure that the fabric is large enough to cover the entire quilt.
- When quilting as you go, you can easily attach the batting and backing to the quilt top using a sewing machine.
- You can also use a tutorial on how to quilt as you go to get detailed instructions on how to attach the batting and backing to the quilt top.
- When attaching the batting and backing to the quilt top, make sure that the batting is not too tight and that there is no puckering of the fabric.
- Finally, use a basting stitch to keep the batting and backing in place and to secure the quilt top to the batting and backing.
Quilting the quilt top
- Lay the batting and backing out on a flat surface. Smooth out any wrinkles and pin the layers together.
- Lay the quilt top over the batting and backing. Smooth out any wrinkles.
- Pin the quilt top in place. Pin around the edges and in the middle to secure the quilt top in place.
- Thread the quilting needle with the quilting thread. Use a color that matches the quilt top.
- Start quilting in the center. Start with a small stitch in the center and work your way out.
- Quilt in a design. Use a free motion quilting design or a quilting pattern to quilt the quilt top.
- Continue quilting until the quilt top is complete. Sew the edges of the quilt top together to finish.
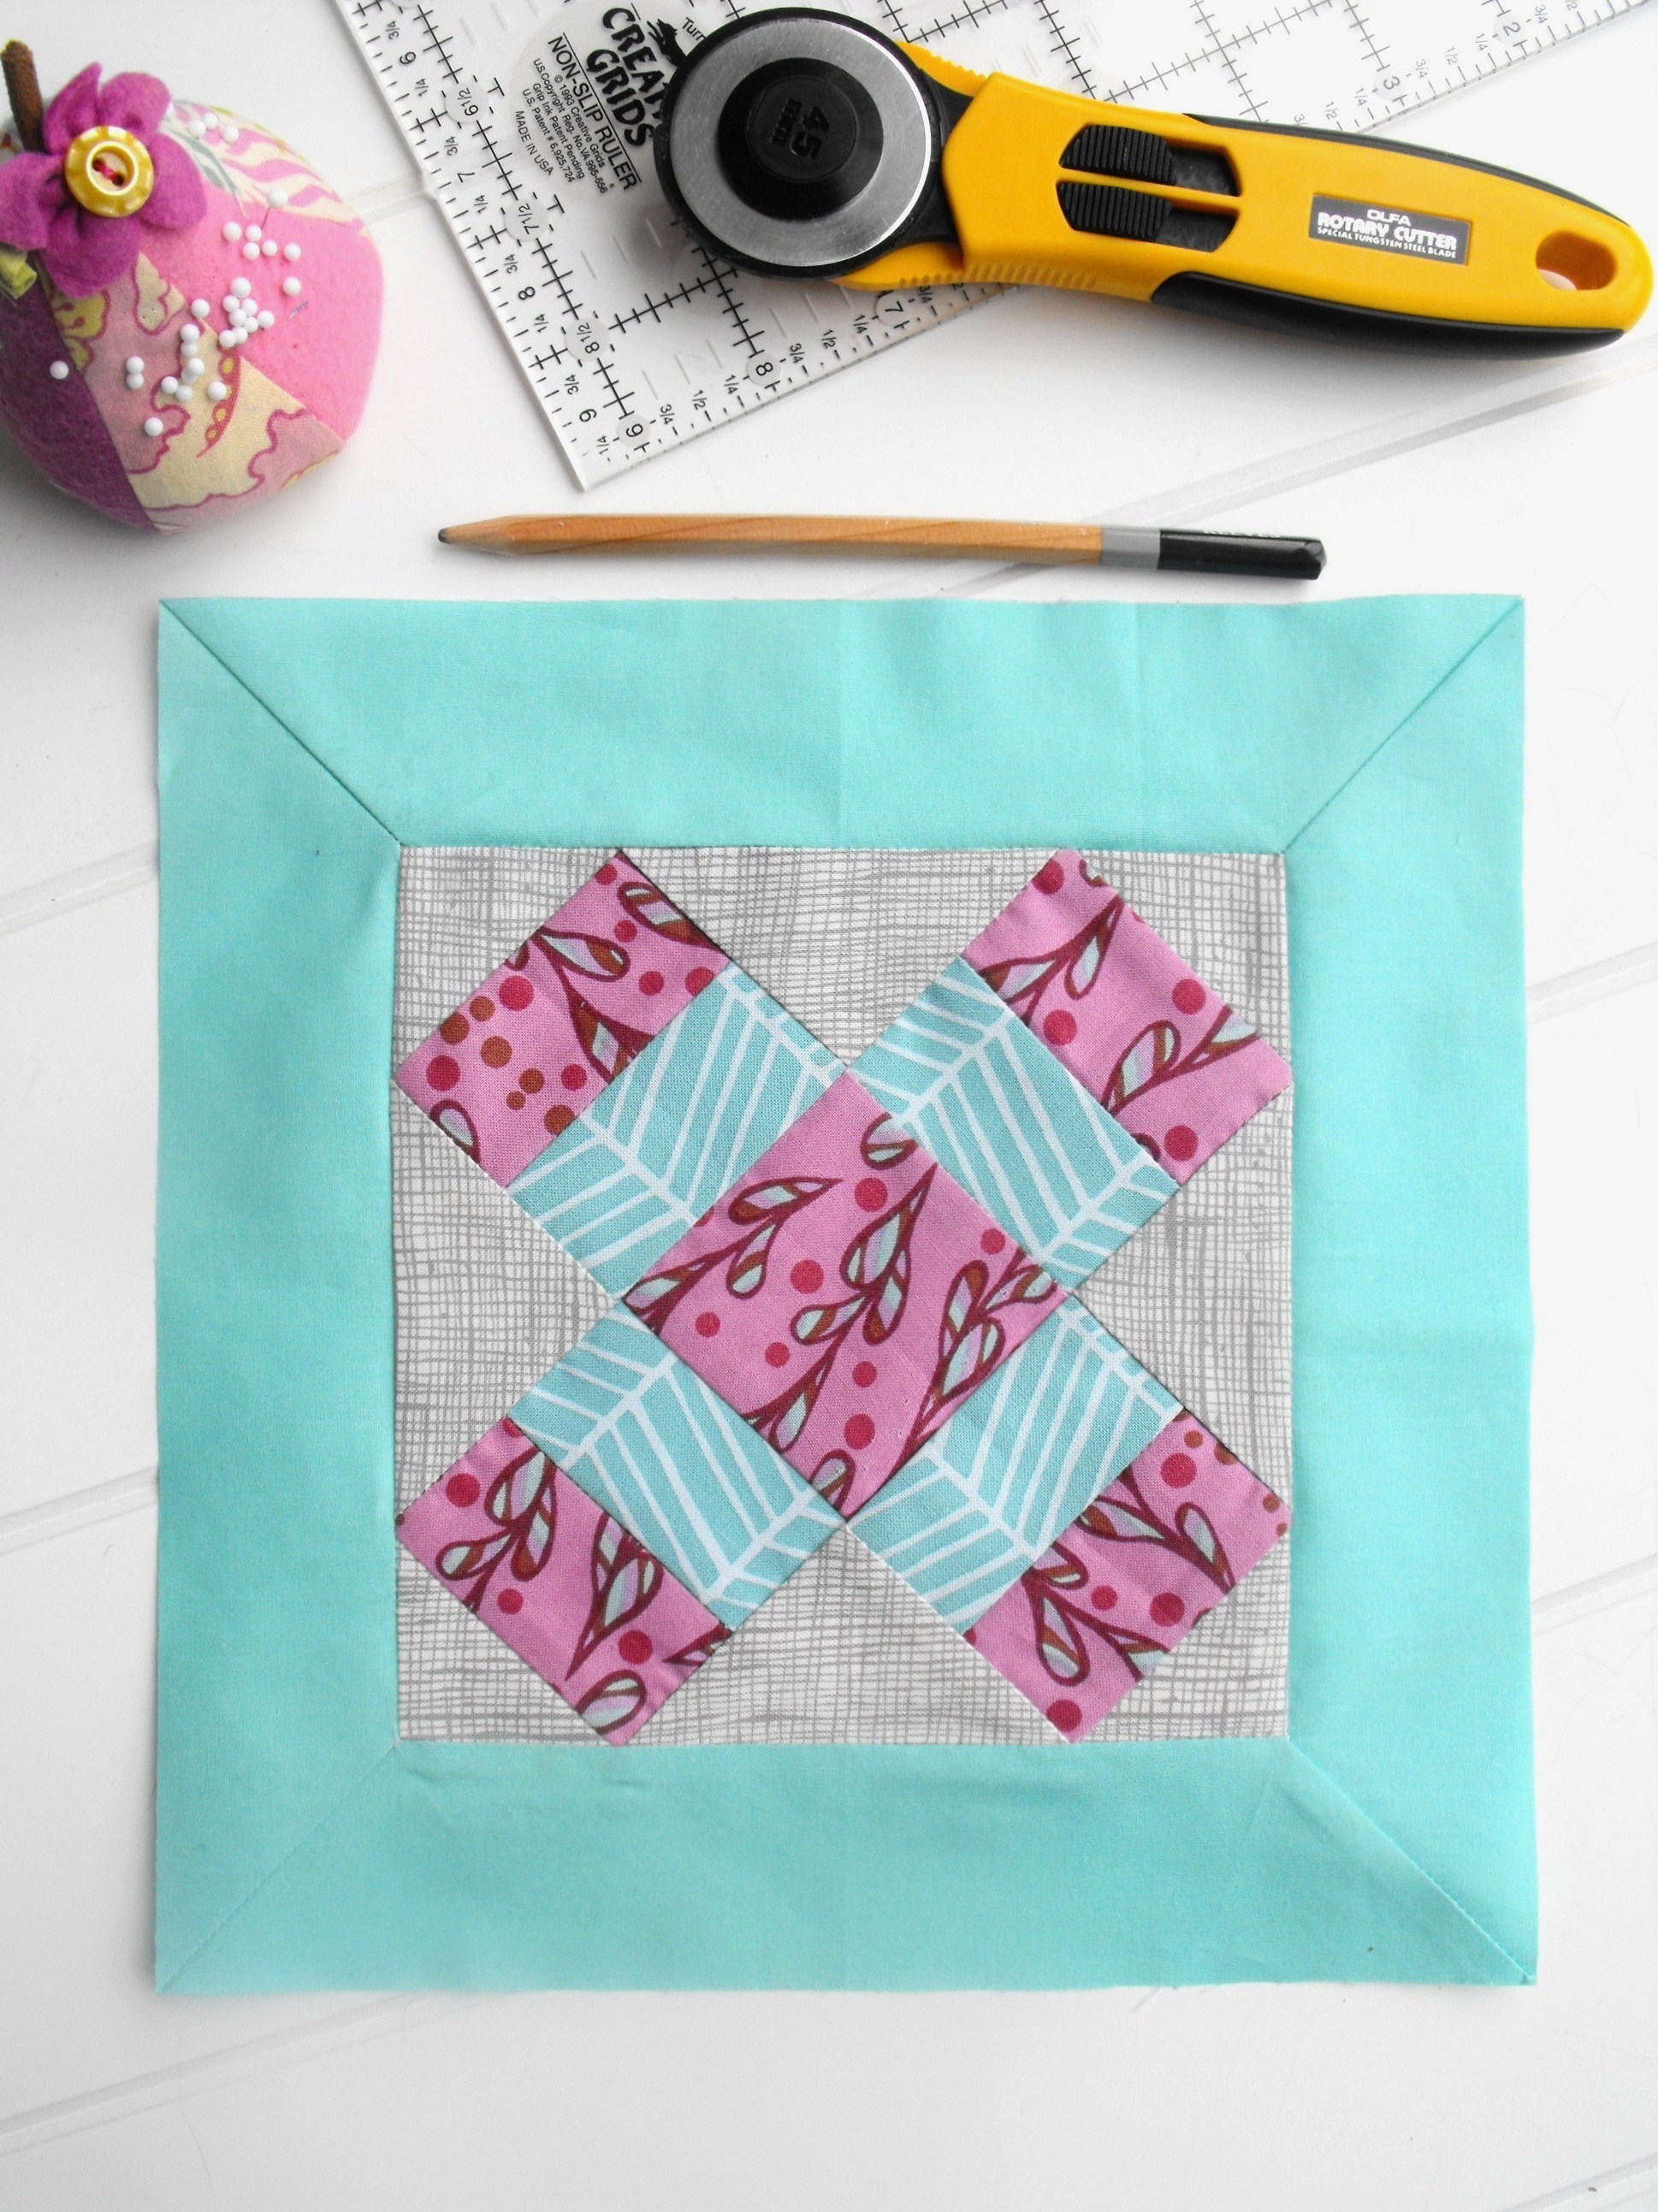
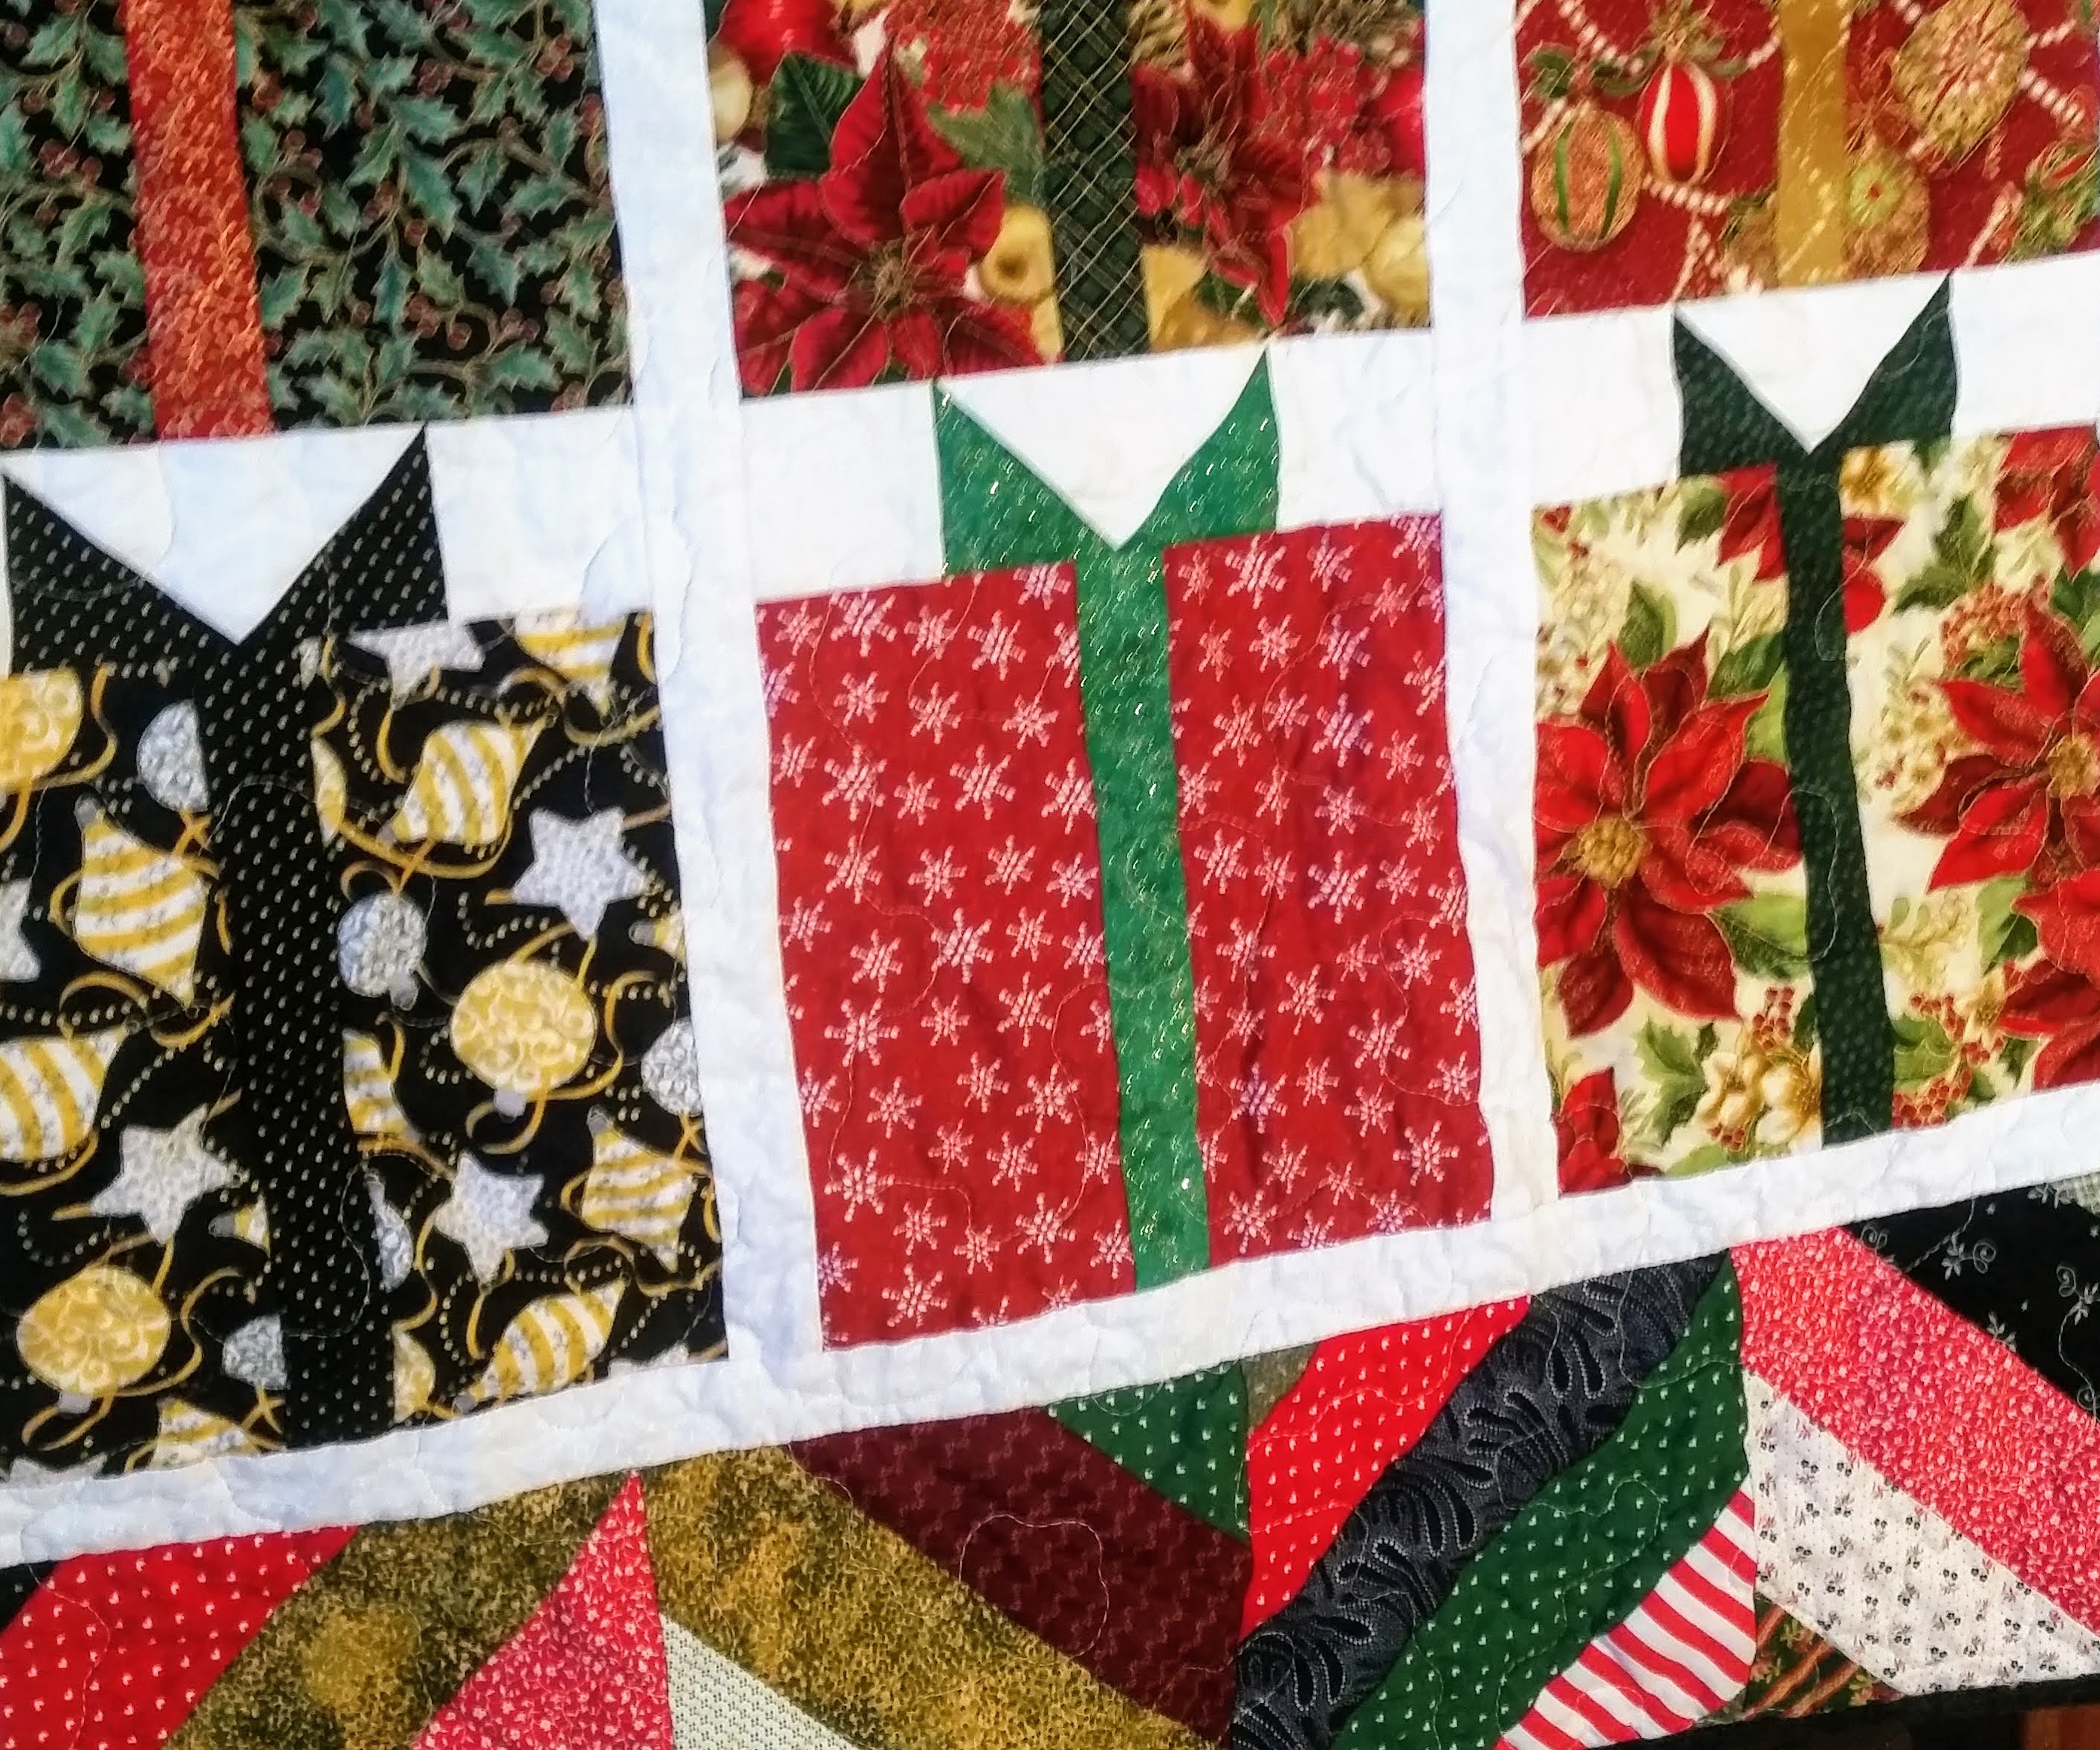
Adding Sashing
Adding sashing to your quilt is a great way to add a unique touch to your quilt. Sashing is the fabric strips that are sewn between the quilt blocks to separate them and give the quilt added texture and interest. To add sashing to your quilt-as-you-go project, you’ll need to measure the size of each quilt block and cut sashing strips to fit. You’ll also need to cut cornerstones, which are small squares of fabric that fit into the corners of the quilt blocks. Once all the sashing and cornerstones are cut, you can sew them onto the quilt blocks. When sewing the sashing strips and the cornerstones, be sure to use a ¼” seam allowance. Once the sashing and cornerstones are sewn onto the quilt blocks, you can assemble the quilt as usual. When you are finished, you will have a quilt with sashing that looks like a traditional pieced quilt top.
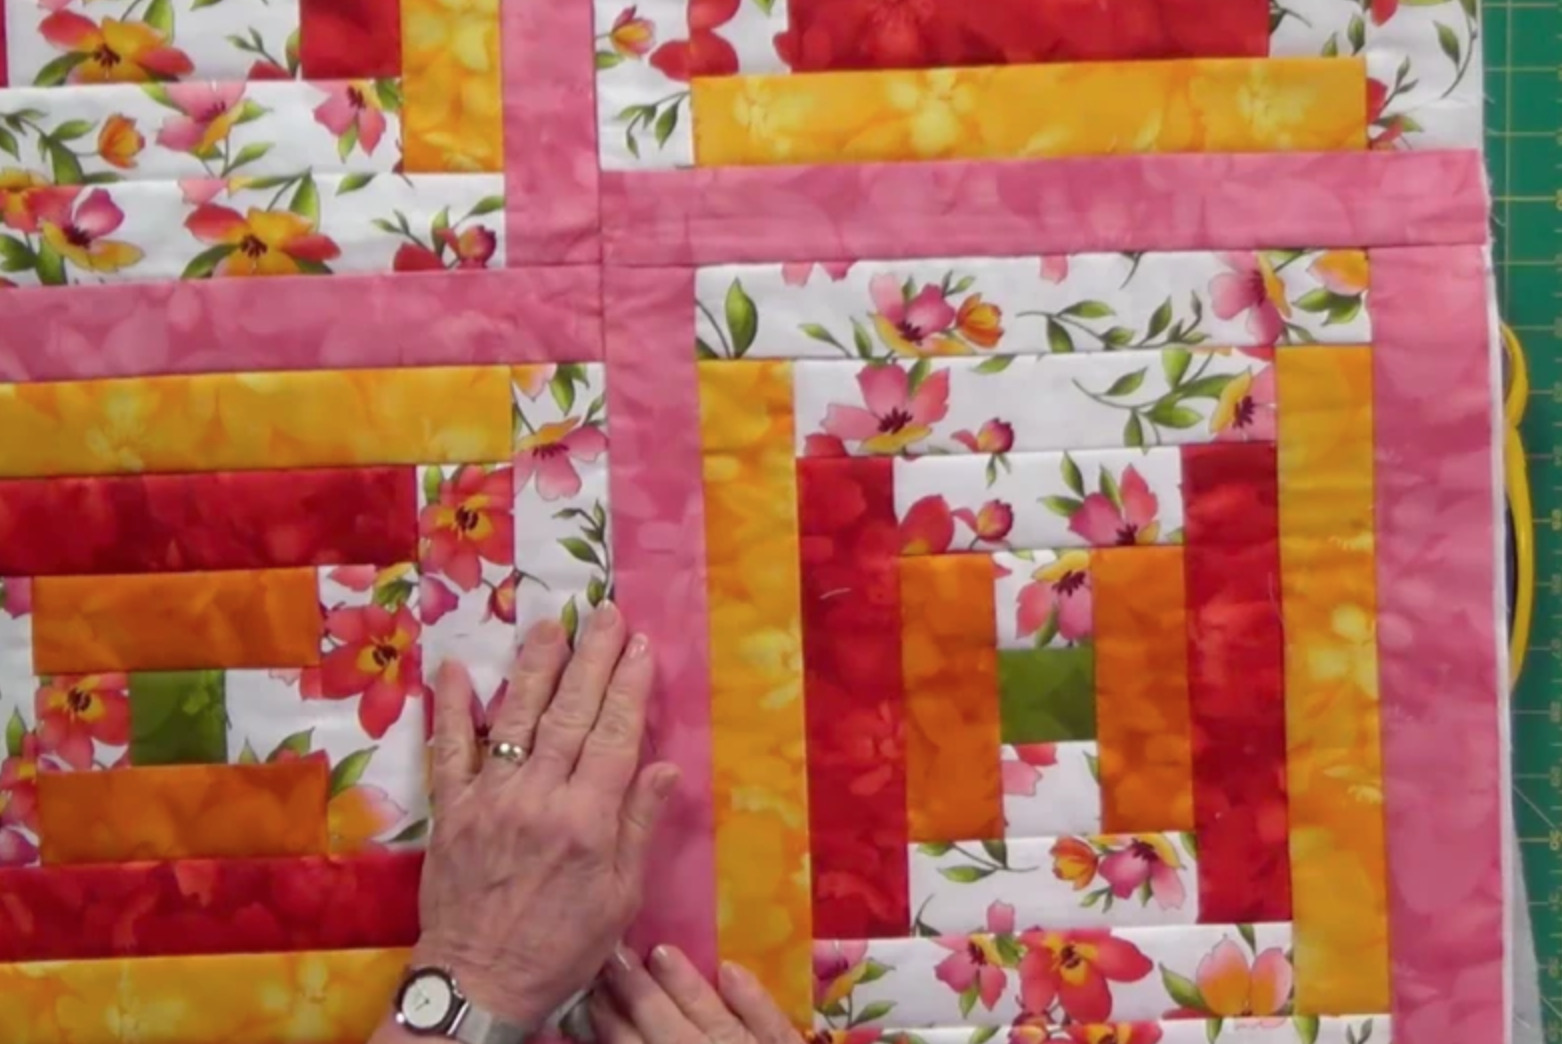
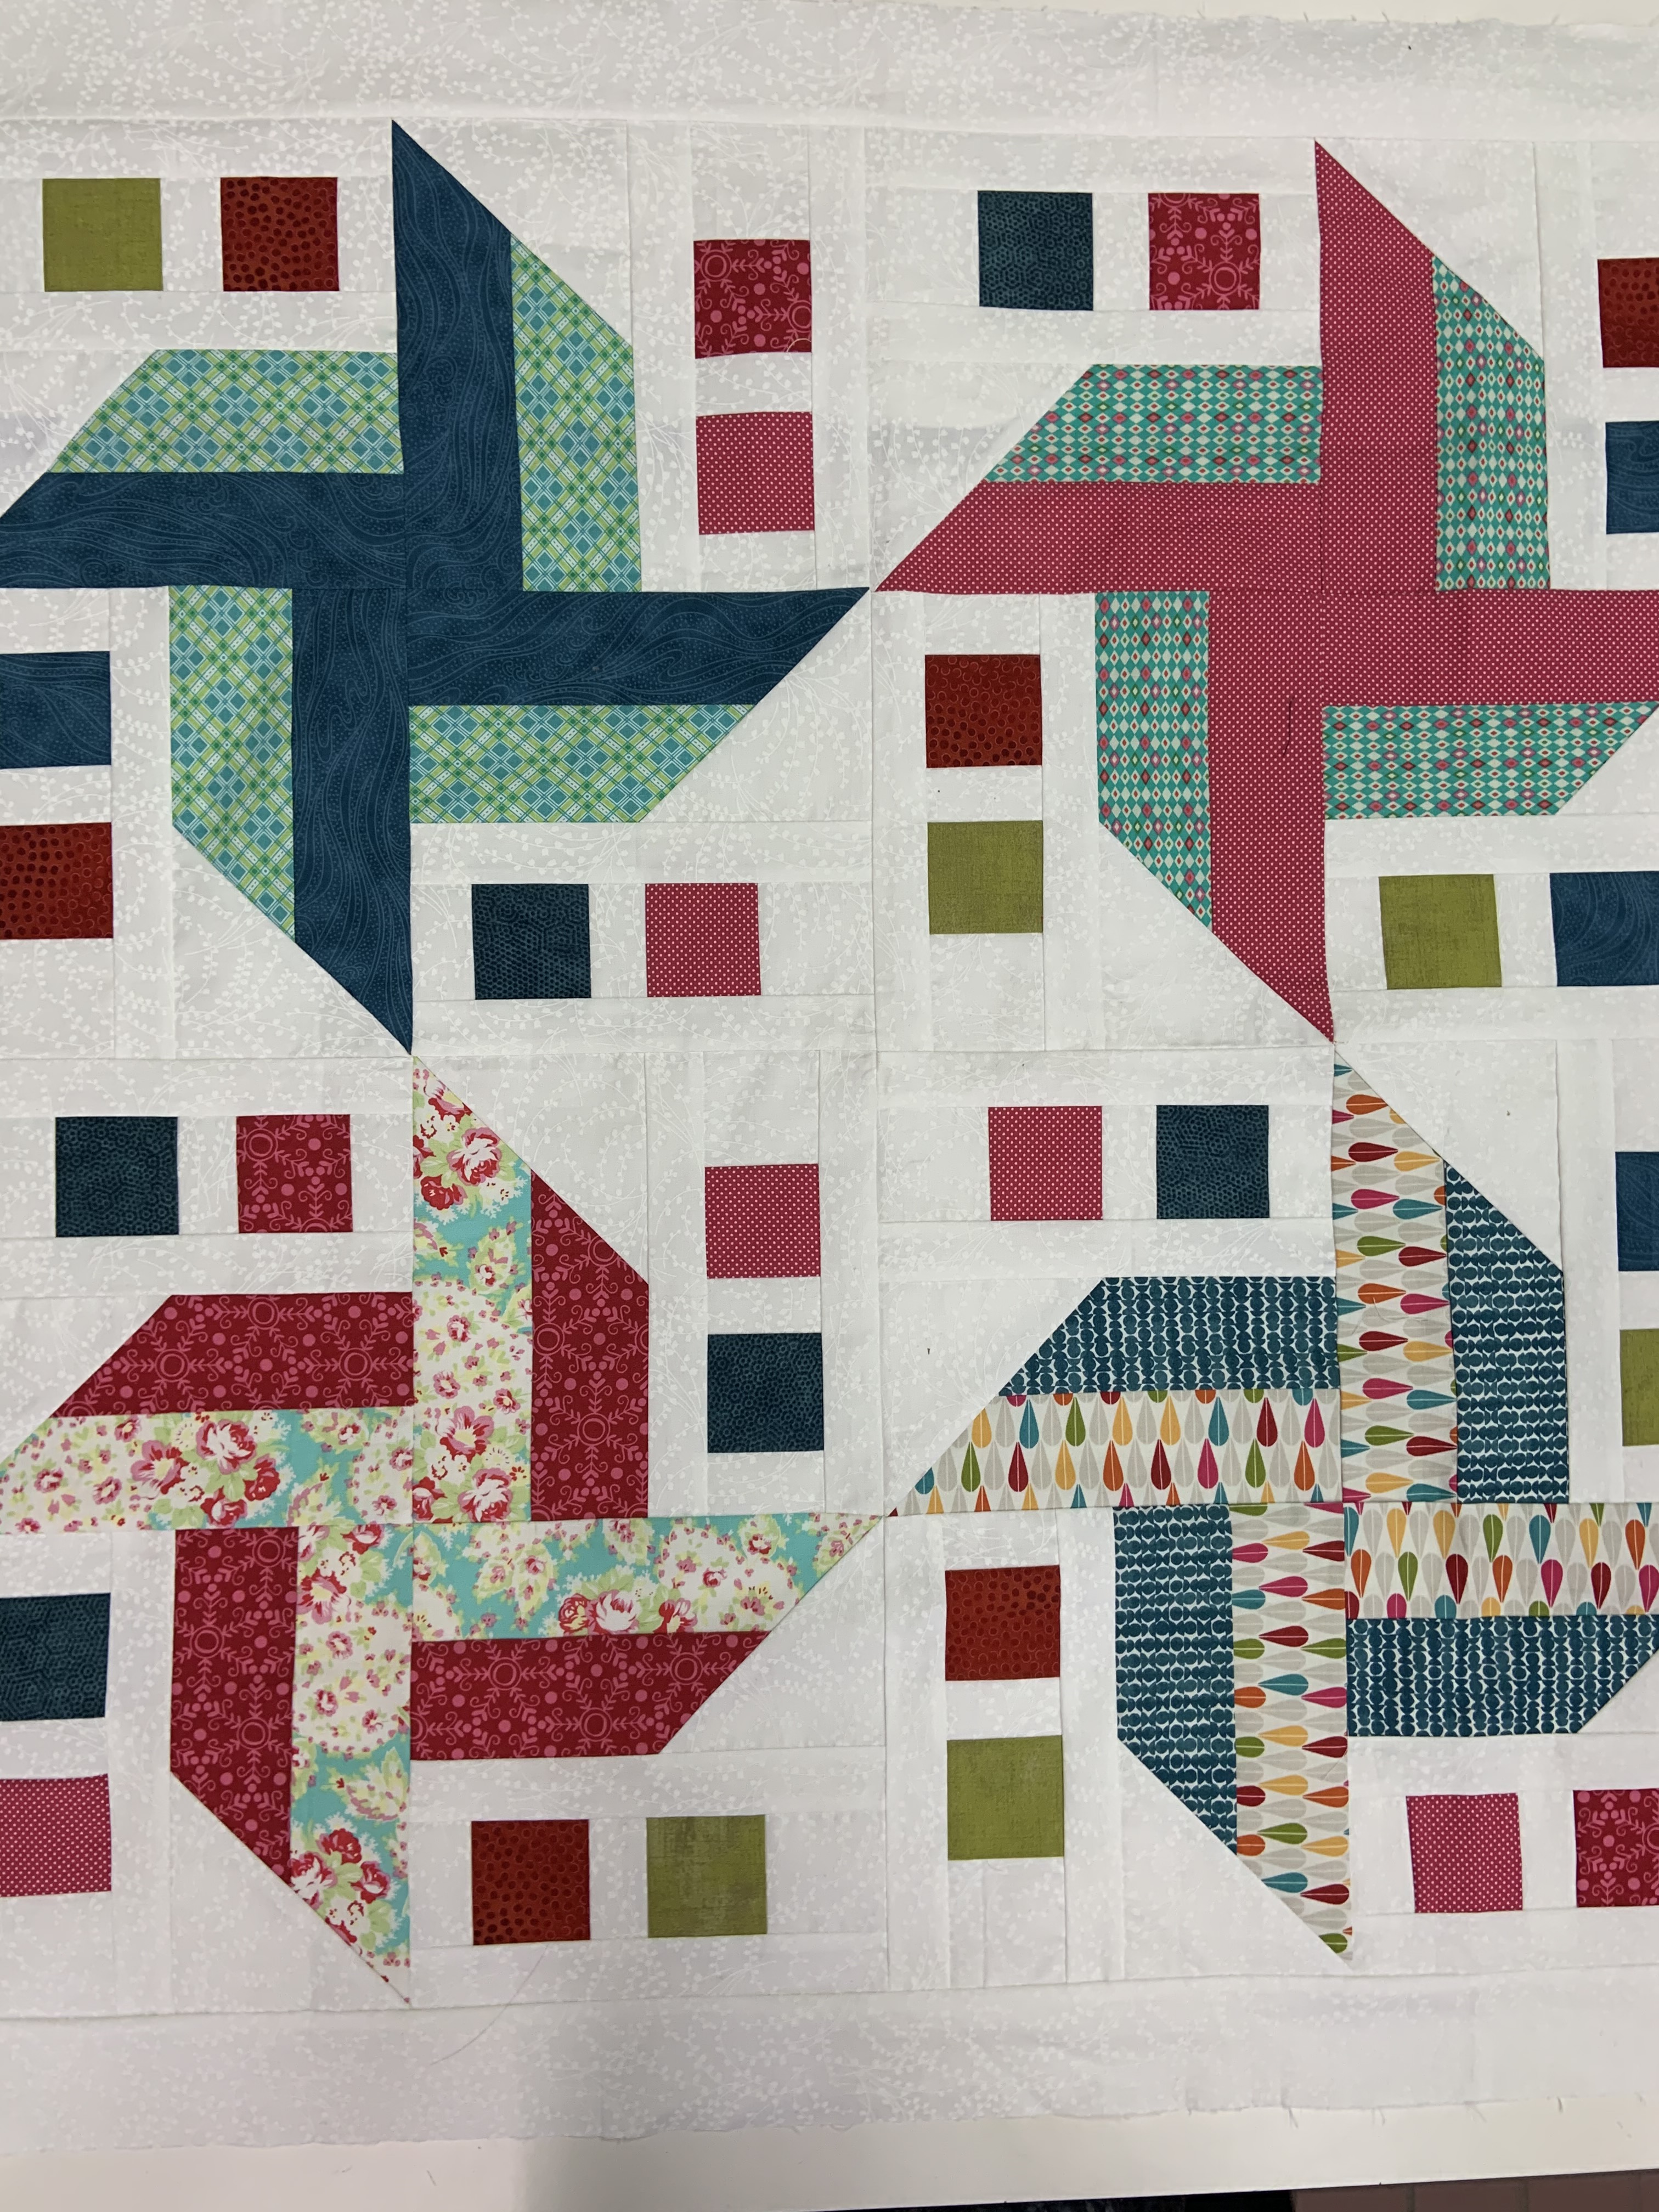
Connecting Blocks
Connecting blocks is an easy way to quilt as you go a large quilt or any quilt. The quilt’s backing is added last. To do this, you need to start by placing two blocks right sides together, and then sewing a ¼-inch seam allowance around the perimeter of the blocks. After that, the blocks should be trimmed and pressed, and the elements should be connected by pressing the seams in the opposite direction. To make the blocks more secure, you can use a walking foot to stitch the seam allowance together. Another option is to use a zig zag stitch for extra security.
Once the blocks are connected, you can start quilting as you go. This can be done with a traditional quilting stitch or other decorative quilting stitch. If you want to make sure that the quilt is secure, you can use a walking foot to quilt the blocks together. This will help to secure the blocks and make sure that the quilt does not fall apart.
The easiest way to quilt as you go is to use a quilt-as-you-sew technique. This is done by sewing the quilt top and batting together and then sewing the quilt backing on last. This technique is great for larger quilts and is much easier than quilting each block individually.
If you are looking for a tutorial on how to quilt as you go, there are many available online. These tutorials will provide step-by-step instructions on how to quilt as you go, as well as tips and tricks for making sure your quilt looks great.
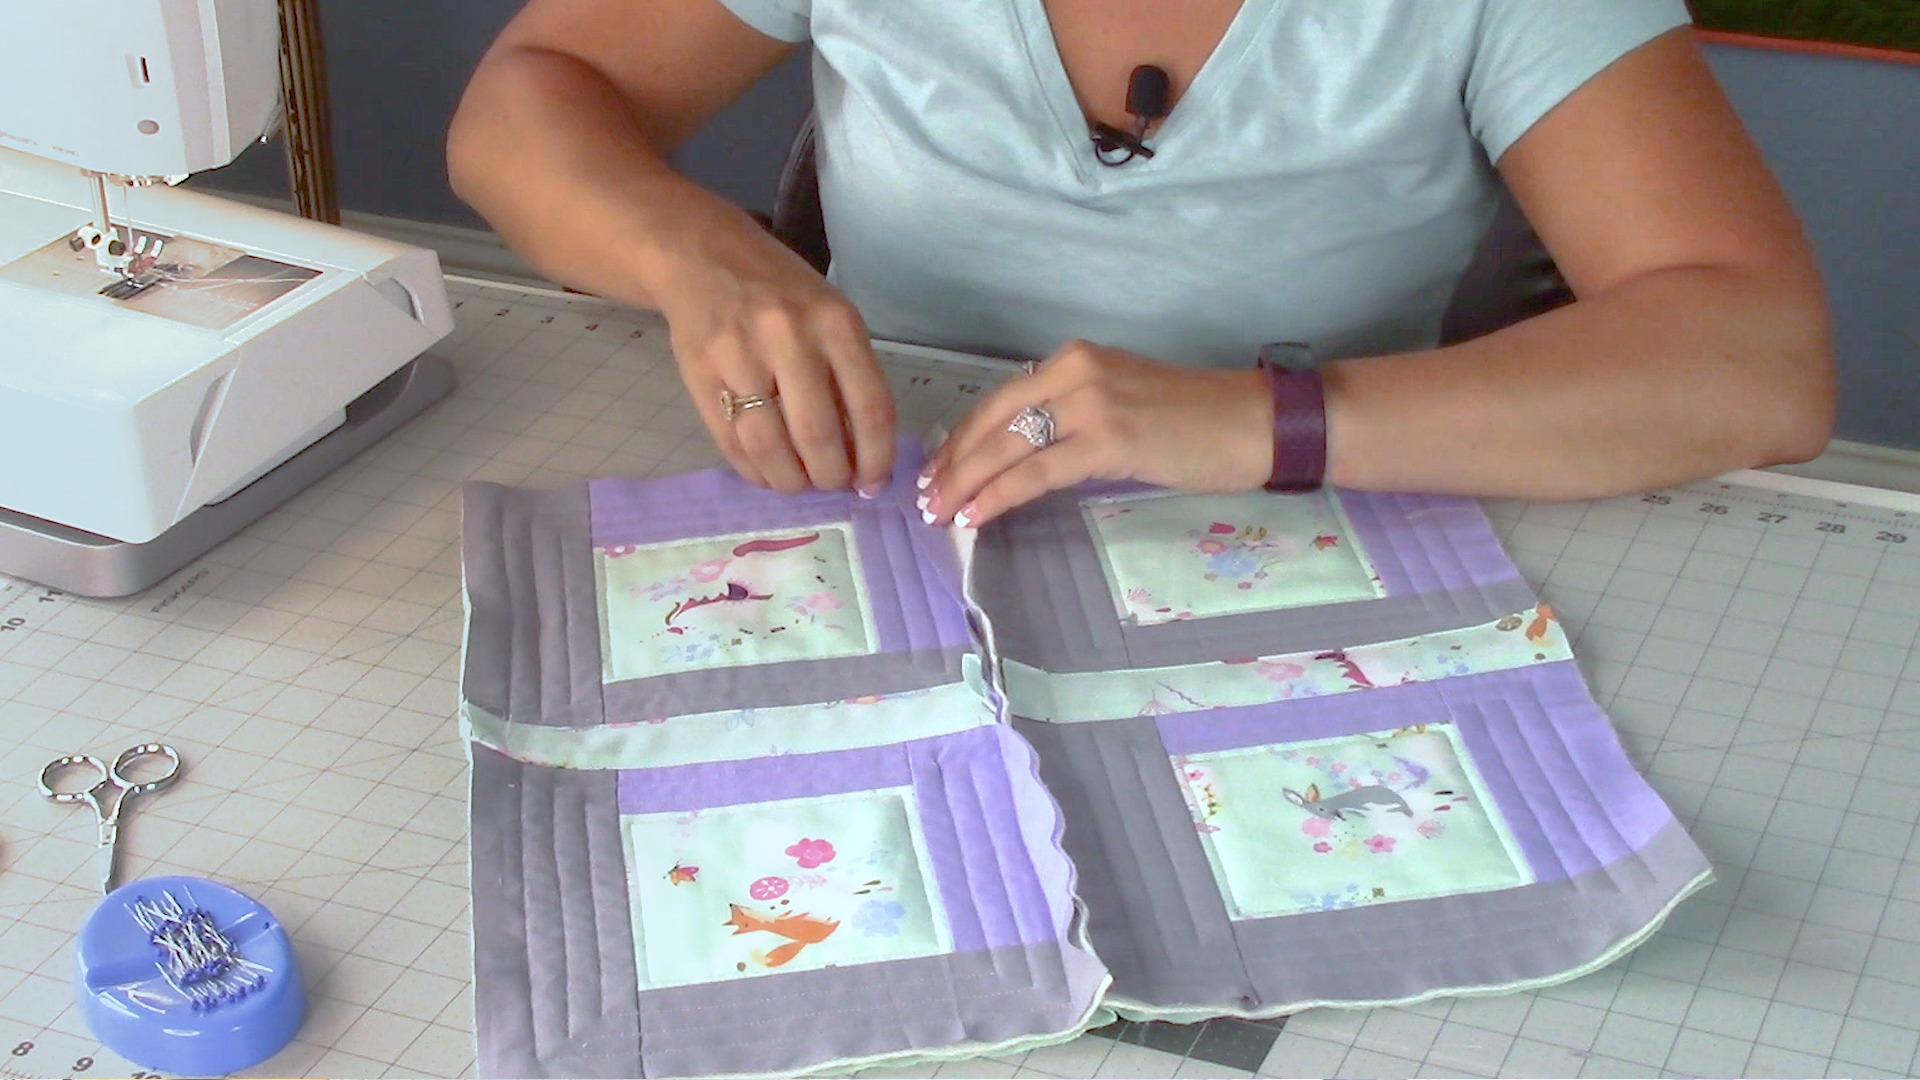
Joining blocks
For quilting as you go, joining blocks is a key step. To join two blocks, place them right sides together and pin them in place. Sew along the edges, using a ¼ inch seam allowance. If you’re sewing more than two blocks together, you can chain piece them to save time. To chain piece, sew the first two blocks together, then add the next block to the same thread, and so on. Once all the blocks are joined, press the seams.
If you’re quilting as you go a large quilt, you can join the blocks in rows and then join the rows together. This makes it easier to manage the larger size. To join the rows, place them right sides together and pin them in place. Sew along the edges, using a ¼ inch seam allowance. Press the seams and your quilt top is complete.
Tips:
- Using a scant ¼ inch seam allowance can help reduce bulk.
- A walking foot can help keep the layers from shifting.
- Pressing the seams open can also help reduce bulk.
Once the quilt top is complete, you can add the quilt backing. For quilting as you go, the backing is added last. This is the quilt sandwich that you’ll quilt through, so it’s important to make sure the backing is big enough. The easiest way to quilt as you go is to start from the center and work your way out. This will help make sure the backing is big enough.
If you’re quilting as you sew, you’ll start by sewing the blocks together like regular piecing. Once the blocks are sewn, you can quilt them together. The quilting stitches will hold the blocks together. This is a great way to quilt a larger quilt because you don’t have to add the backing until the quilting is complete.
For a step-by-step tutorial on how to quilt as you go, check out the video below. It’s a great way to learn the basics and get started with quilting as you go.
Adding Borders
Quilting as you go is a great way to simplify the quilting process, especially for larger quilts. After you have pieced and quilted each block, you may want to add a border to your quilt. There are a few different techniques you can use to add borders to a quilt-as-you-go project.
Standard Borders: The easiest way to add a border to your quilt-as-you-go project is to use the same quilting-as-you-go technique you used for the blocks. Start by sewing the border pieces onto the quilt top, then quilt the border pieces to the quilt top.
Mitered Borders: You can also add mitered borders to a quilt-as-you-go project. Start by cutting the border strips to the desired length and width. Then, sew the border strips onto the quilt top and press the seams open. To miter the corners, fold the corner of the border strip in half and press. Unfold the corner and press the seam allowance toward the border strip. Repeat for all four corners. Finally, quilt the border pieces to the quilt top.
Attaching the Backing: Once you have added the borders to the quilt top, the last step is to attach the backing. If you are using a quilt-as-you-go technique, the backing should be the last piece to be added. Start by laying the quilt top right side up on a flat surface. Then, lay the backing fabric wrong side up over the quilt top. Pin the backing fabric to the quilt top. Finally, quilt the backing fabric to the quilt top.
Adding a border to a quilt-as-you-go project is a great way to finish your quilt and give it a professional look. With the right technique, you can easily add borders to any quilt-as-you-go project.
Quilting the Backing
- Measure : Measure the backing fabric to match the size of your completed quilt top.
- Cut : Cut the backing fabric to the desired size.
- Pin : Pin the backing fabric to the quilt top.
- Baste : Baste the backing fabric to the quilt top using quilting pins.
- Quilt : Quilt the backing fabric in quilting stitch patterns.
- Finish : Finish the quilt-as-you-go process by trimming any excess backing fabric.
Quilting the backing is the final step in the quilt-as-you-go process. It’s important to take your time and make sure the backing fabric is properly pinned, basted, and quilted to ensure a professional-looking finish. When quilting the backing, you can use any quilting stitch patterns you prefer to create the desired texture and design. Once the quilting is complete, trim any excess backing fabric to give the finished quilt a neat and professional look.
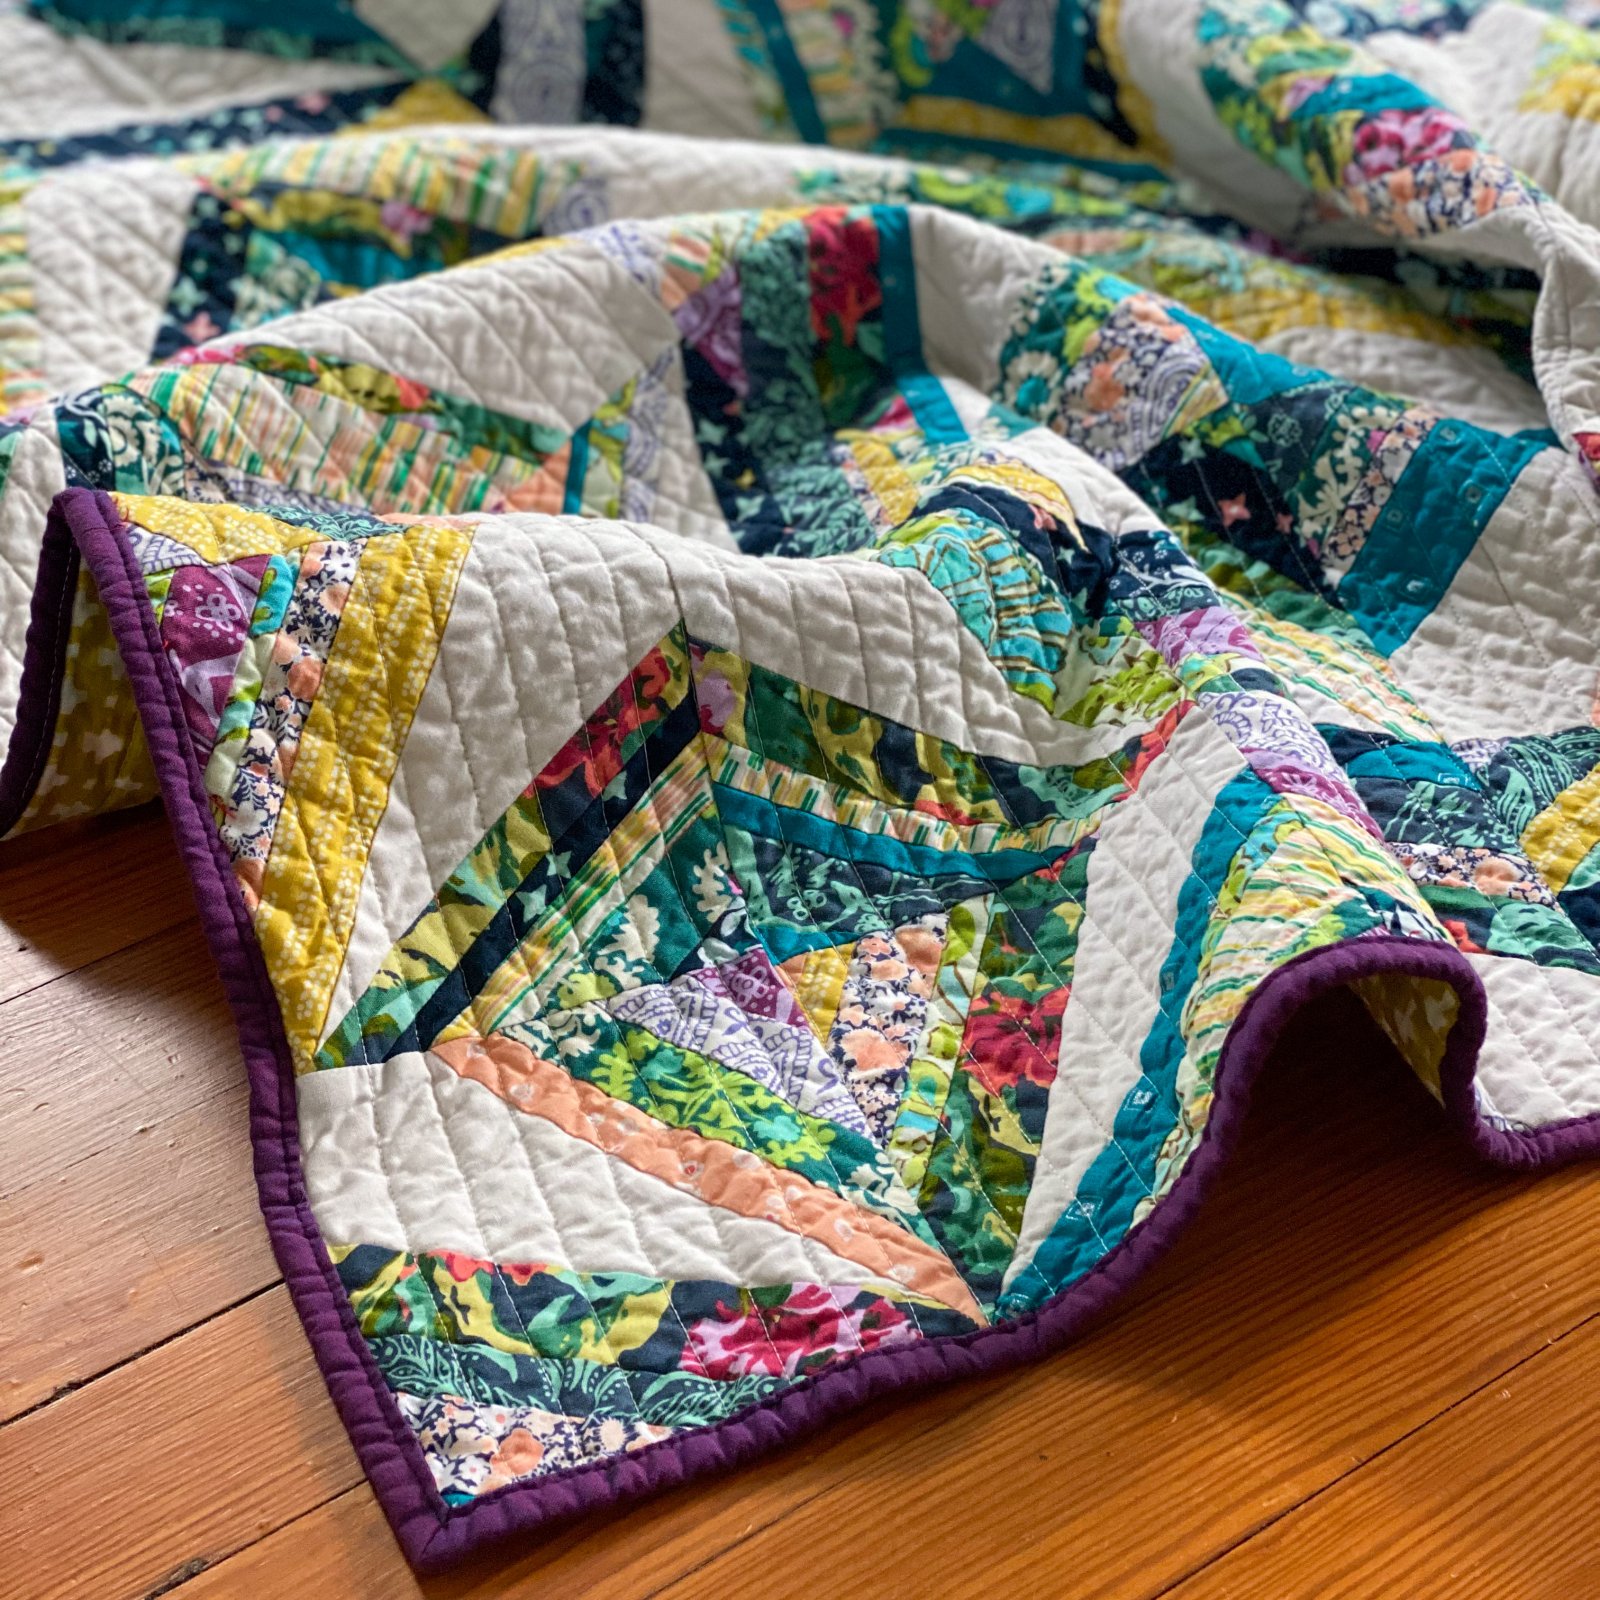
Adding the Binding
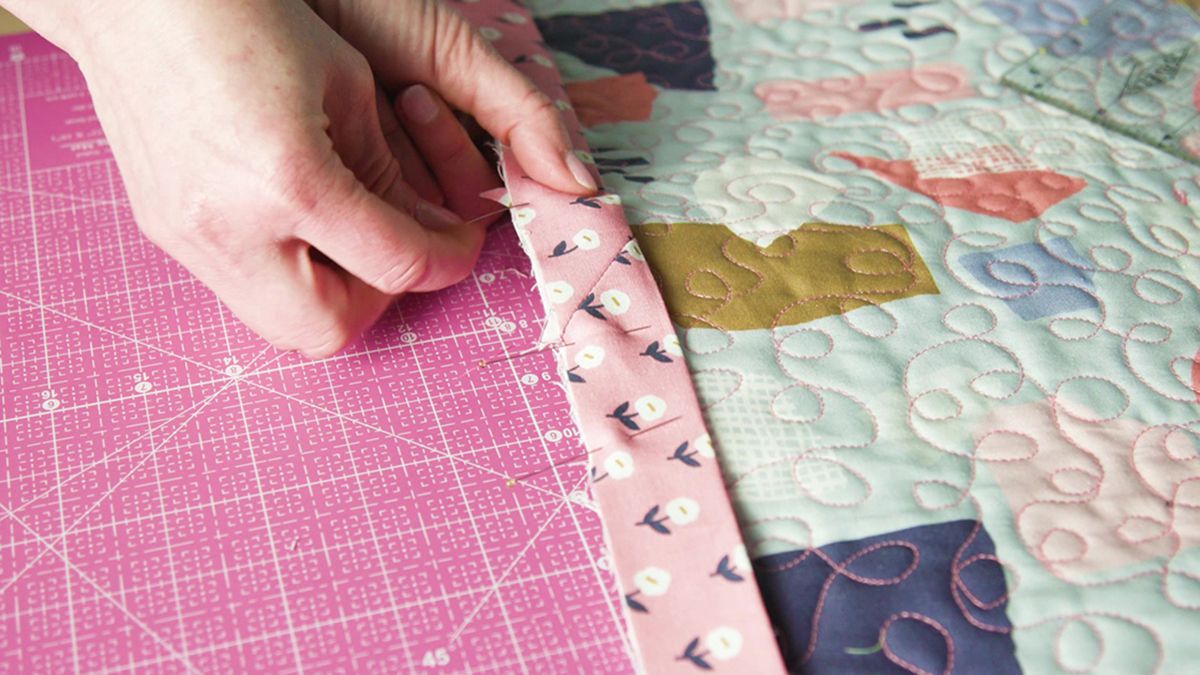
After the quilt top is finished, add the binding. Cut the binding fabric into 2½ inch strips and sew them together. Join the two ends of the binding strips and press the seam open. Fold the binding in half lengthwise and press. Attach the binding to the quilt top by aligning the raw edges and using a ¼ inch seam allowance. Sew the binding to the quilt top and fold the binding over to the back. Hand stitch the binding to the quilt. Trim any excess batting or backing fabric. To finish, press the quilt and binding.
For larger quilts, adding the binding can be a time-consuming process. To make it easier, use a walking foot and longer stitches when attaching the binding. For added stability, use a stitch-in-the-ditch technique to secure the binding. To do this, sew the binding on the right side of the quilt and use a straight stitch in the same seam line on the back of the quilt. This will help to keep the binding in place over time.
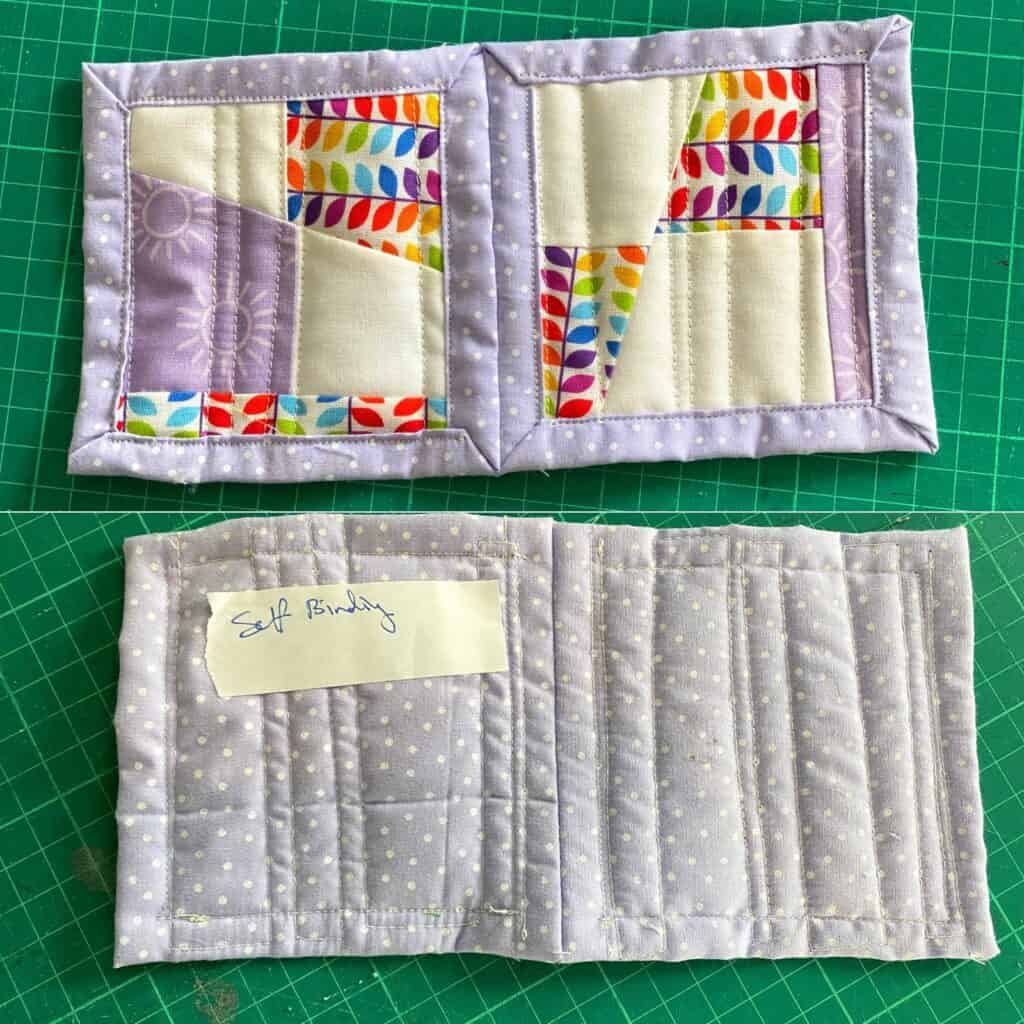
If you’re looking for an easier way to quilt as you go, consider adding the binding last. This method allows you to quilt your top and backing separately and then join them together with the binding. For more detailed instructions on how to quilt as you go, check out our tutorial.
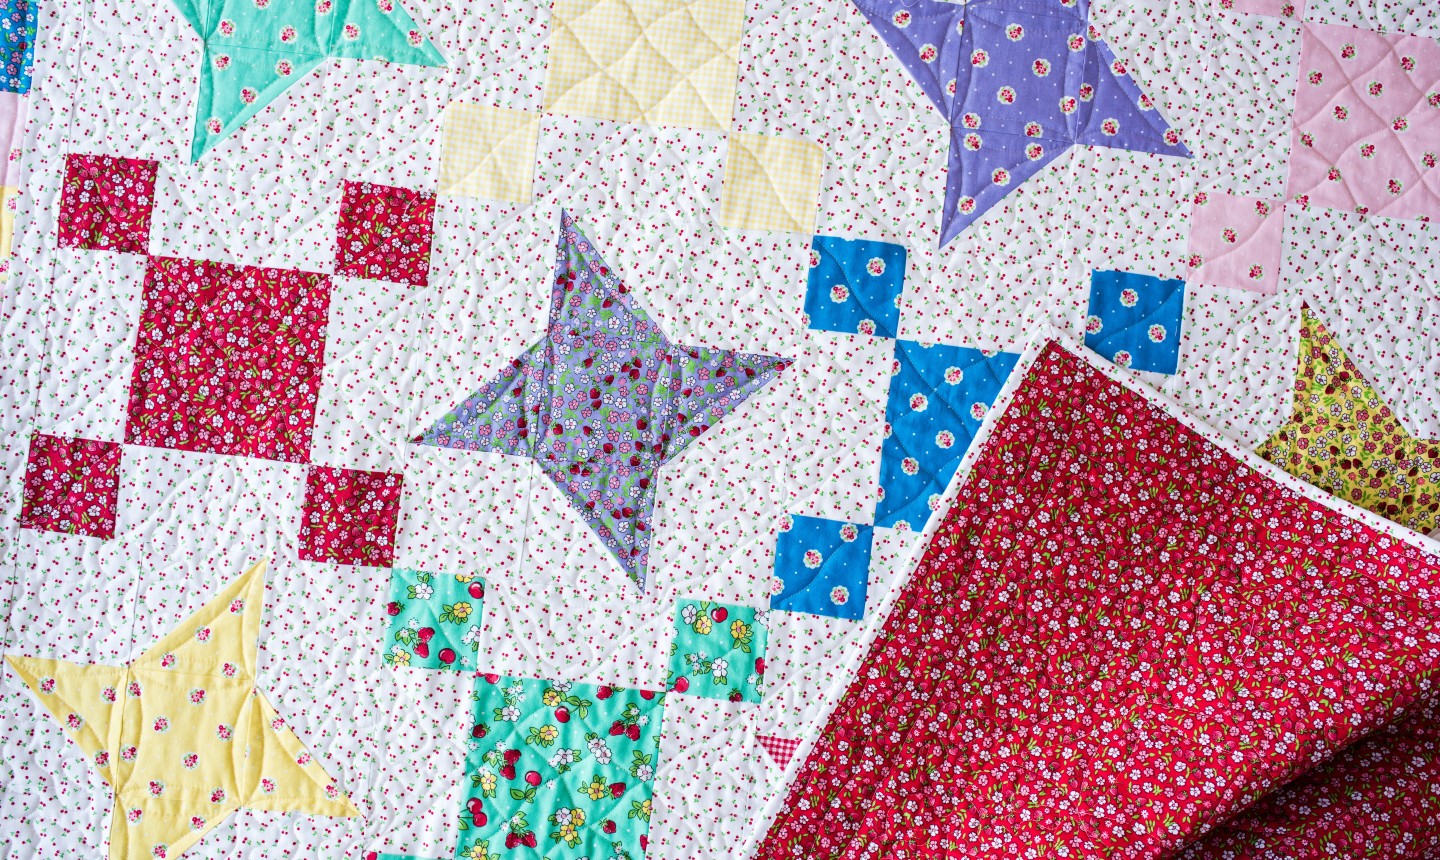
Finishing touches
Traditional Quilting
Quilting is the process of stitching together fabric pieces to create a quilt. As you go quilting is a method of quilting that allows you to finish your quilt with fewer steps than the traditional method. It is the perfect choice for quilters who have limited time or who want to create a quilt quickly.
In traditional quilting, the batting and backing fabric must be basted together before quilting. The quilting is then done with a quilting machine or by hand. After the quilting is finished, the quilt must be bound and finished with a binding.
With as you go quilting, the batting and backing fabric are quilted together as you sew. This eliminates the need for basting and makes the quilting process much faster. The binding is then done as you sew the quilt blocks together, saving even more time.
As you go quilting is a great way to save time and complete your quilt quickly. It is a great option for beginners and experienced quilters alike. With just a few simple steps, you can complete your quilt in a fraction of the time it would take with traditional quilting.
Easiest Way to Quilt As You Go
- Start by cutting the quilt top into sections, such as blocks or strips.
- Then lay the section on a batting piece that is slightly larger than the section.
- Quilt the section using your favorite quilting design.
- Lay the quilted section on a backing piece that is slightly larger than the quilted section.
- Pin the batting and backing pieces together.
- Stitch the quilted section to the backing piece using a walking foot and a 1/4” seam allowance.
- Trim the batting and backing pieces even with the quilted section.
- When all the sections are quilted and attached to the backing, join your sections together.
- Finally, join the backing to the quilt top.
You can also quilt as you go with a continuous quilting method. This technique uses one continuous piece of batting and one continuous piece of backing. Quilt the sections in place and stitch the batting and backing together as you go. This is a great way to quilt large quilts without having to join sections.
Alternatively, you can use a quilt-as-you-go or lap quilting method. This technique uses separate batting pieces for each section and the backing is added last. The quilted sections are stitched together and the backing is then attached.
You can also quilt as you sew if you prefer. This method requires you to sew the sections together before quilting. This can be a time consuming process, but it is great for quilting intricate designs.
No matter what technique you choose, quilting as you go can be a great way to finish a quilt quickly and easily. And as you become more experienced you can experiment with different techniques to create unique quilts.
Quilting As You Sew
Quilting As You Sew is a technique that allows you to quilt as you make your quilt, rather than having to do the quilting after the quilt top is finished. This method is especially useful when making larger quilts or intricate quilting designs. To quilt as you go, you will need to add batting and backing fabric to each quilt block or panel before sewing them together. The quilting designs can be stitched into the individual quilt blocks or panels as they are being sewn, or the entire quilt top can be quilted after all the blocks or panels are sewn together. The easiest way to quilt as you go is to add the batting and backing fabric to each quilt block or panel before sewing them together. After the quilt blocks or panels are sewn together, the entire quilt top can be quilted. A tutorial on how to quilt as you go can be found online, and there are many books and videos available that explain the process in detail.
Frequently Asked Questions
What type of fabrics are best suited for quilting as you go?
- Cotton: Cotton is the most popular choice of fabric for quilting as it is easy to handle, has excellent breathability and durability, and is available in a variety of prints and colors.
- Batting: Batting, or batting material, is a type of fabric that is used to fill in the quilt, giving it a soft, cushioned feel. It is usually made of polyester, wool, or cotton, and can be purchased in different weights.
- Linen: Linen is a lightweight fabric that is great for quilting as it is strong and durable. It also has a luxurious feel to it, making it a great choice for quilts.
- Fleece: Fleece is a soft, warm fabric that is perfect for quilting. It is lightweight and easy to work with, and can be found in a variety of colors and textures.
How do you accurately measure and cut fabric for quilting as you go?
- Measure twice: Measure the fabric twice, using a ruler and marking the measurement with a marker or tailor’s chalk. This ensures that the fabric is cut accurately.
- Cut with a rotary cutter: Use a rotary cutter to cut the fabric. The sharp blade will ensure a precise, clean cut.
- Use a quilt ruler: A quilt ruler can be used to measure the fabric accurately, and to cut it in straight, even lines.
- Use a quilting template: A quilting template can be used to accurately measure and cut fabric pieces to the same size. Templates come in different shapes and sizes.
- Cut on a cutting mat: Use a self-healing cutting mat to protect your table and chair from the sharp rotary cutter.
What are the benefits of quilting as you go?
- Faster quilting: By quilting as you go, you don’t need to wait until the quilt top is completed in order to start the quilting process. This allows you to finish quilts much faster than if you were to wait until the entire quilt top was complete.
- Less stress: Quilting as you go eliminates the stress of quilting a large quilt top in one go. You can break the quilting process down into smaller, more manageable tasks.
- Easier for bigger quilts: Quilting as you go makes it easier to handle bigger quilt tops. The quilt top is divided into smaller sections and each section is quilted separately.
- More control: Quilting as you go allows you to take more control over the quilting process. You can adjust the quilting design and tension as you go, allowing for a more customized quilt.
What Tools and Supplies Do I Need to Get Started with Quilting As You Go?
To start quilting as you go, you will need a sewing machine, quilting thread, quilting pins, quilting needles, backing fabric, batting, and your quilt top. You will also need a rotary cutter, cutting mat, and rulers, as well as a quilting hoop or frame. Iron and pressing board are also essential, as are scissors and a marking pen or pencil.
Are there any special techniques to consider when quilting as you go?
Quilting as you go requires careful planning and careful stitching to ensure the quilt remains secure. When dealing with narrow seams, it is important to use a narrow stitch to prevent the seams from unraveling. It is also important to press the seams open to ensure the quilt remains even and flat. Additionally, using a walking foot to ensure even stitches and a consistent quilting pattern is essential when quilting as you go. Finally, use a layer of batting and backing fabric that is slightly larger than the quilt top to ensure the quilt remains properly stretched and secure.
Conclusion
Quilting-as-you-go is a great way to make quilts faster and easier. By breaking the quilt into smaller blocks, it’s easy to work on sections at a time. With the right supplies and a bit of patience, you can quilt as you go and make a beautiful quilt in no time.


