
Creating a beautiful portrait quilt is a great way to capture memories and showcase your creativity. This step-by-step guide will show you how to make a gorgeous portrait quilt that you can display in your home or give as a special gift. With a few simple supplies and some patience, you’ll learn how to make a portrait quilt that is truly unique and eye-catching.
Materials Needed
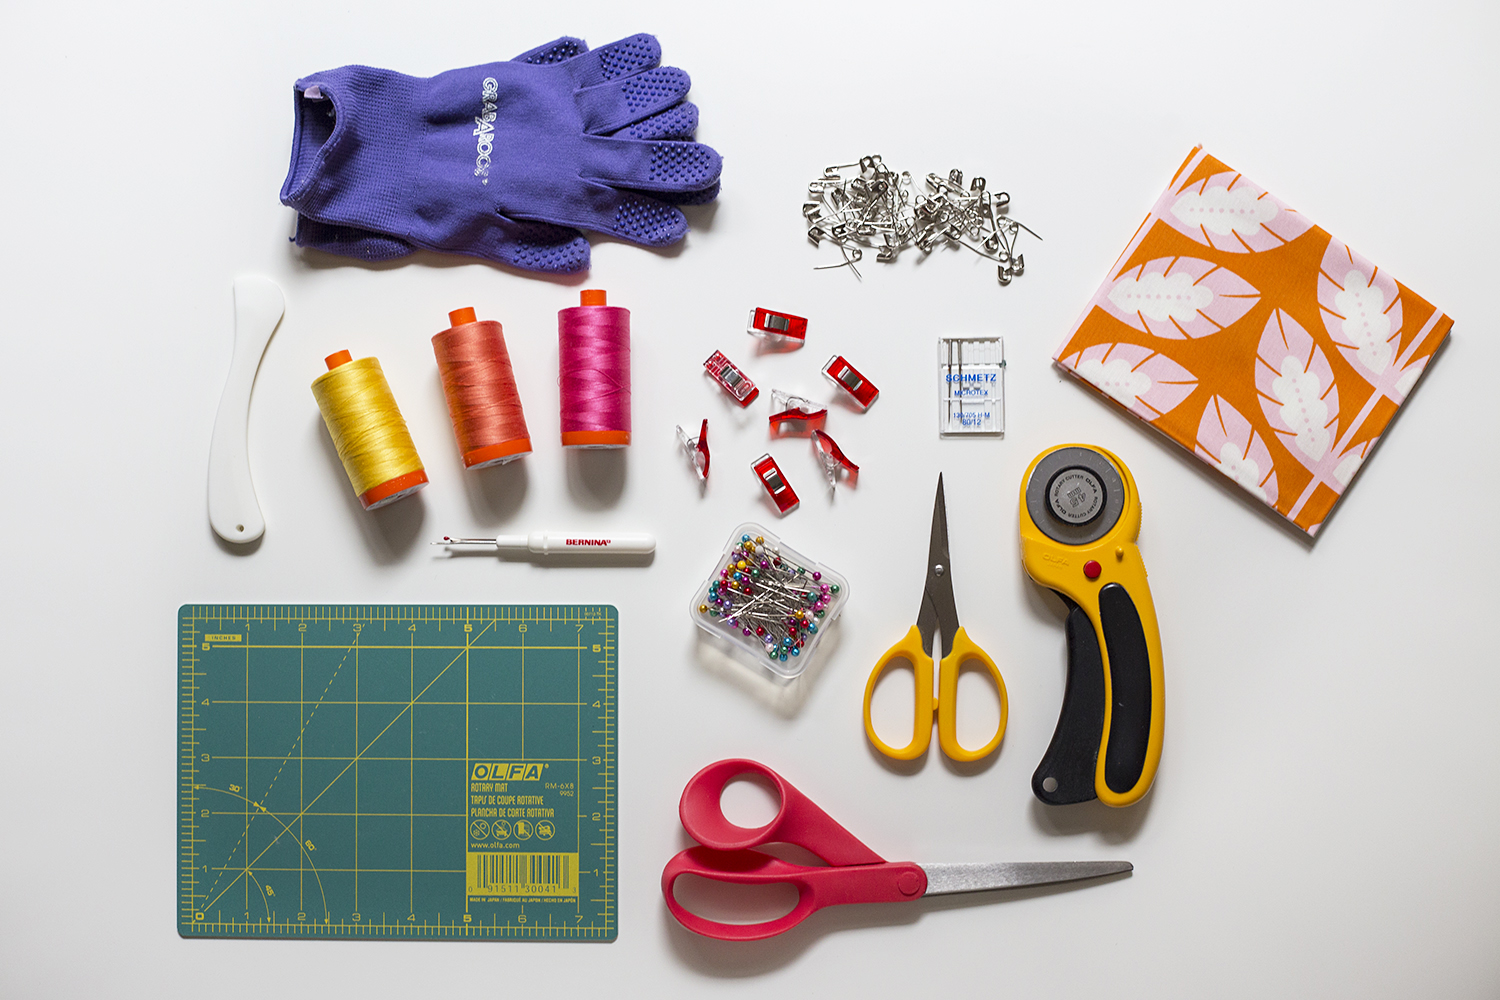
- Fabric: Choose a lightweight fabric that is easy to manipulate, such as cotton, for the quilt’s top layer.
- Thread: Coordinating thread is essential for a professional-looking portrait quilt.
- Backing fabric: Choose a backing fabric that is slightly larger than the quilt’s top layer.
- Batting: Select batting that is larger than the quilt’s top layer, to ensure the edges of the quilt are not exposed.
- Photo: To start making a portrait quilt, you need a high-quality, printed photo.
- Quilting ruler: A quilting ruler is necessary for precise cutting and measuring.
- Rotary cutter: A rotary cutter and mat make it easier to cut fabric into precise shapes.
- Iron: An iron will be necessary to press the quilt pieces before sewing them together.
- Sewing machine: A sewing machine is essential for constructing the quilt.
Selecting and Preparing the Photo
Before starting to make a portrait quilt, it is important to select the right photo that you want to use. Consider what elements of the photo you want to feature in the quilt, such as facial features, clothing, or objects. Once you have chosen your photo, you should make sure that it is in a high enough resolution to work with. If it is not, you can use digital tools to edit the photo and increase its resolution. Additionally, be sure to print the photo at its actual size on high-quality paper to ensure that all the details of the photo can be seen in the quilt. Using a black and white copy of the photo can also be helpful for creating the quilt to focus on the contours of the face instead of the colors. Once you have chosen and prepared your photo, you are ready to start making your portrait quilt. Using a simplified version of the photo, you can begin to create the quilt pattern and start quilting faces.
Preparing the Fabric
Choose the fabric: Select the fabric you would like to use for your quilt. You should select fabric that has a print or texture that is appropriate for the portrait you are making. You may want to select a patterned fabric or a solid-coloured fabric, depending on the look you want to achieve.
Cut the fabric: Once you have selected the fabric, you will need to cut it into the sizes that you need for your quilt. You can use large, medium and small pieces of fabric to create the portrait. You will also need to cut a small piece of fabric for the quilt’s backing.
Sew the fabric together: Once you have cut all of the pieces of fabric, you will need to start sewing them together. You will need to sew the pieces together in the order that you have determined for your quilt. Once the pieces have been sewn together, you will have the foundation that you need to create your portrait quilt.
Iron the fabric: After you have sewn all of the pieces of fabric together, you will need to iron the fabric. This will help to ensure that the fabric is properly aligned and that the edges are held together in the right places.
Mark the fabric: Once you have ironed the fabric, you will need to mark it with a marker. This will help to ensure that you are placing the pieces of fabric in the right places when creating the portrait quilt.
Prepare the batting: You will also need to prepare the batting for your quilt. The batting will provide cushioning and warmth for the quilt. Make sure that the batting is the correct size for the quilt and that it is properly secured.
By following these steps, you will be able to properly prepare the fabric for your portrait quilt and create the quilt of your dreams.
Creating the Quilt Block

To create the quilt blocks, you need to cut pieces of fabric in the exact sizes and shapes needed. This is best done using a rotary cutter, ruler, and cutting mat. If you are working with a large quilt, it is important to use a design wall to help you organize the pieces of fabric. Next, you need to stitch the pieces together using a ¼ inch seam allowance. Finally, press the seams flat and use a quilting iron to press the entire block flat.
Now it is time to assemble the quilt blocks into a portrait quilt. Start by laying out the blocks in the desired formation. When you have the pattern the way you like it, pin the blocks together and stitch them together with a ¼ inch seam allowance. Once the blocks are sewn together, press the seams and use a quilting iron to press the entire block flat. You can then add sashing and borders to give your quilt the desired design. Finally, quilt the quilt and bind it to finish your portrait quilt.
Adding Borders
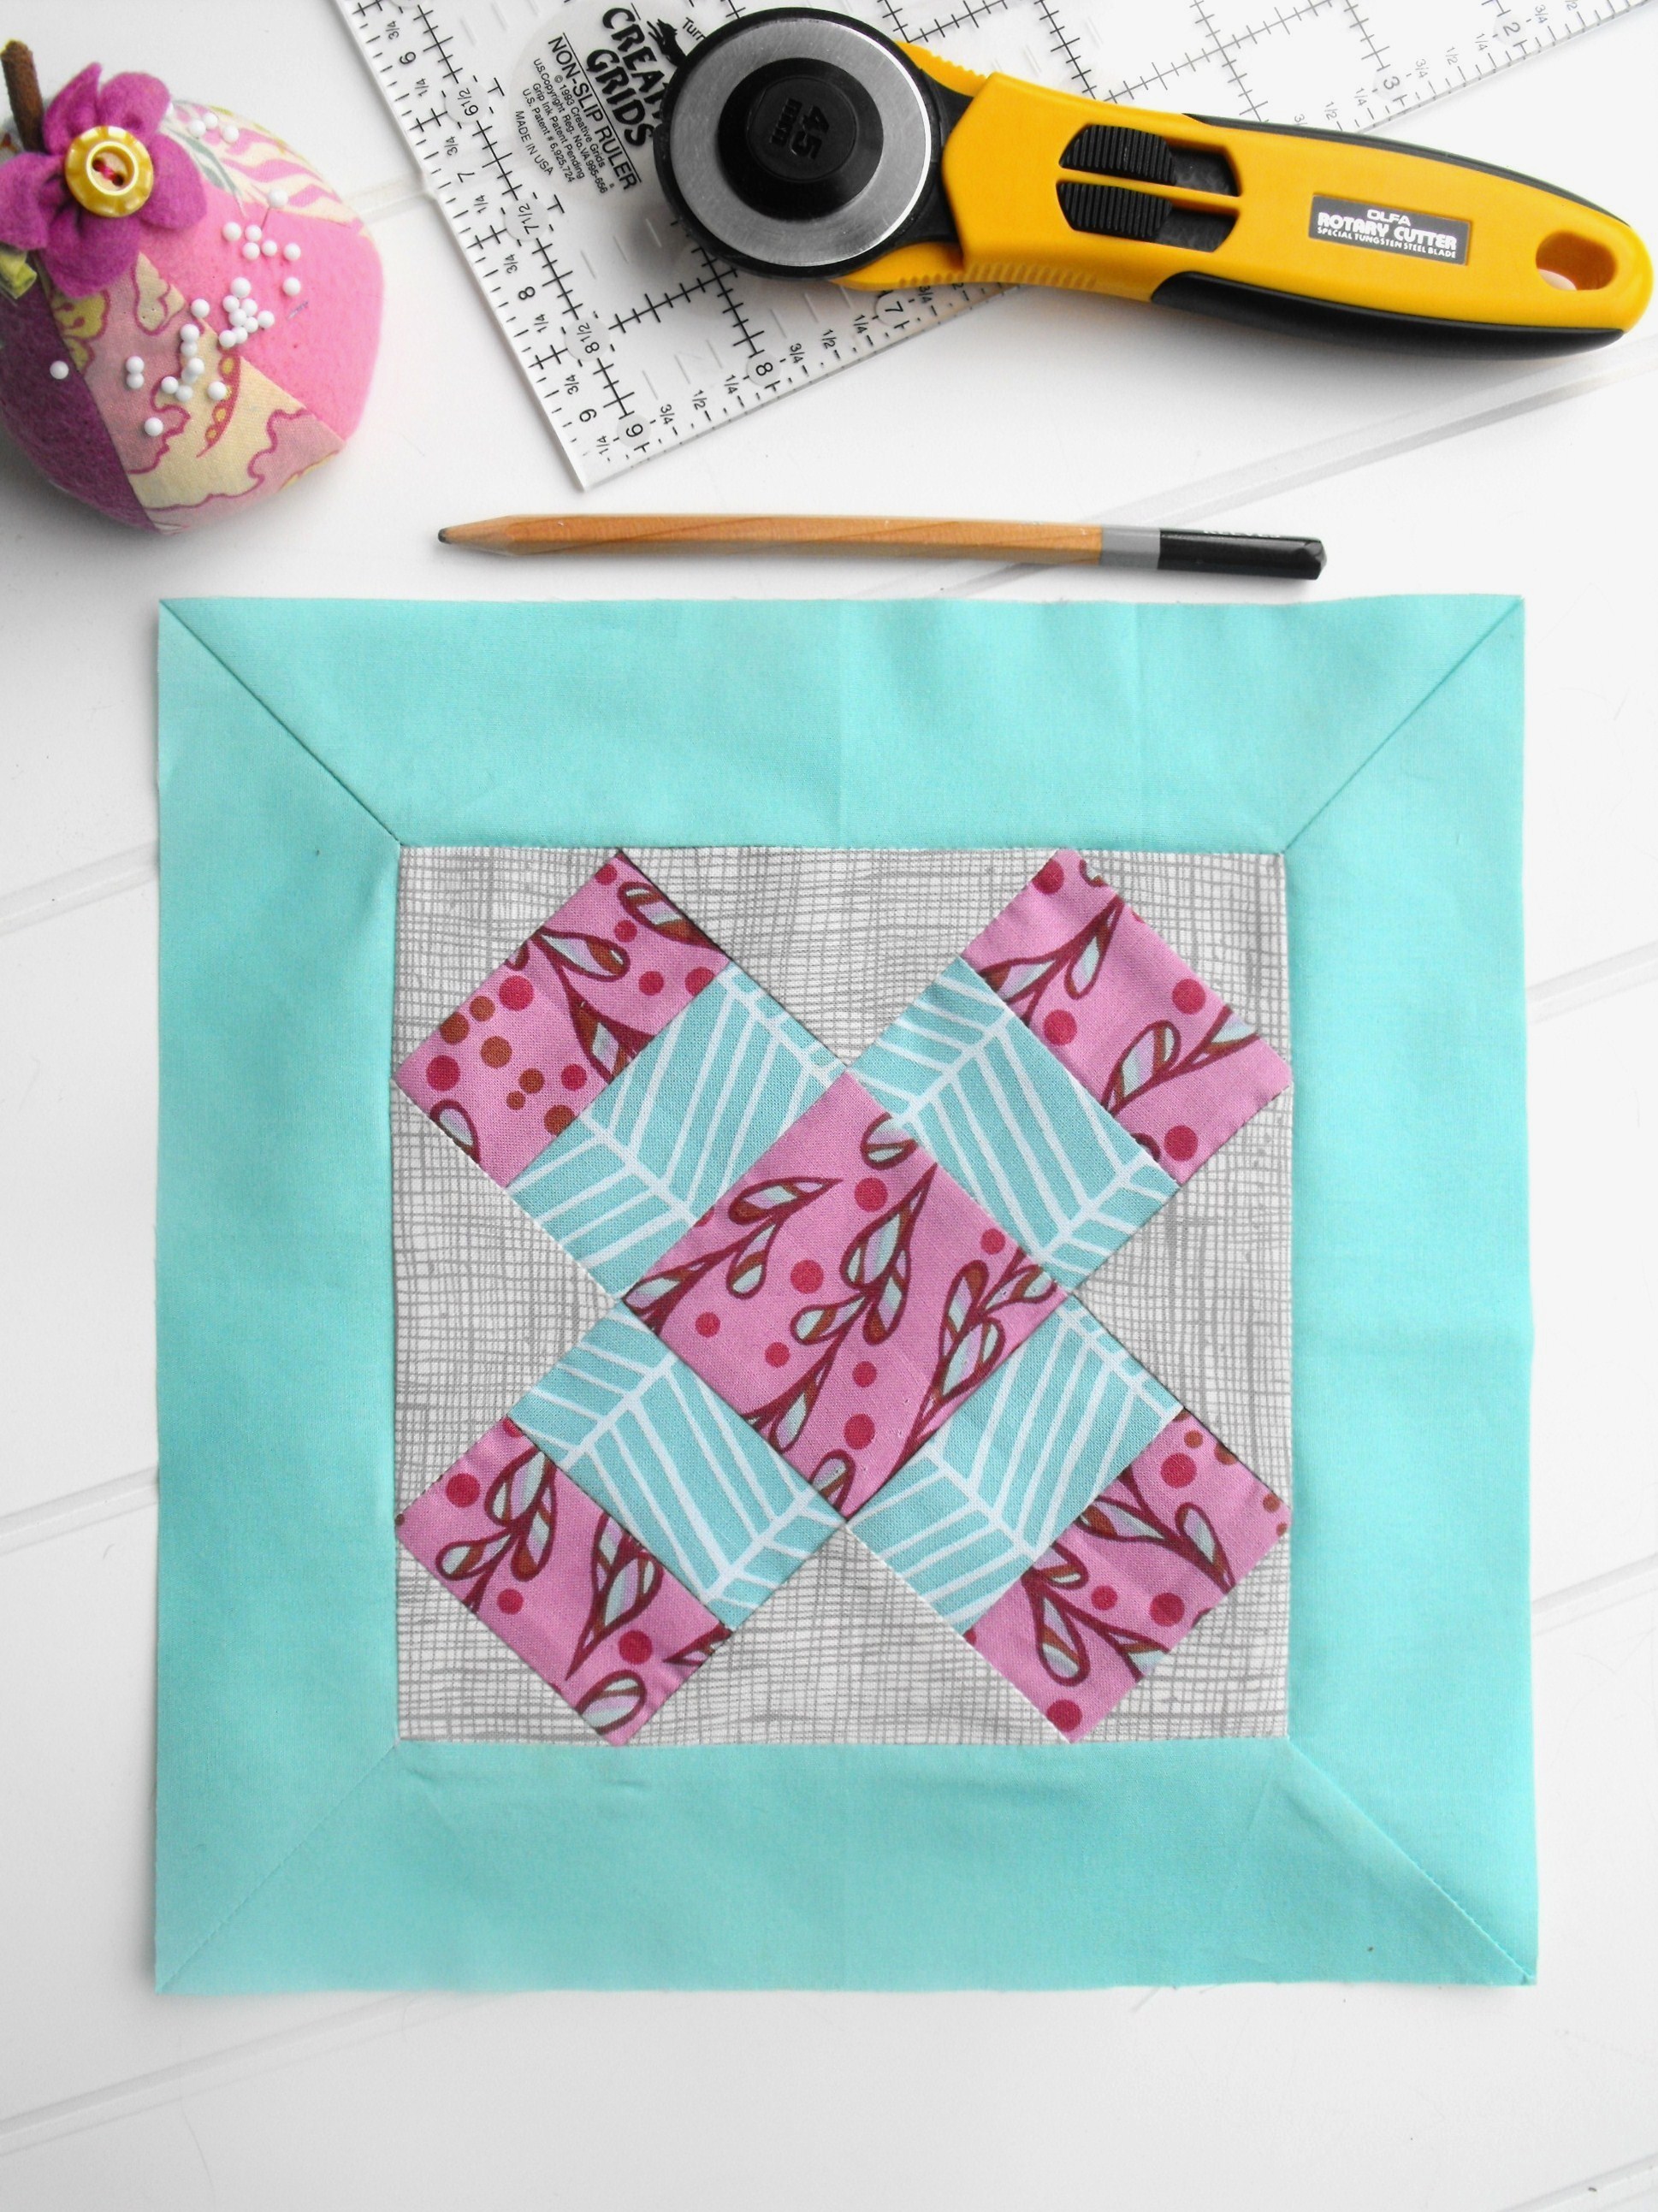
- Cut fabric for borders in the size of your quilt plus the desired width of the border. To calculate the required length, add twice the width of the border to the length and twice the width of the border to the width of the quilt.
- Join the strips to the length and width of the quilt with a ¼ inch seam. Make sure to press the seams open.
- Cut the border strips to the correct length.
- Sew the border strips to the quilt top. Make sure to match the corners. Press the seams open.
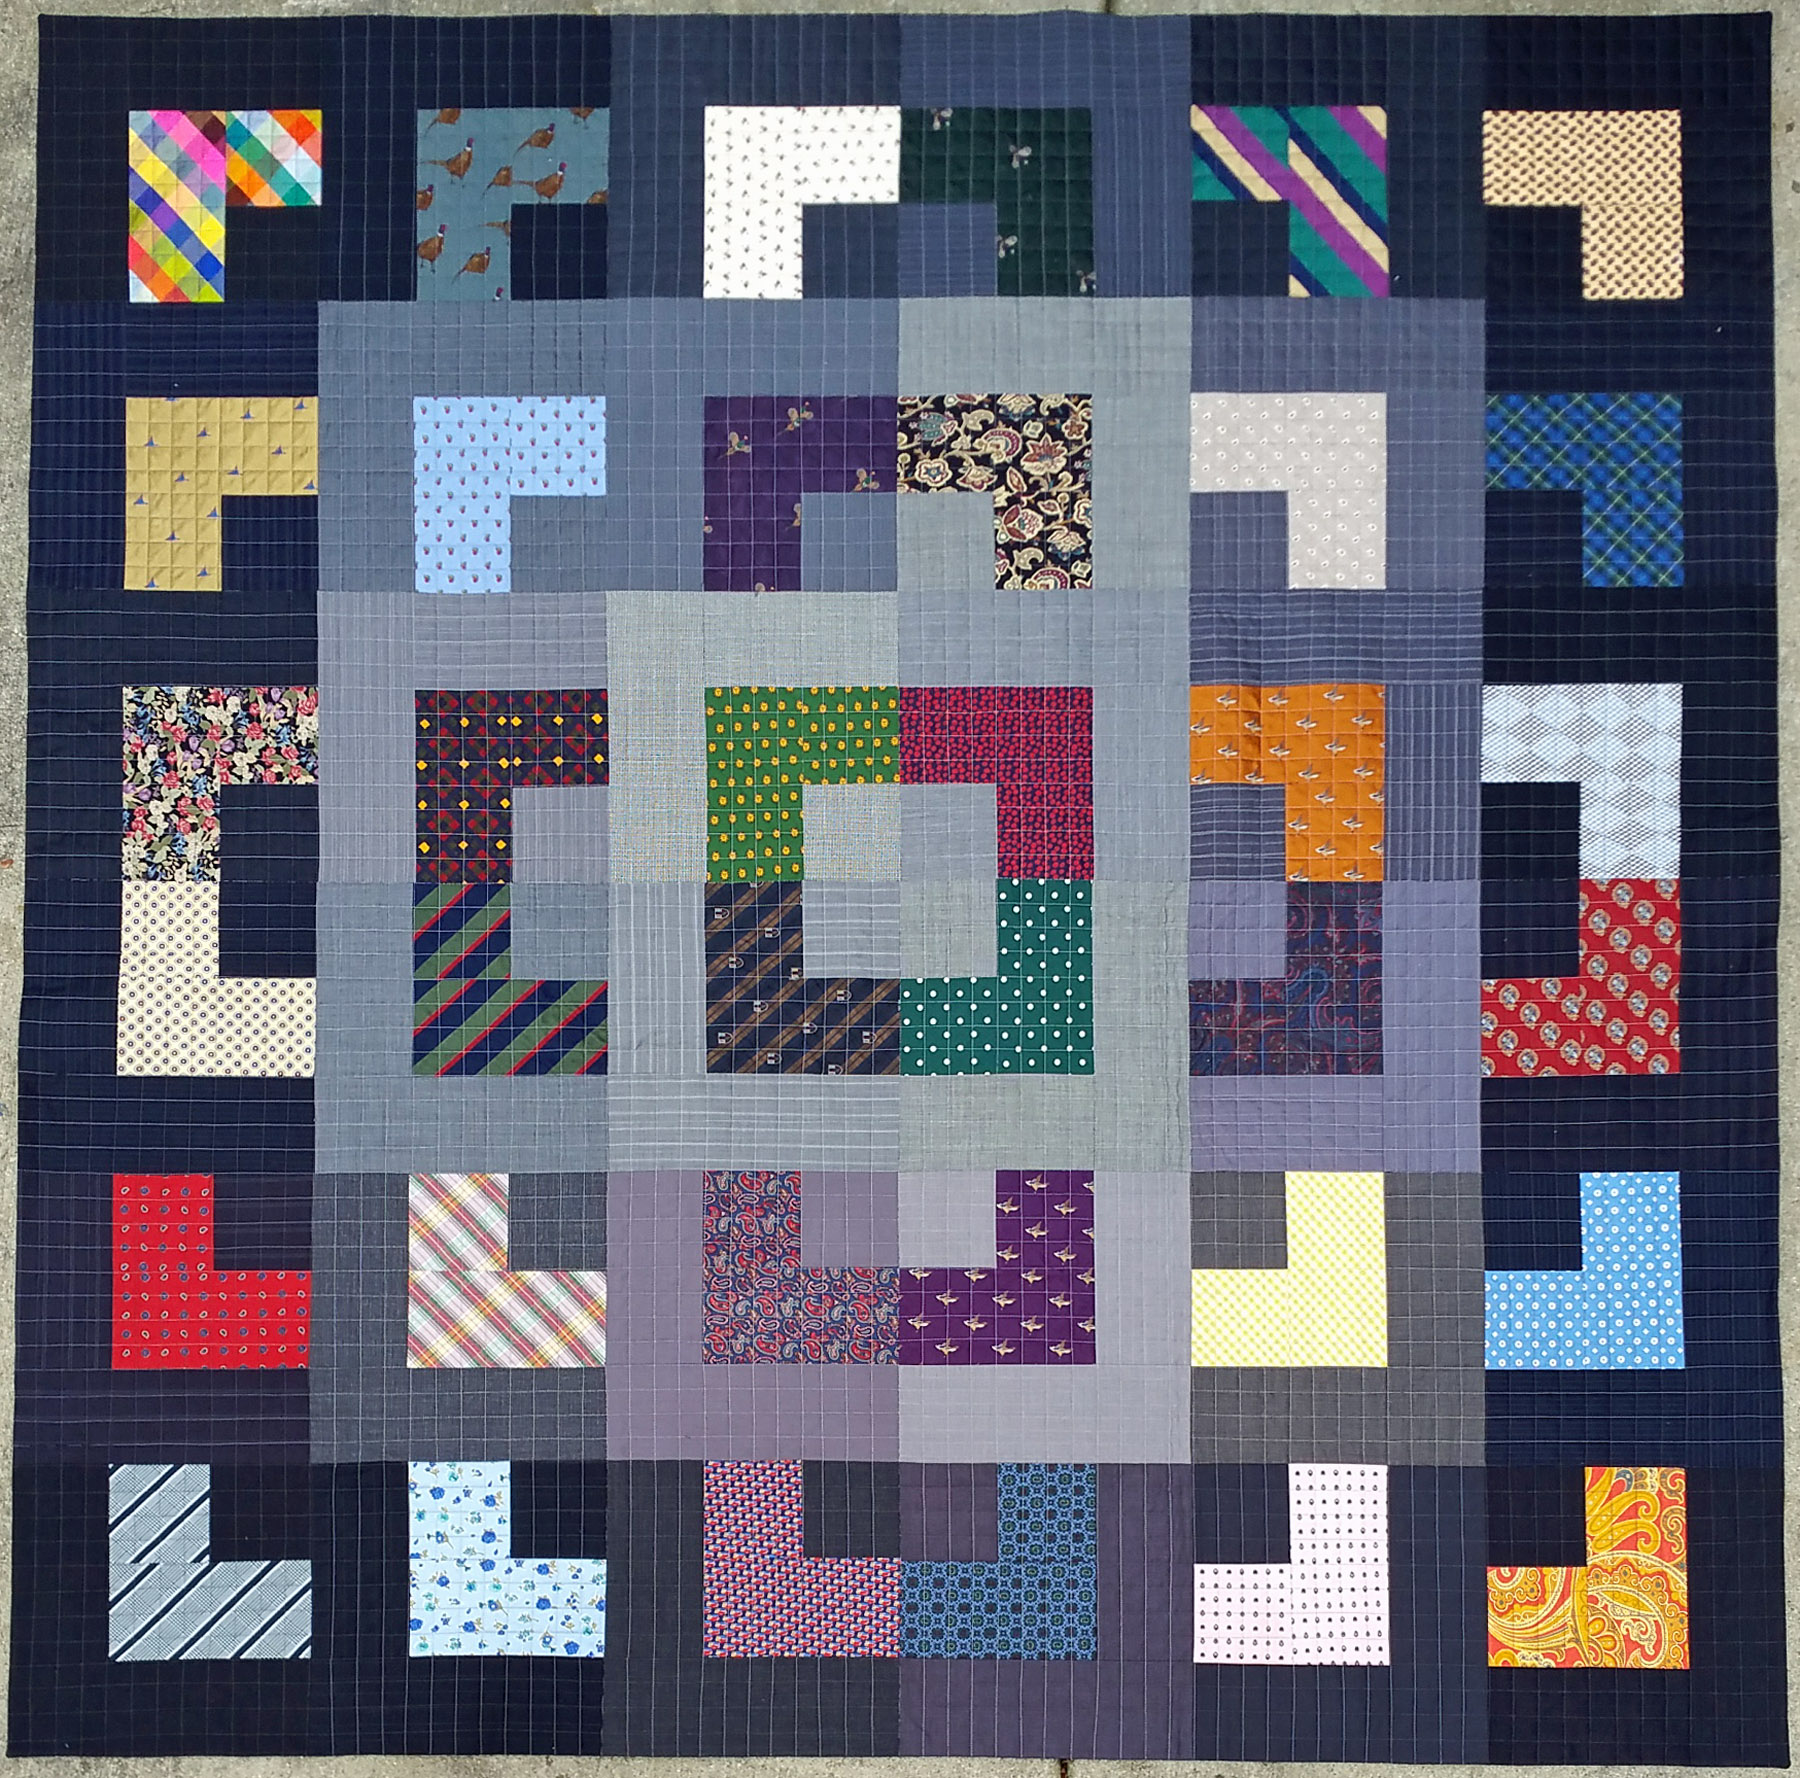
Joining Blocks
1. Arrange the quilt blocks in the desired order.
2. Sew together rows of blocks using a 1/4″ seam allowance.
3. Press the seams in one direction for each row.
4. Sew the rows together and press.
5. Trim the quilt top to the desired size.
6. Layer the quilt top, batting, and backing, basting them together.
7. Quilt as desired.
8. Trim the edges of the quilt.
9. Bind the edges by machine or by hand.
Adding the Backing

Once the quilt top is finished, the next step is to add the backing. This is the layer of fabric that will be on the back of the quilt and can be made of any fabric of your choice.
| Step | Description |
|---|---|
| 1 | Cut the backing fabric to the size of the quilt top plus about four inches on all sides. |
| 2 | Lay the backing fabric wrong side up on a flat surface. Place the quilt top on top of it, right side up. |
| 3 | Pin the backing fabric and quilt top together. |
| 4 | Using a sewing machine, stitch the two pieces together. |
Trim off any excess fabric to make sure that the backing and quilt top are the same size.
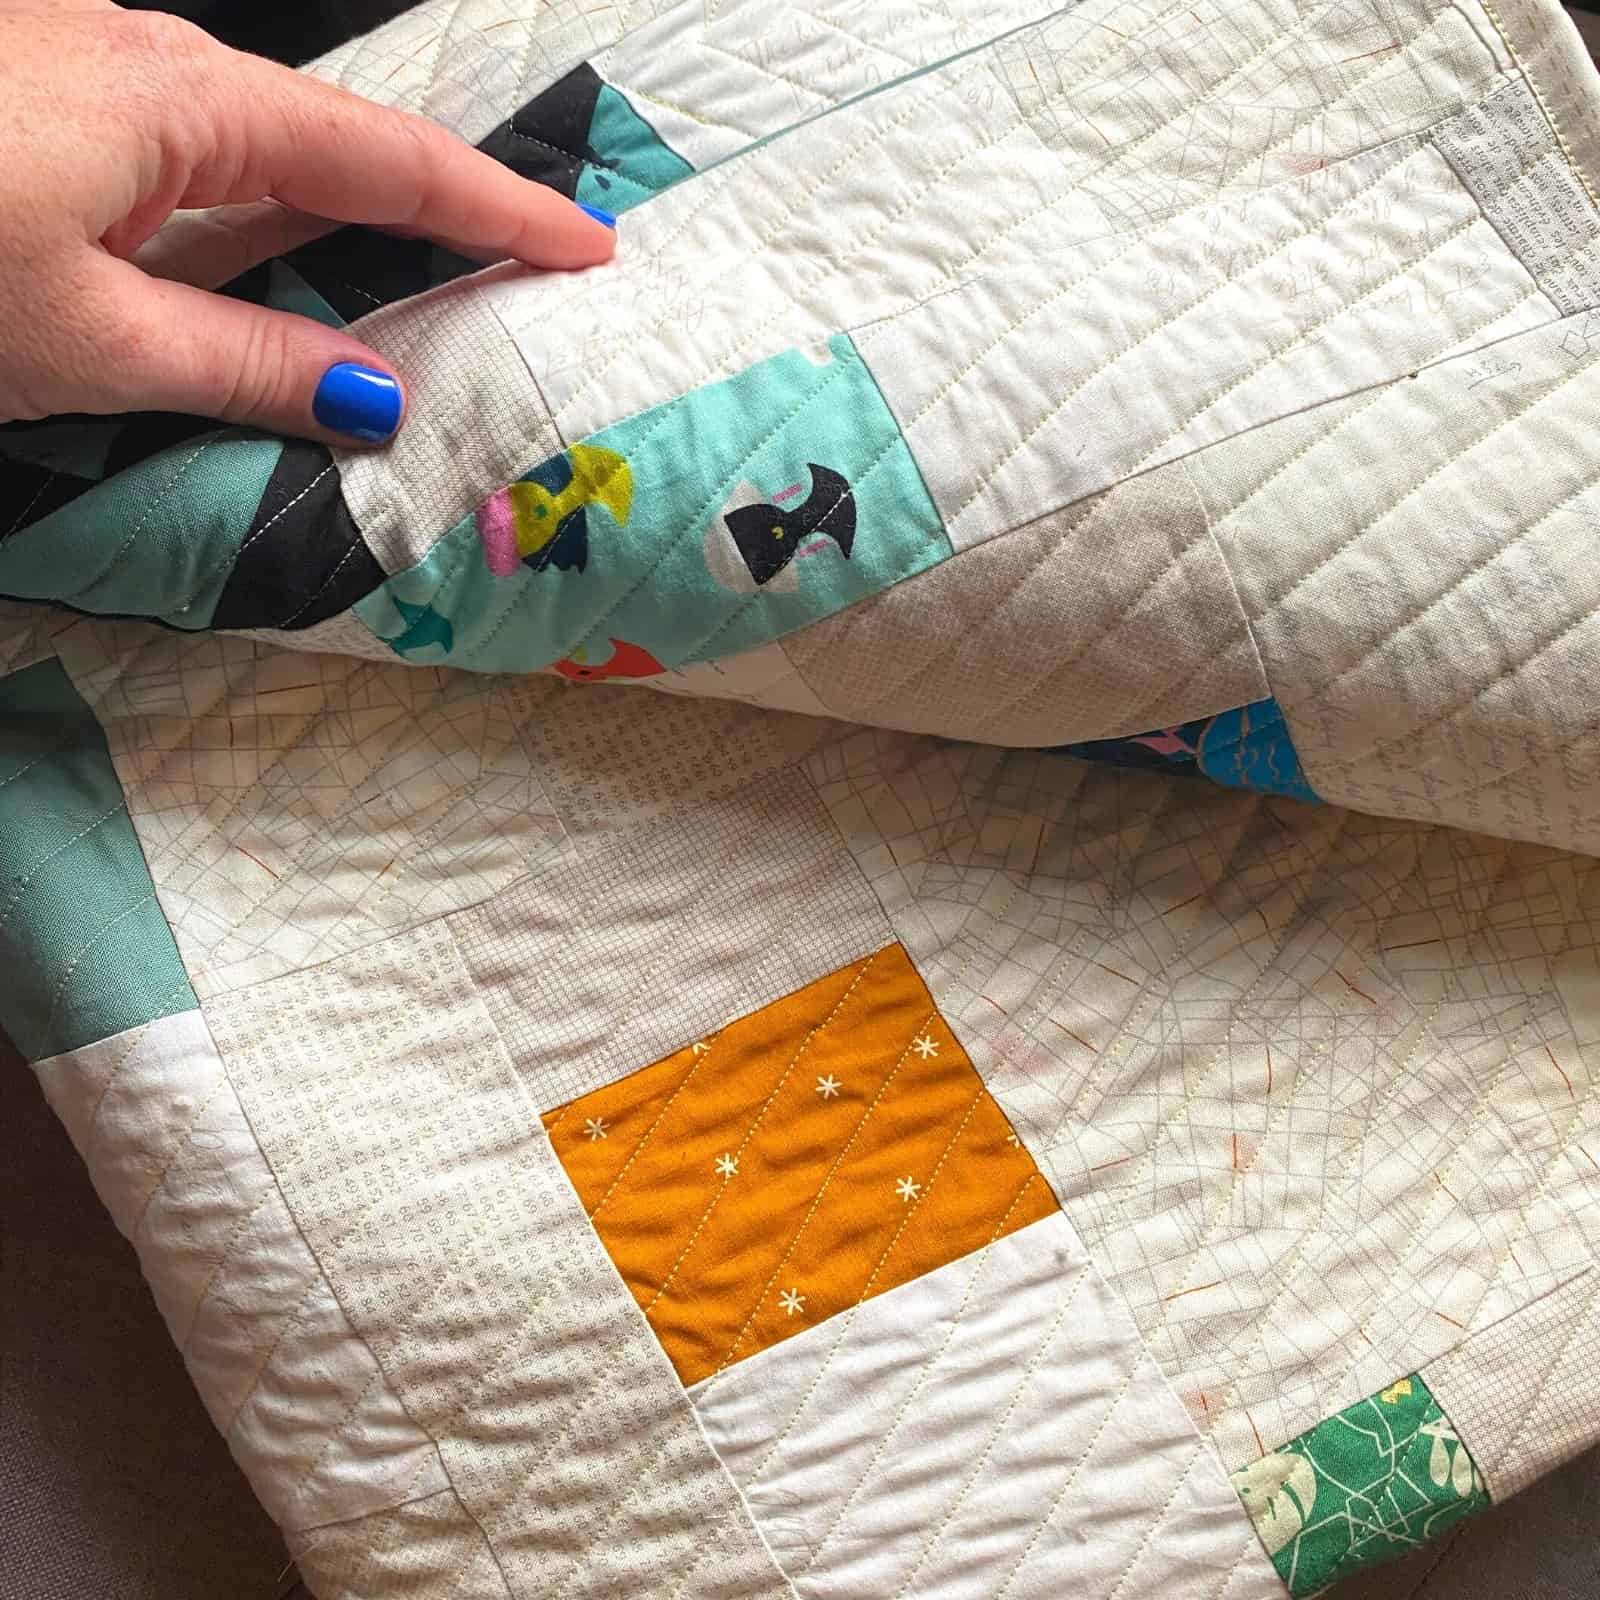
Finishing the Quilt
The final step of making a portrait quilt is to finish it. First, decide on the quilting design. This can be a simple stipple pattern, an intricate pattern quilted over the facial features or a combination of multiple designs. Next, layer the batting and quilt top with backing fabric and secure them together by pinning and basting. Once basted, quilt the layers together using the chosen design.
After the quilting is done, trim the edges and square off the corners. To finish the edges, use binding fabric. Cut strips of fabric twice the width of the desired binding and attach the strips along the edges of the quilt. Fold the binding in half and finish the edges by sewing the binding to the front and back of the quilt.
Finally, add a label with the quilter’s name, the date, and any other details. This will help preserve the quilt’s history and make it a treasured heirloom.
With these steps, you can easily make a beautiful portrait quilt.
Frequently Asked Questions
What type of fabric do I need for a portrait quilt?
Cotton: Cotton is the best fabric to use for quilting and is the most popular choice for portrait quilts. It is a good choice for its lightweight and low-cost properties. Cotton has a good feel and it is easy to work with.
Fleece: Fleece is a soft and warm fabric that is great for portrait quilts. It is also lightweight and affordable, making it a great choice. Fleece is also easy to work with and has an excellent drape.
Denim: Denim is a sturdy and durable fabric that works well in portrait quilts. It is thicker than cotton and fleece and can be more expensive, but it is worth it for its durability. Denim is also easy to work with and gives a unique look to your quilt.
Linen: Linen is a lightweight, breathable fabric that is soft and has a natural texture. It is a more expensive fabric, but it is worth it for its luxurious feel. Linen is also easy to work with and adds a unique texture to your quilt.
Other fabrics: Other fabrics such as wool, velvet, and silk can also be used for portrait quilts. These fabrics are more expensive, but they provide a luxurious feel and a unique look.
What tools are necessary to make a portrait quilt?
Fabric: To make a portrait quilt, you will need fabric in various colors and textures, such as cotton, polyester, linen, and wool. You will also need backing fabric and batting to complete the project.
Thread: You will need cotton or polyester thread to stitch the fabric pieces together.
Tools:
- Rotary cutter
- Cutting mat
- Sewing machine
- Iron and ironing board
- Needles
- Pins
- Scissors
- Ruler
- Sewing clips
- Quilting stencils
- Quilting template
Other materials: To make a portrait quilt, you will also need a quilt frame, batting, and quilt basting spray.
How Much Time Should I Expect to Spend Creating a Portrait Quilt?
- Research: Depends on the complexity of the portrait. If you’re replicating a photograph, setting aside enough time to research the best fabrics, colors, and techniques will be important. This can take several days to a few weeks.
- Fabric Preparation: Pre-washing and ironing fabric, cutting fabric pieces, and fusing fabric pieces to a stabilizer can take several days or weeks, depending on the complexity of the quilt.
- Design: Drawing the quilt design and auditioning fabrics can take several days or weeks, depending on the complexity of the quilt.
- Piecing: Piecing the quilt top takes several days or weeks, depending on the complexity of the quilt.
- Quilting: Quilting the quilt top takes several days or weeks, depending on the complexity of the quilt.
- Binding: Binding the quilt takes several days or weeks, depending on the complexity of the quilt.
In total, creating a portrait quilt can take several weeks to a few months, depending on the complexity of the portrait.
What Techniques Should I Use When Piecing Together a Portrait Quilt?
- Fussy Cutting: Fussy cutting is a technique used to cut precise pieces of fabric for a quilt. This is especially useful when piecing together a portrait quilt, as it allows for precise cuts of facial features and clothing.
- Fabric Selection: When piecing together a portrait quilt, it is important to select fabrics that will accurately represent the subject. Choose a color and pattern that will create a realistic representation of the subject.
- Stitching: When piecing together a portrait quilt, it is important to be precise with your stitching. Use a small stitch size and take extra care to ensure that your stitches are even and secure.
- Press: It is important to press each piece of fabric before piecing together a quilt. This will ensure that the fabric is smooth and flat, and will make it easier to piece together the quilt block.
- Seam Allowance: When piecing together a portrait quilt, it is important to be precise with your seam allowance. Make sure to keep a consistent seam allowance for every piece of fabric to ensure that your quilt block comes together smoothly.
- Layering: Layering is an important technique to use when piecing together a portrait quilt. This will help to create the finished look of the quilt and make it easier to stitch the quilt together.
How do I finish a portrait quilt to ensure its durability?
Quilting:
- Choose a quilting pattern that will not distort the image.
- Quilt the layers together with an even tension.
- Stitch in the ditch, outlining the images and motifs.
Binding:
- Attach the binding using a ¼ inch seam allowance.
- Ensure the binding is securely attached.
- Fold the binding over the quilt’s edge.
- Baste the binding in place.
- Use a decorative stitch to finish the binding.
Finishing Touches:
- Add a label to the back of the quilt.
- Secure the label with a few stitches.
- Spray the quilt with a fabric protector.
Conclusion
Creating a beautiful portrait quilt is a fun and rewarding project. With some patience, creativity and a few supplies, you can create a quilt that will be cherished for years to come. Use a photo you love, pick out fabrics that match your vision, and adhere to a step-by-step process to make a special quilt that you will be proud of.
References
- How to Make a Portrait Quilt by All People Quilt
- Portrait Quilt Tutorial by The Spruce Crafts


